Week2
Computer-Controlled Cutting
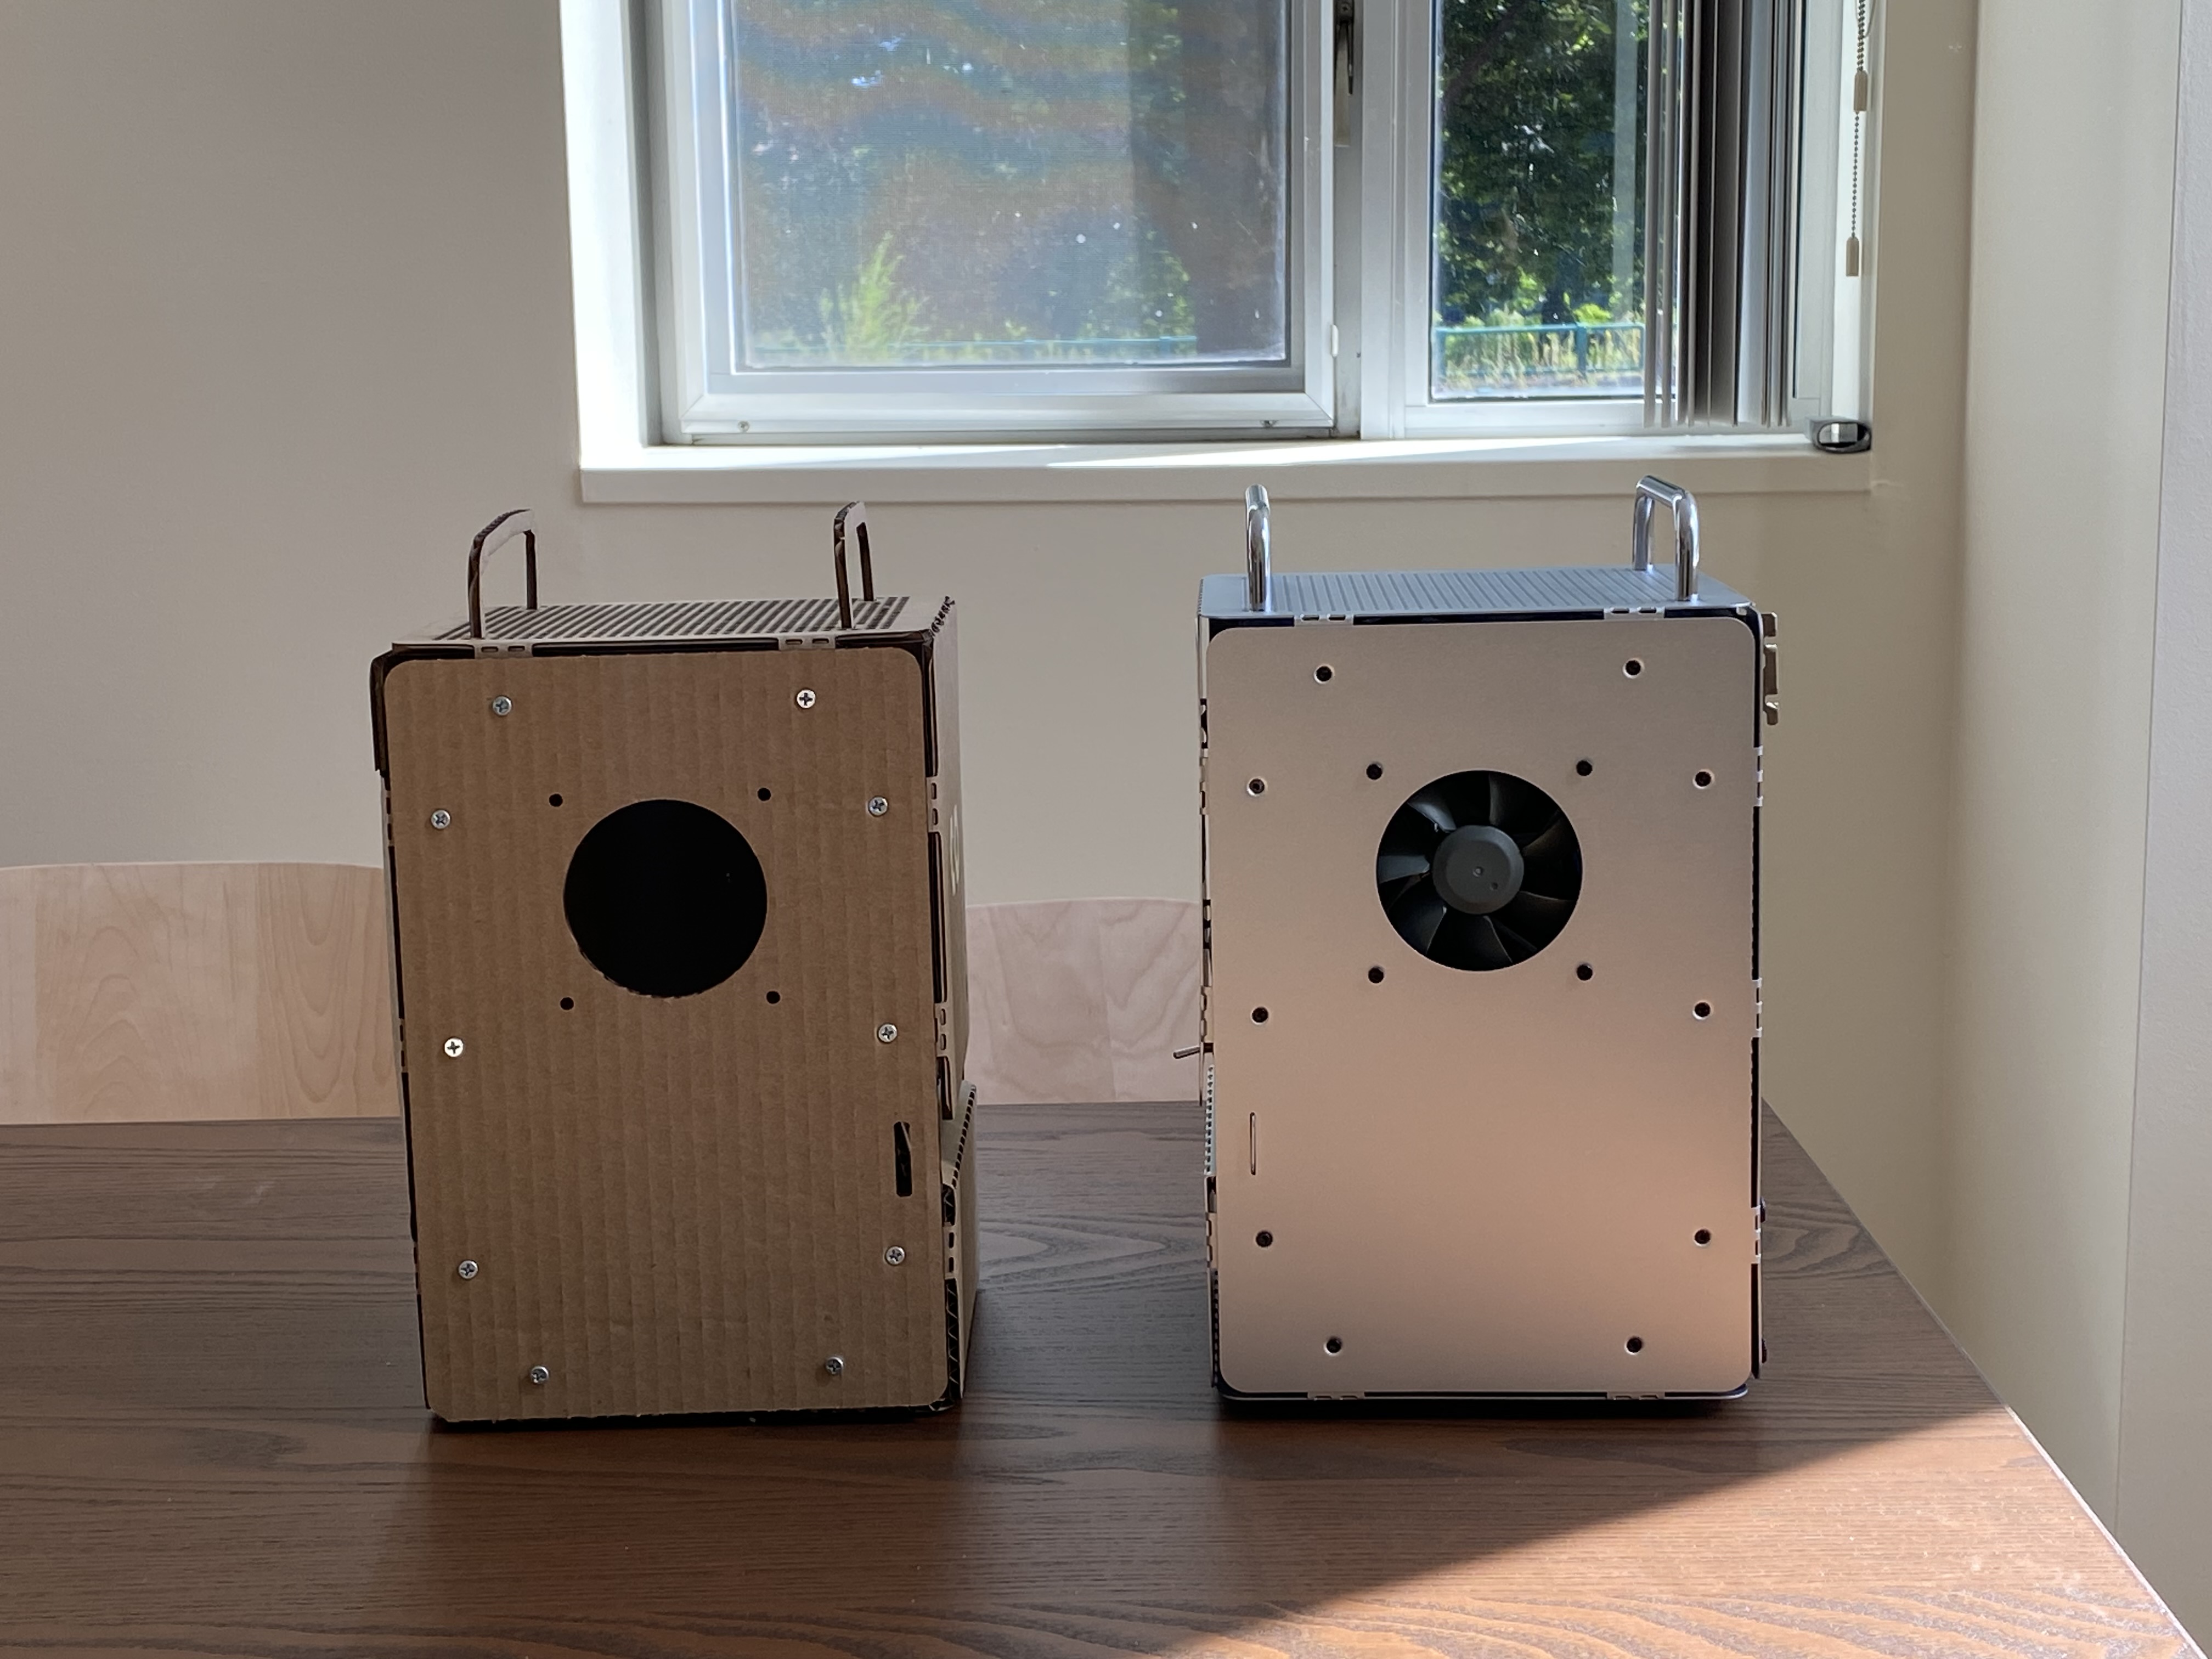
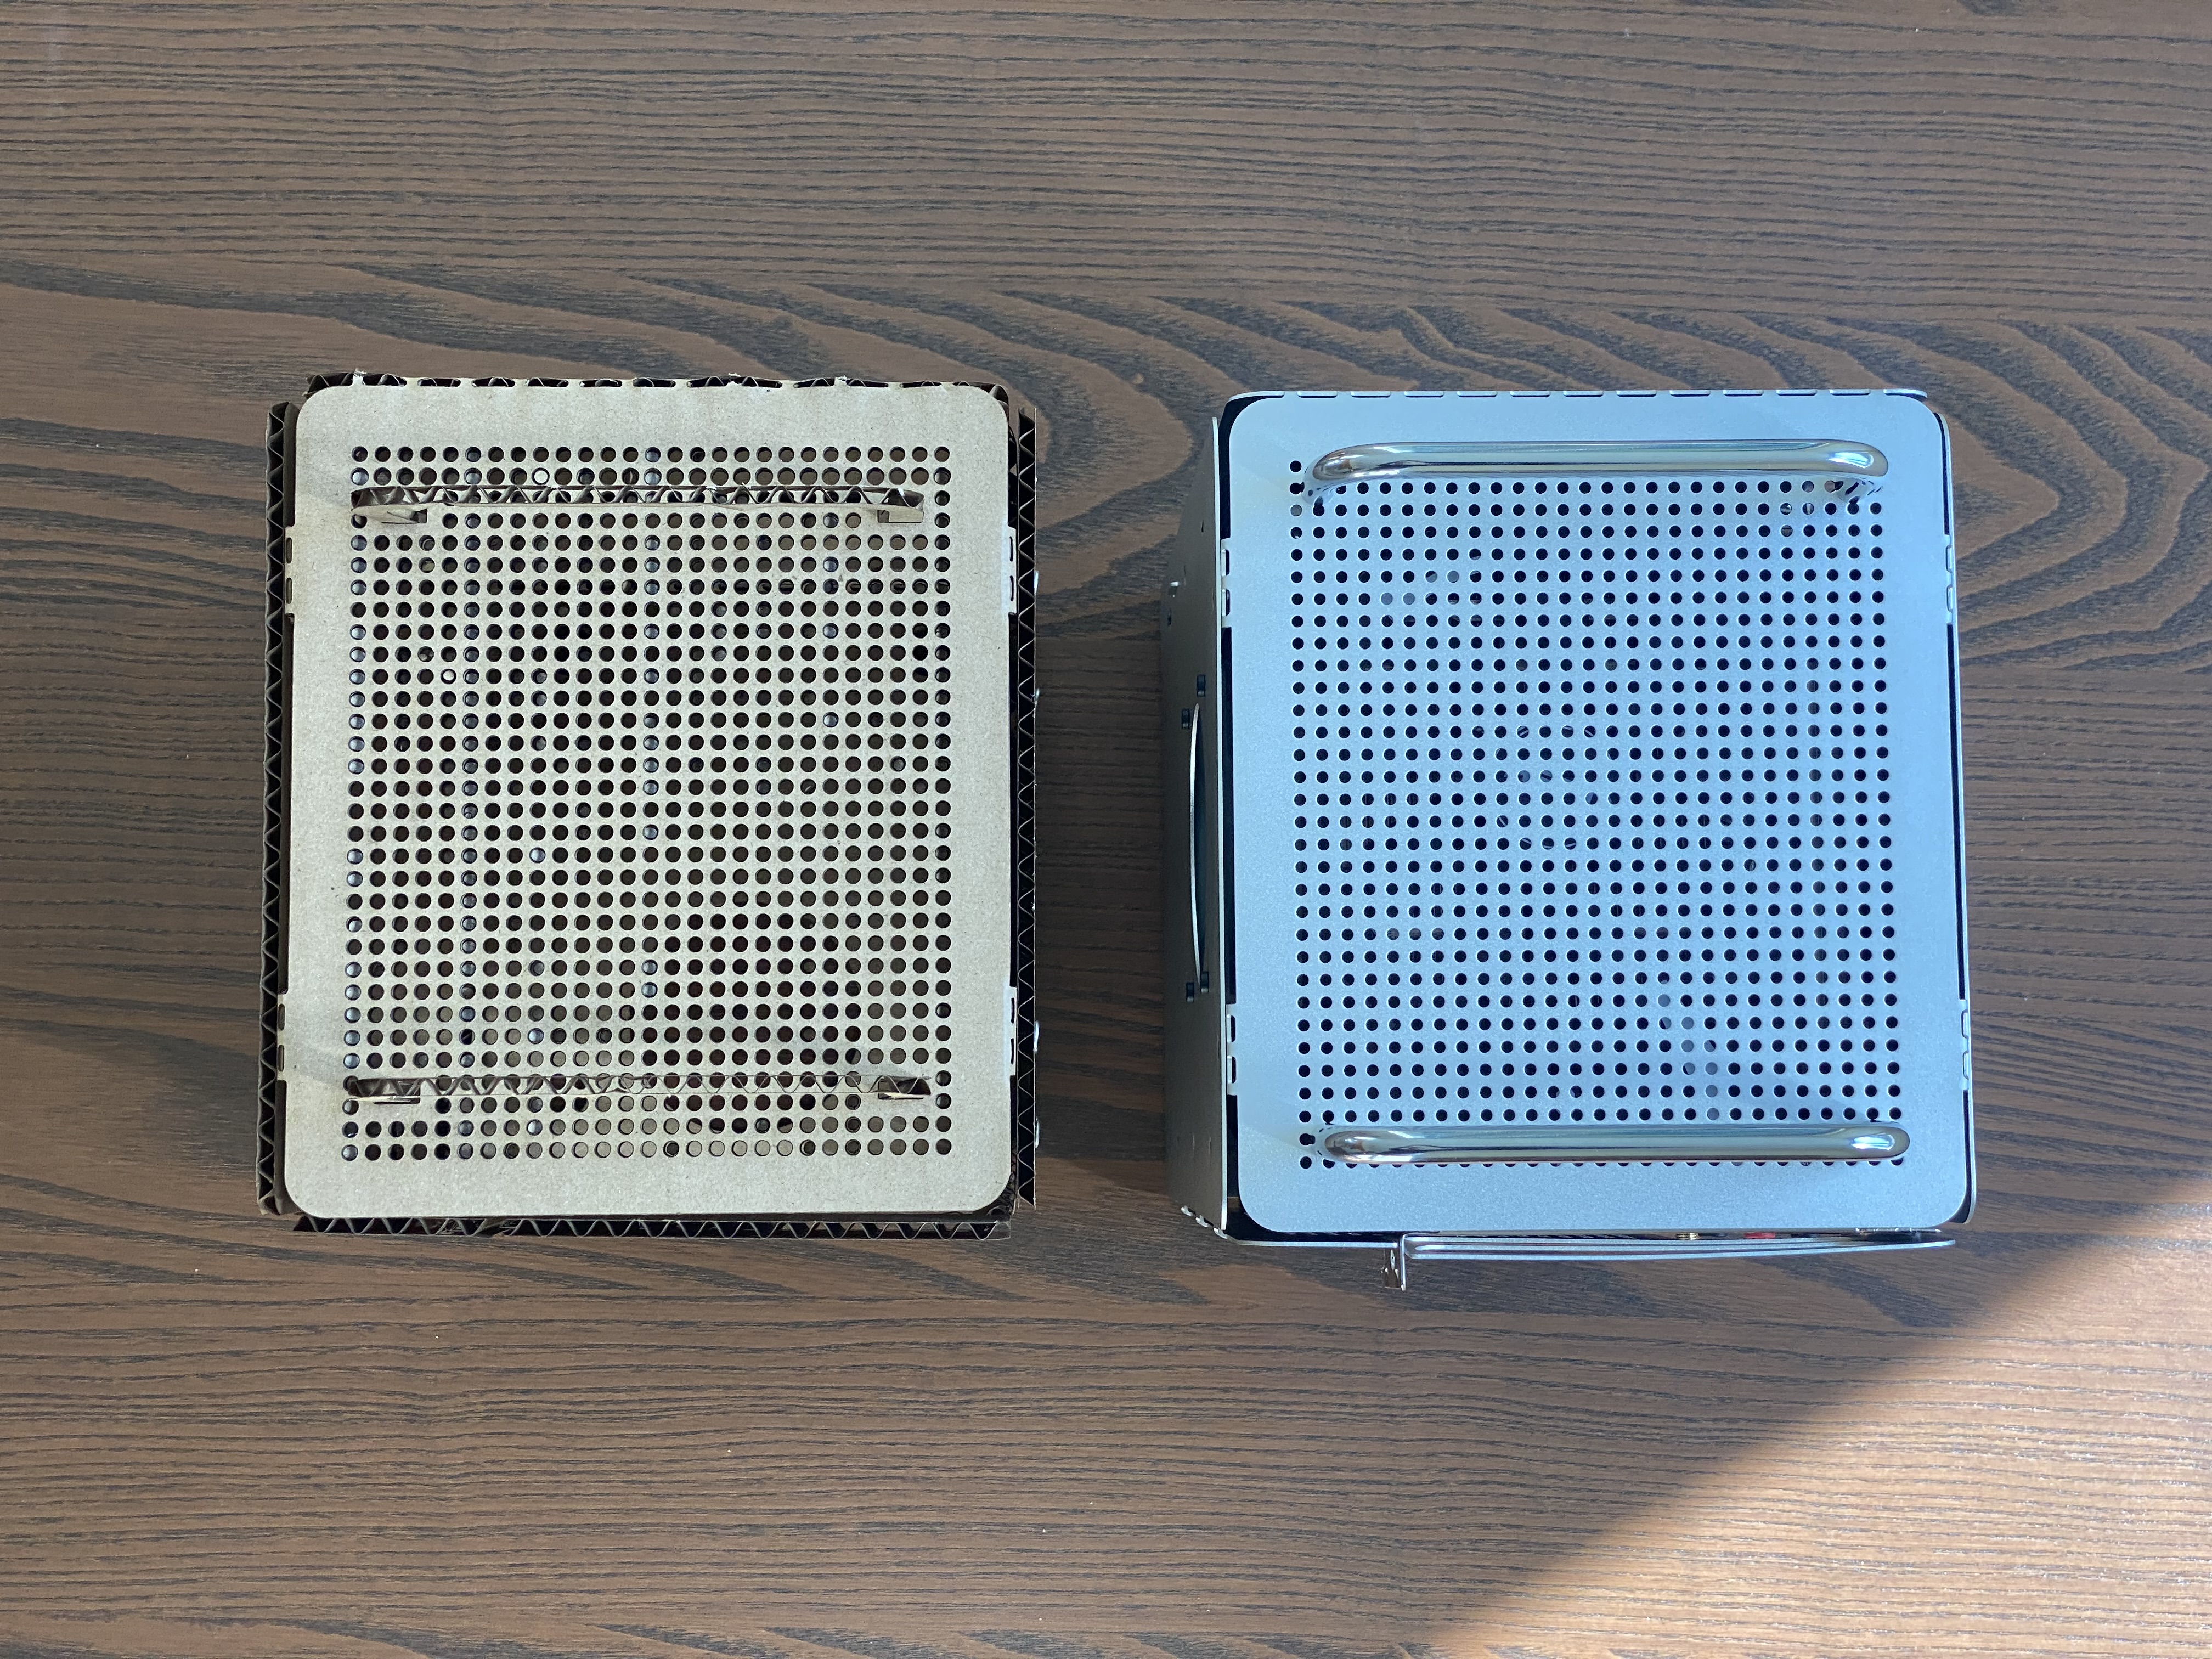
Output A : Clone of my Custom mini-ITX PC (Computer-1 by Teenage Engineering)

Why?
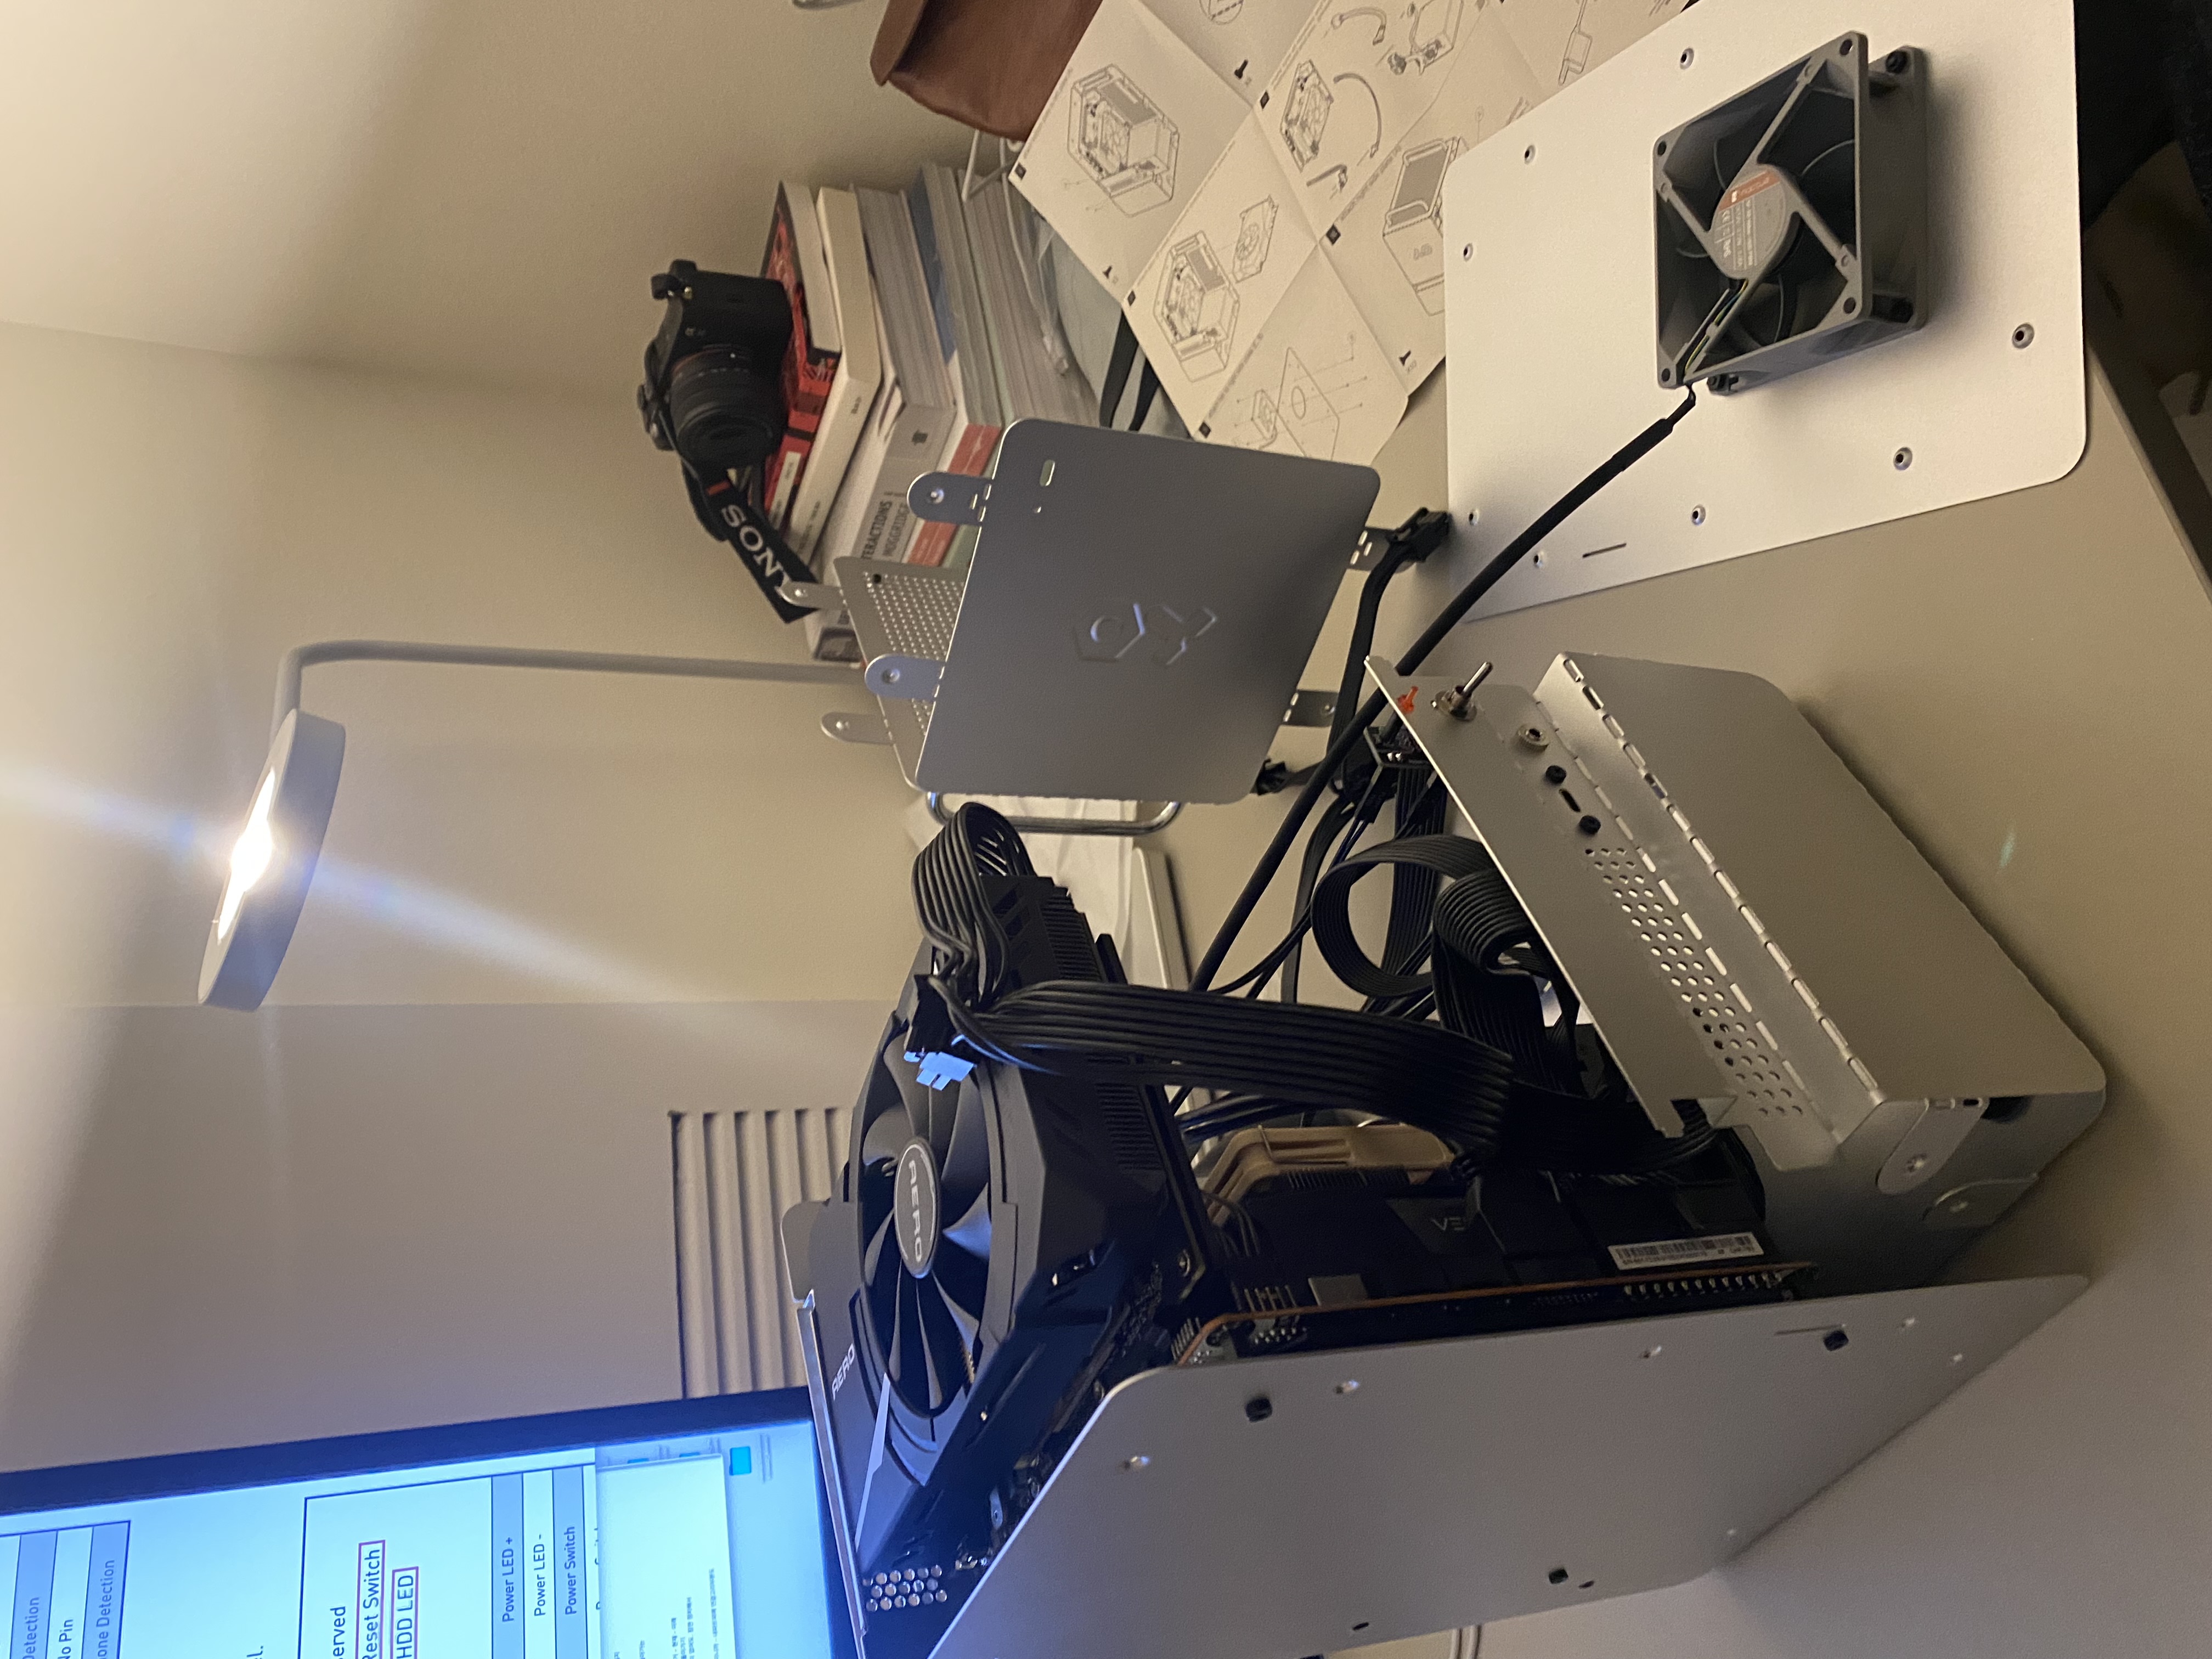
I bought a mini-itx computer case designed by Teenage Engineering (Computer1).
Although it looks nice, It was very hard to assemble it. That brought me here to test if this could be made with cardboard.
Process: CAD -> Laser Cut -> Vynl cut -> Assembly
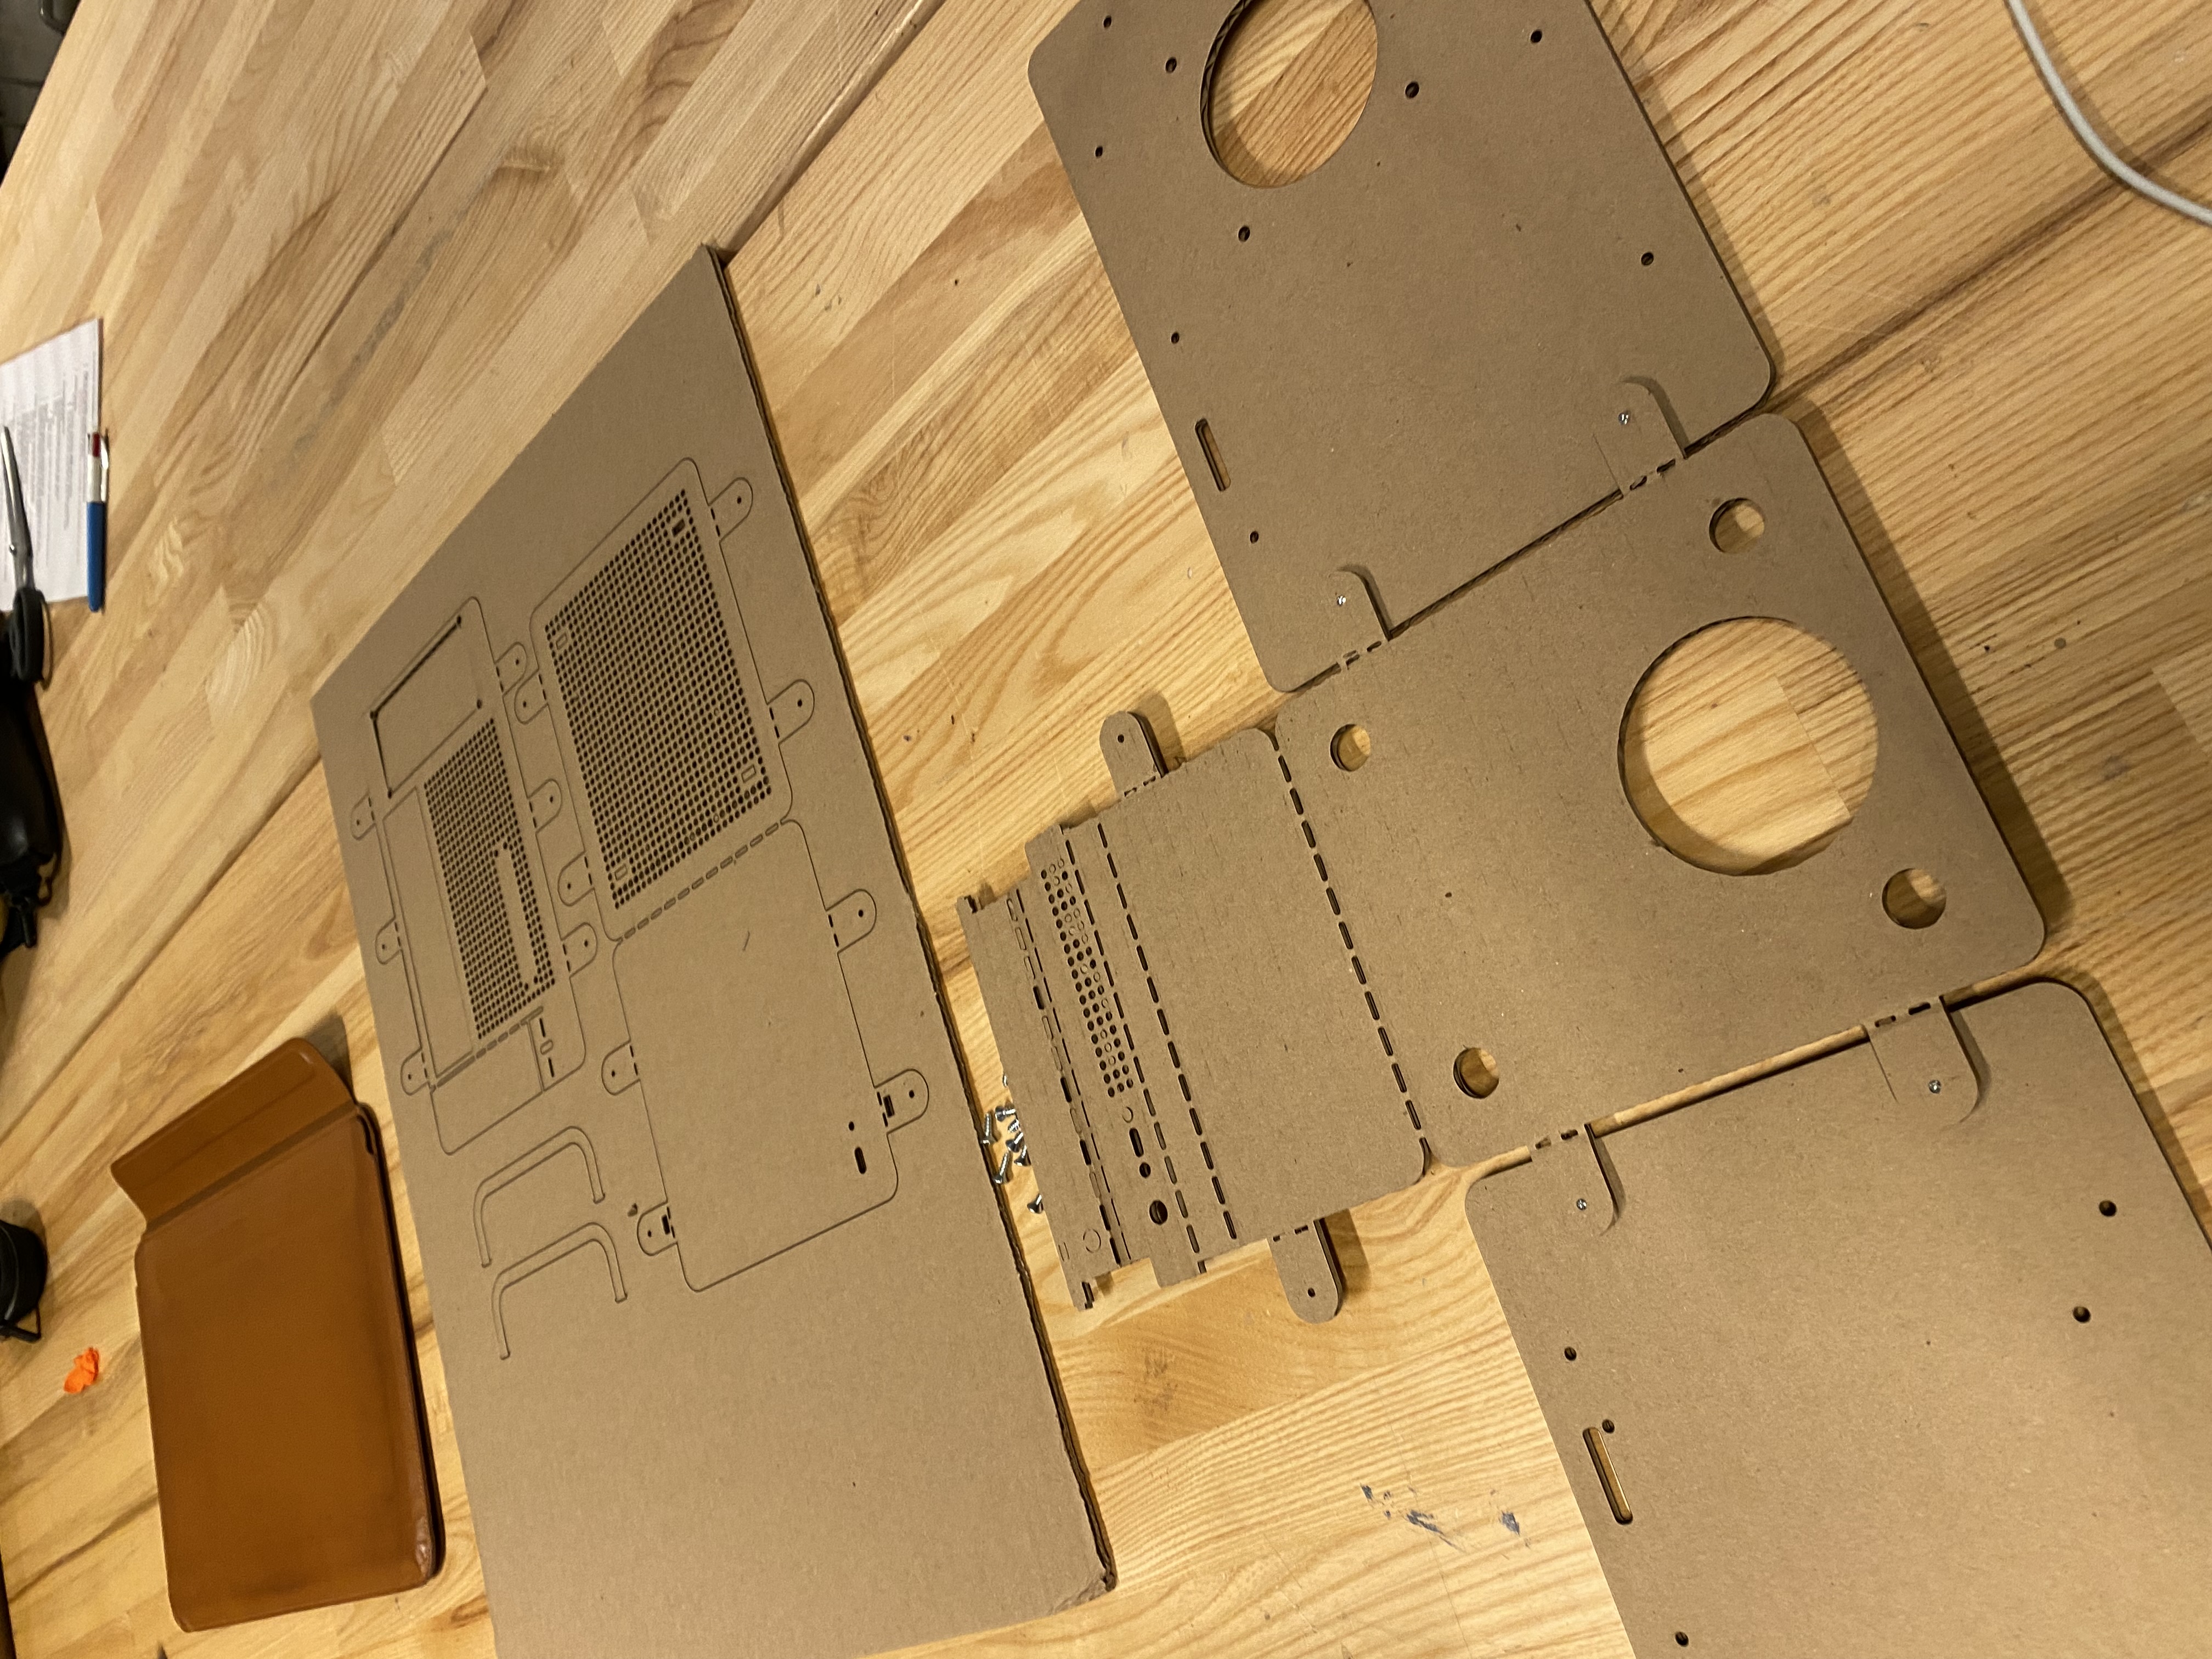
1. CAD: Clone the PC case based on the picture or dimensions on the website

2. Lasercut: Export the AI file and put it into the computer linked to the Fusion Pro

Having a camera on a Laser cutter is nice - I’ve never used one with a camera before.
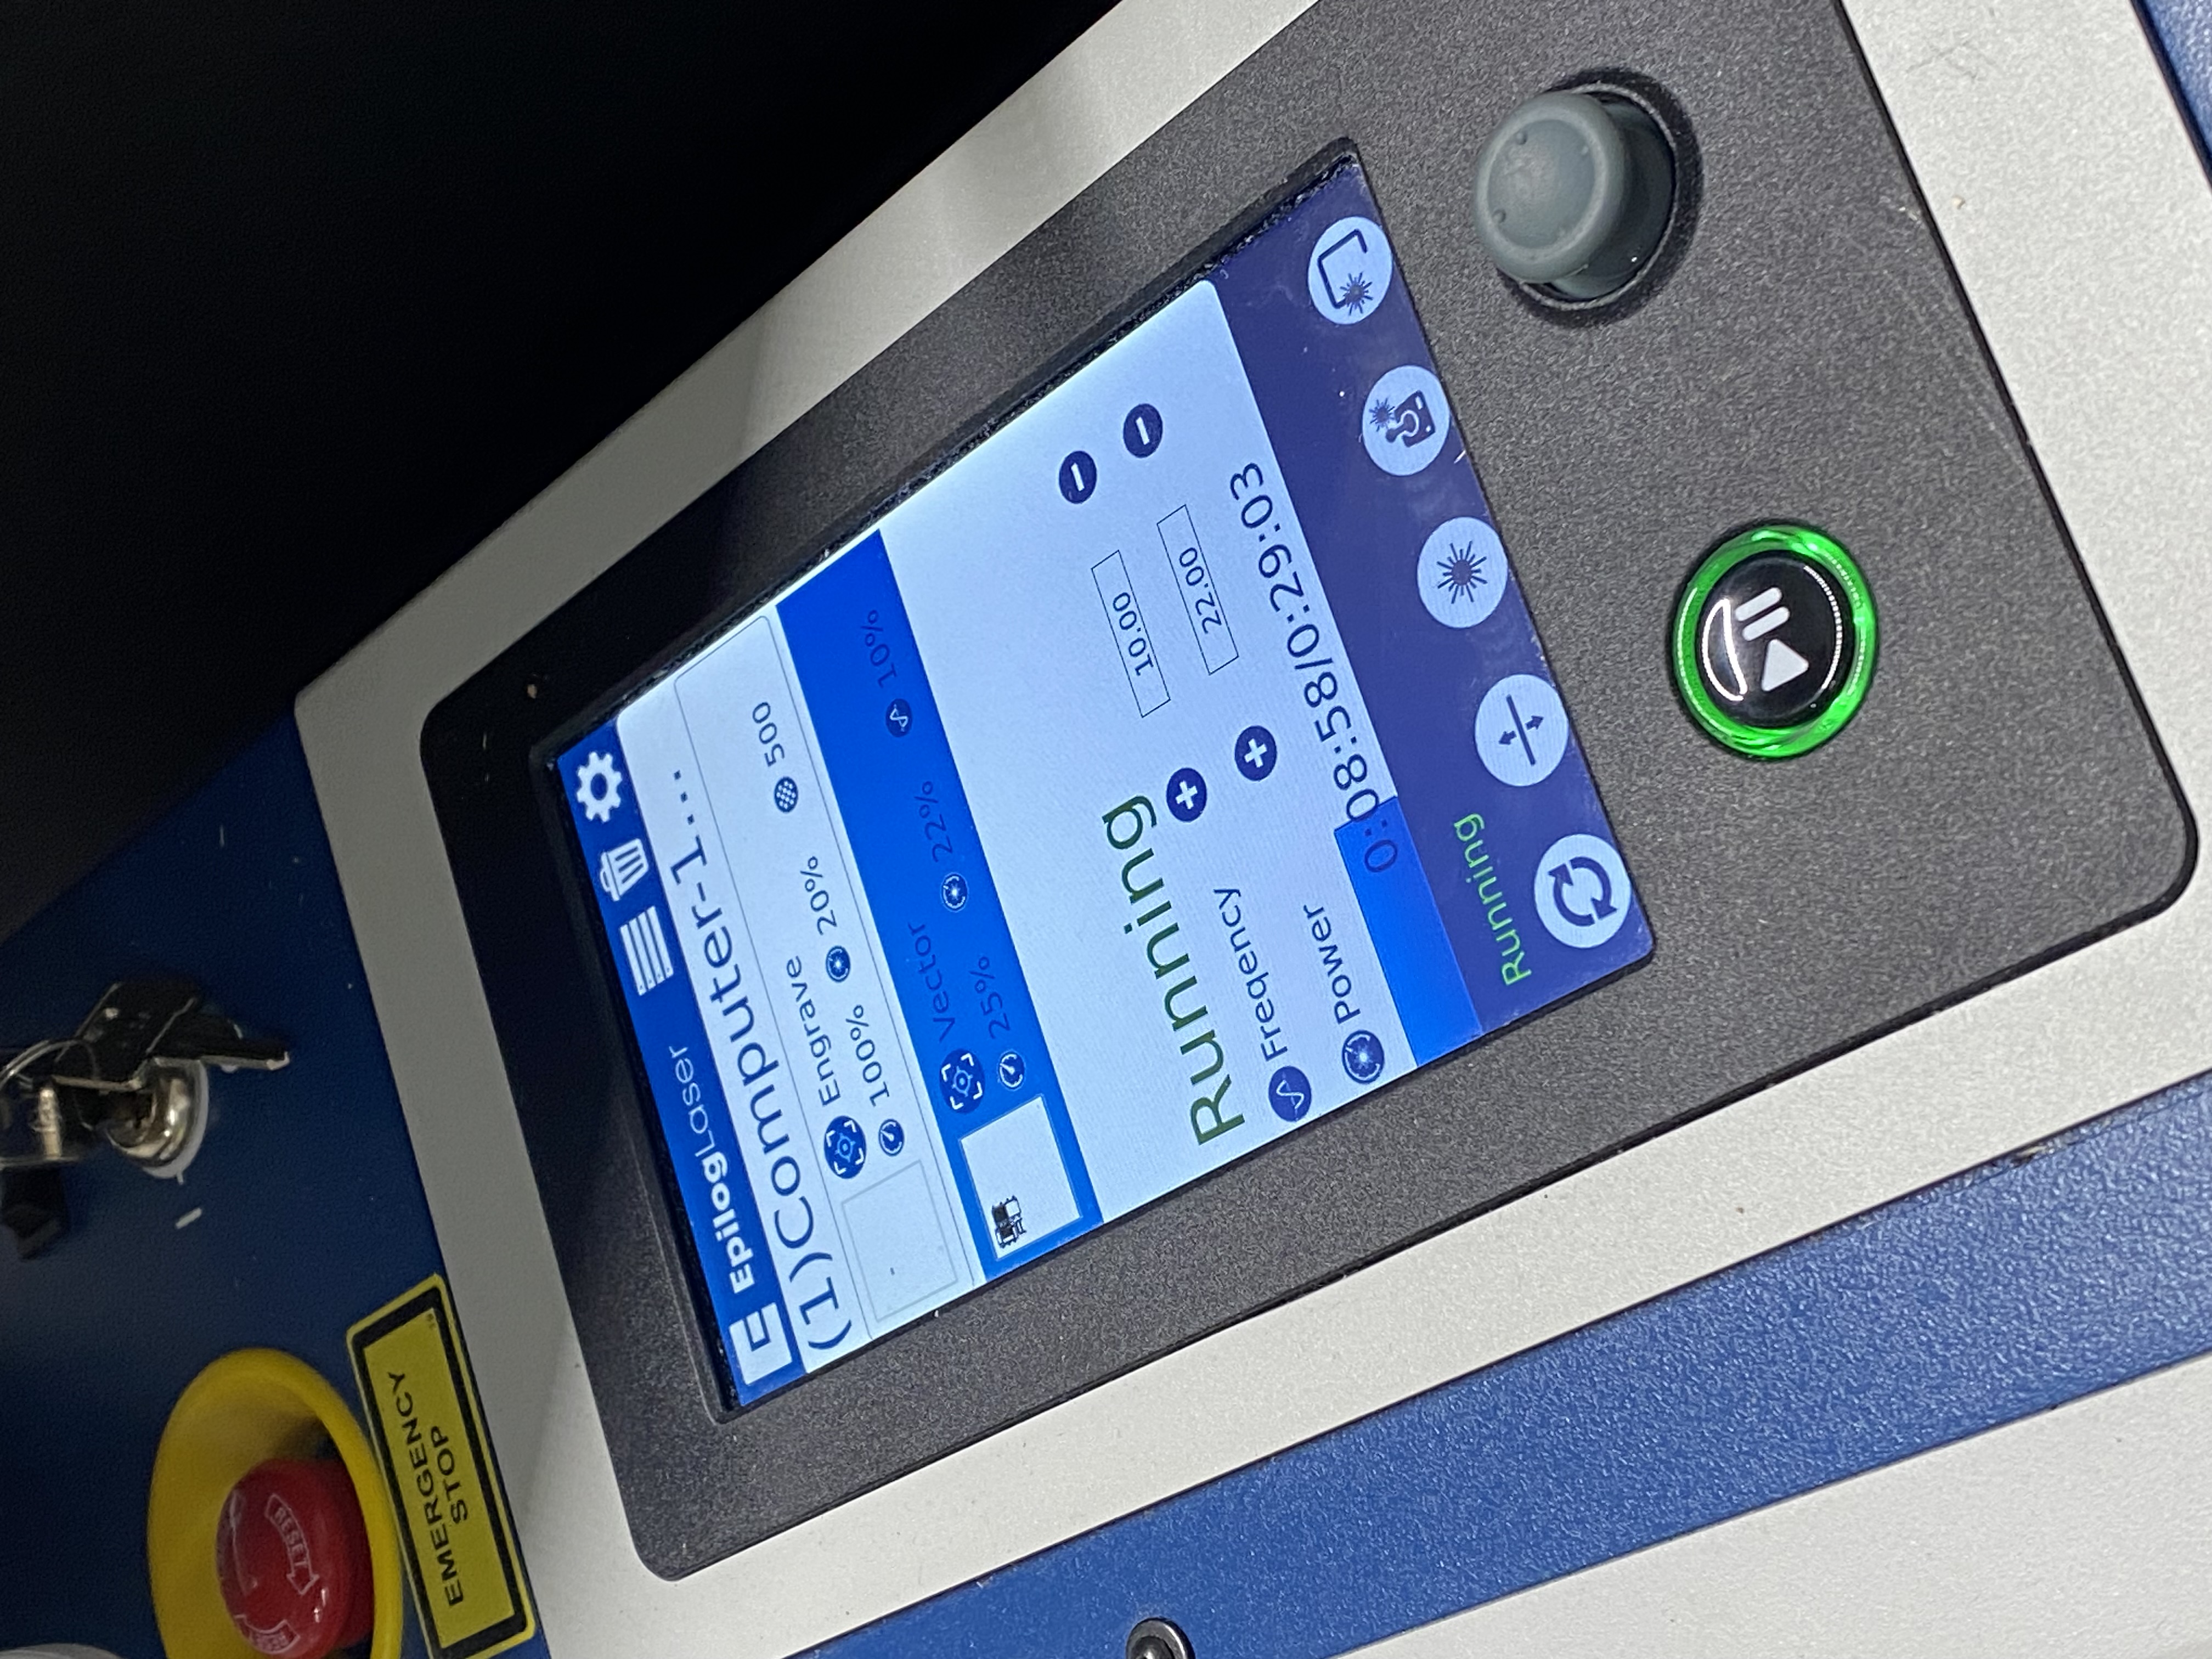 See the running time? It took 30 mins to finish - because
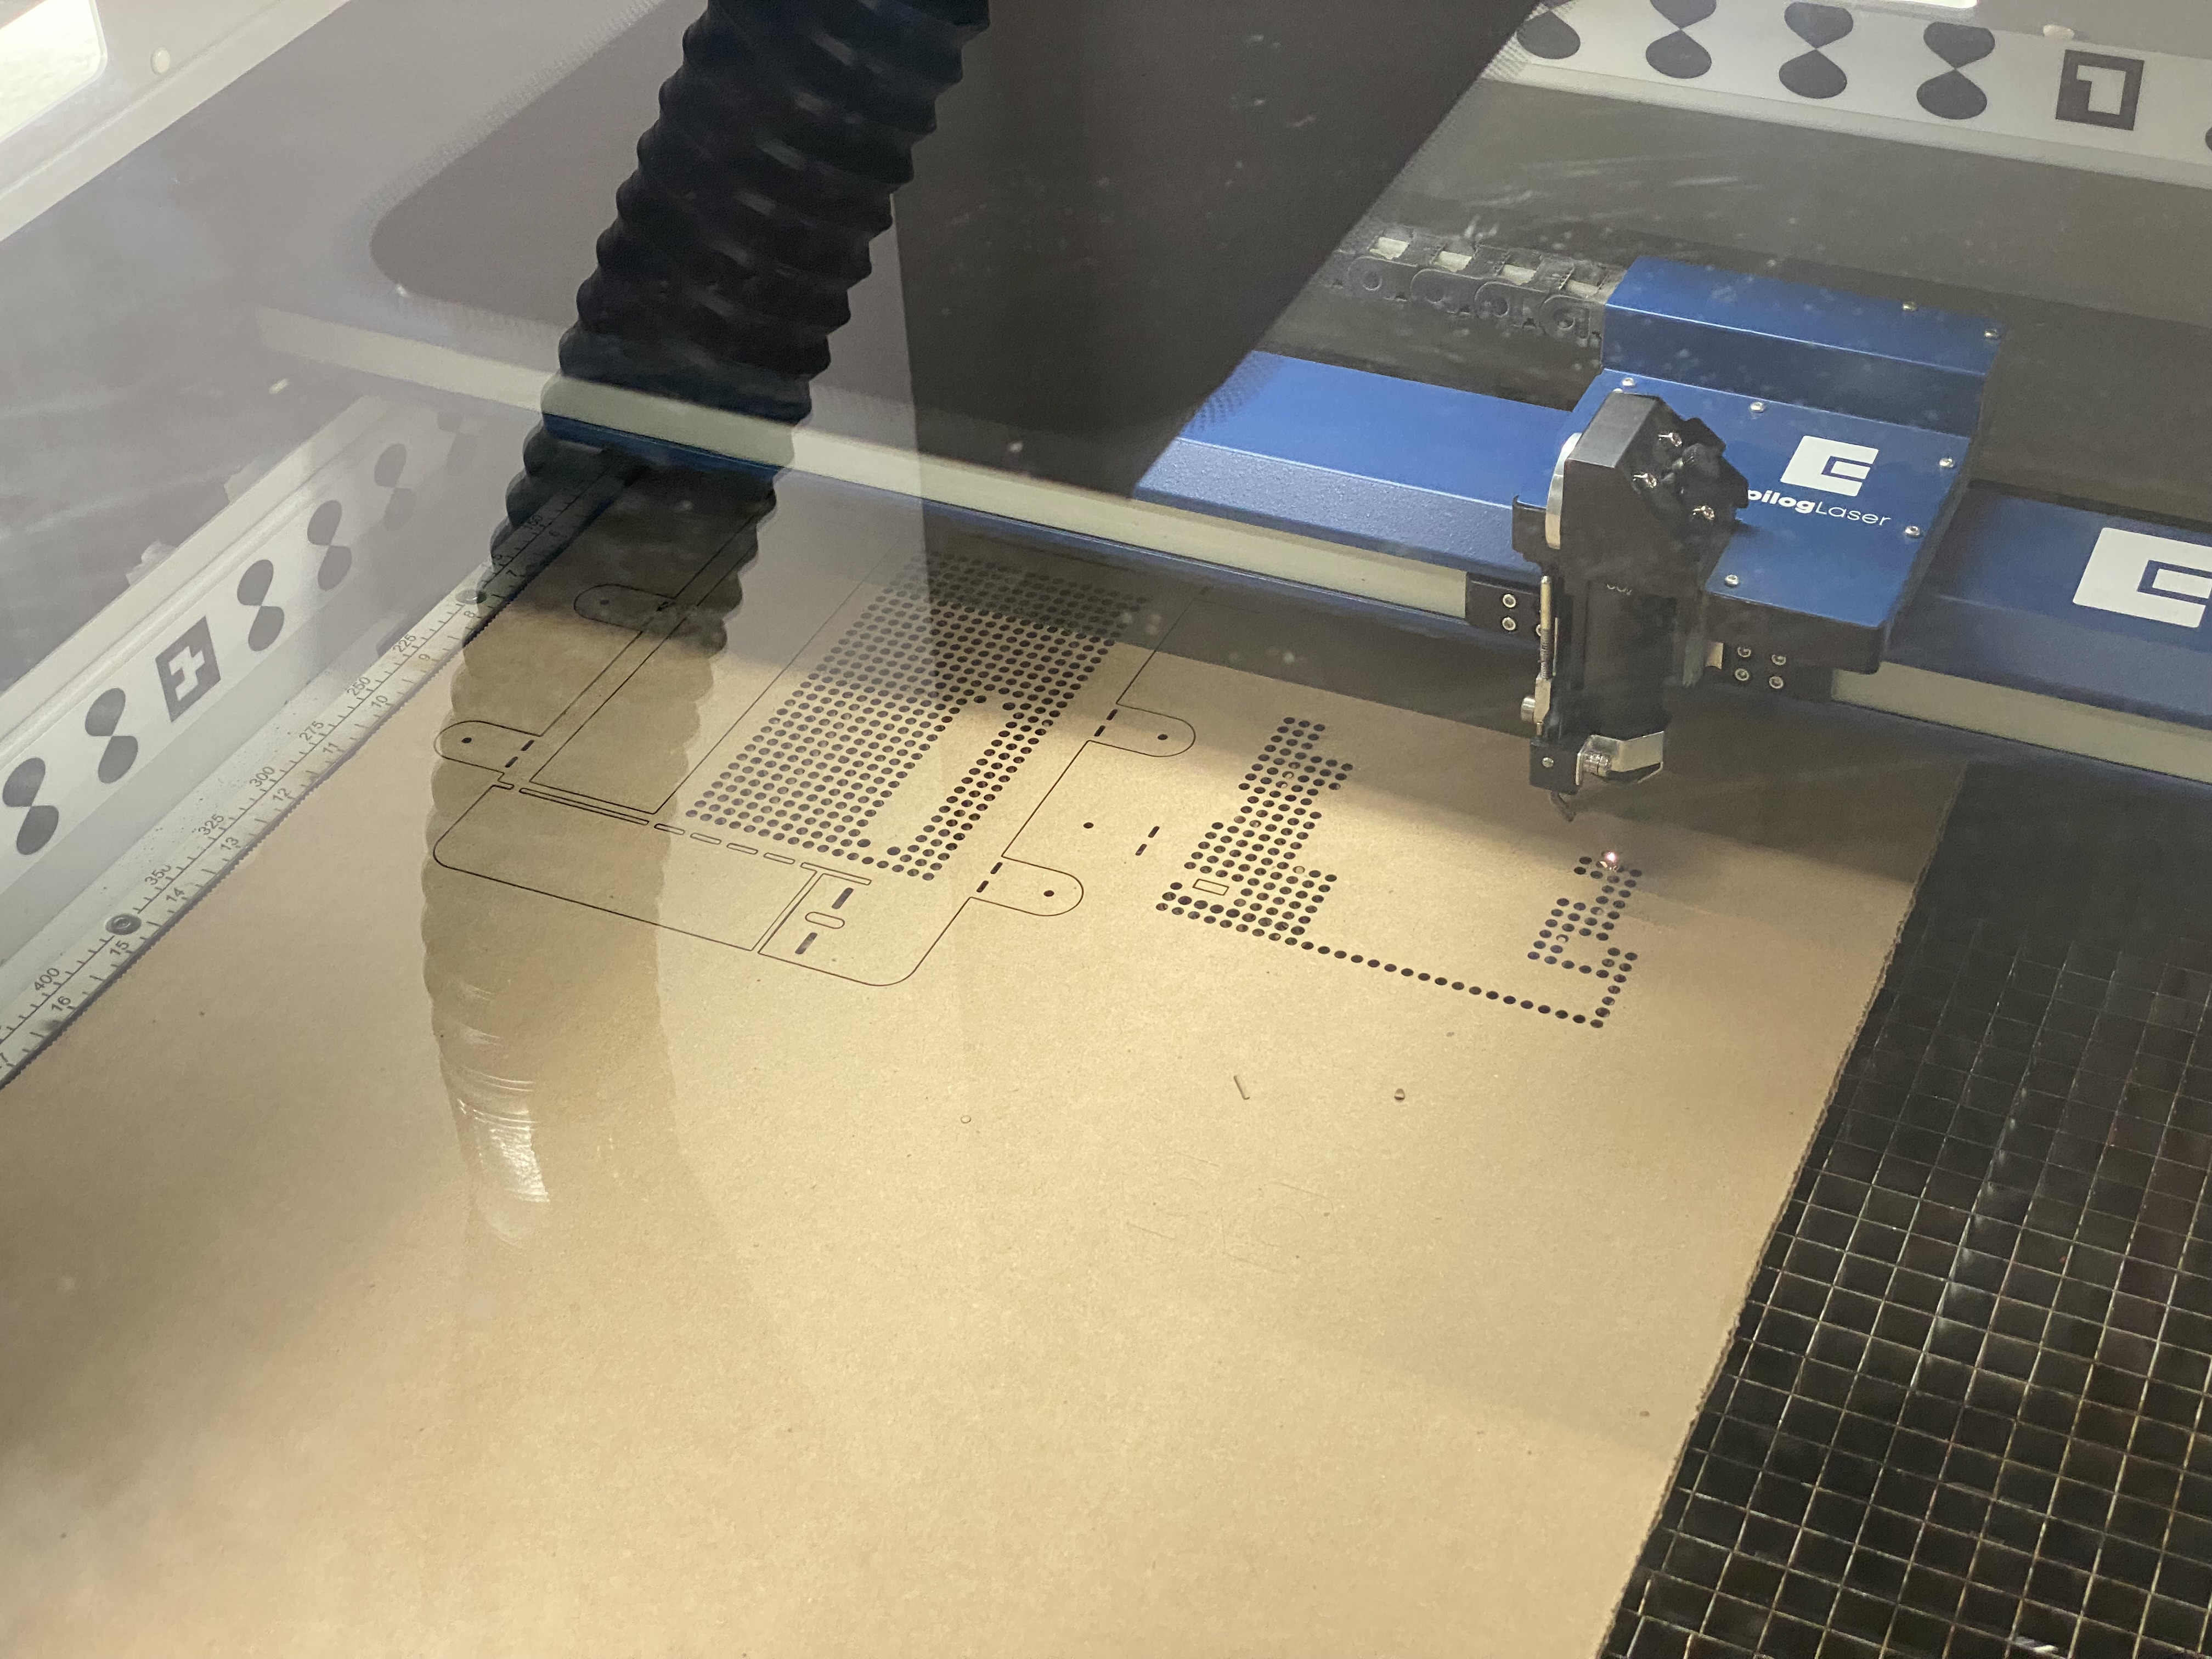
There are a lot of holes, and these holes take a lot of time to finish.
3. Assembly: I assembled it with wood screws - as the original PC case is assembled with screws.


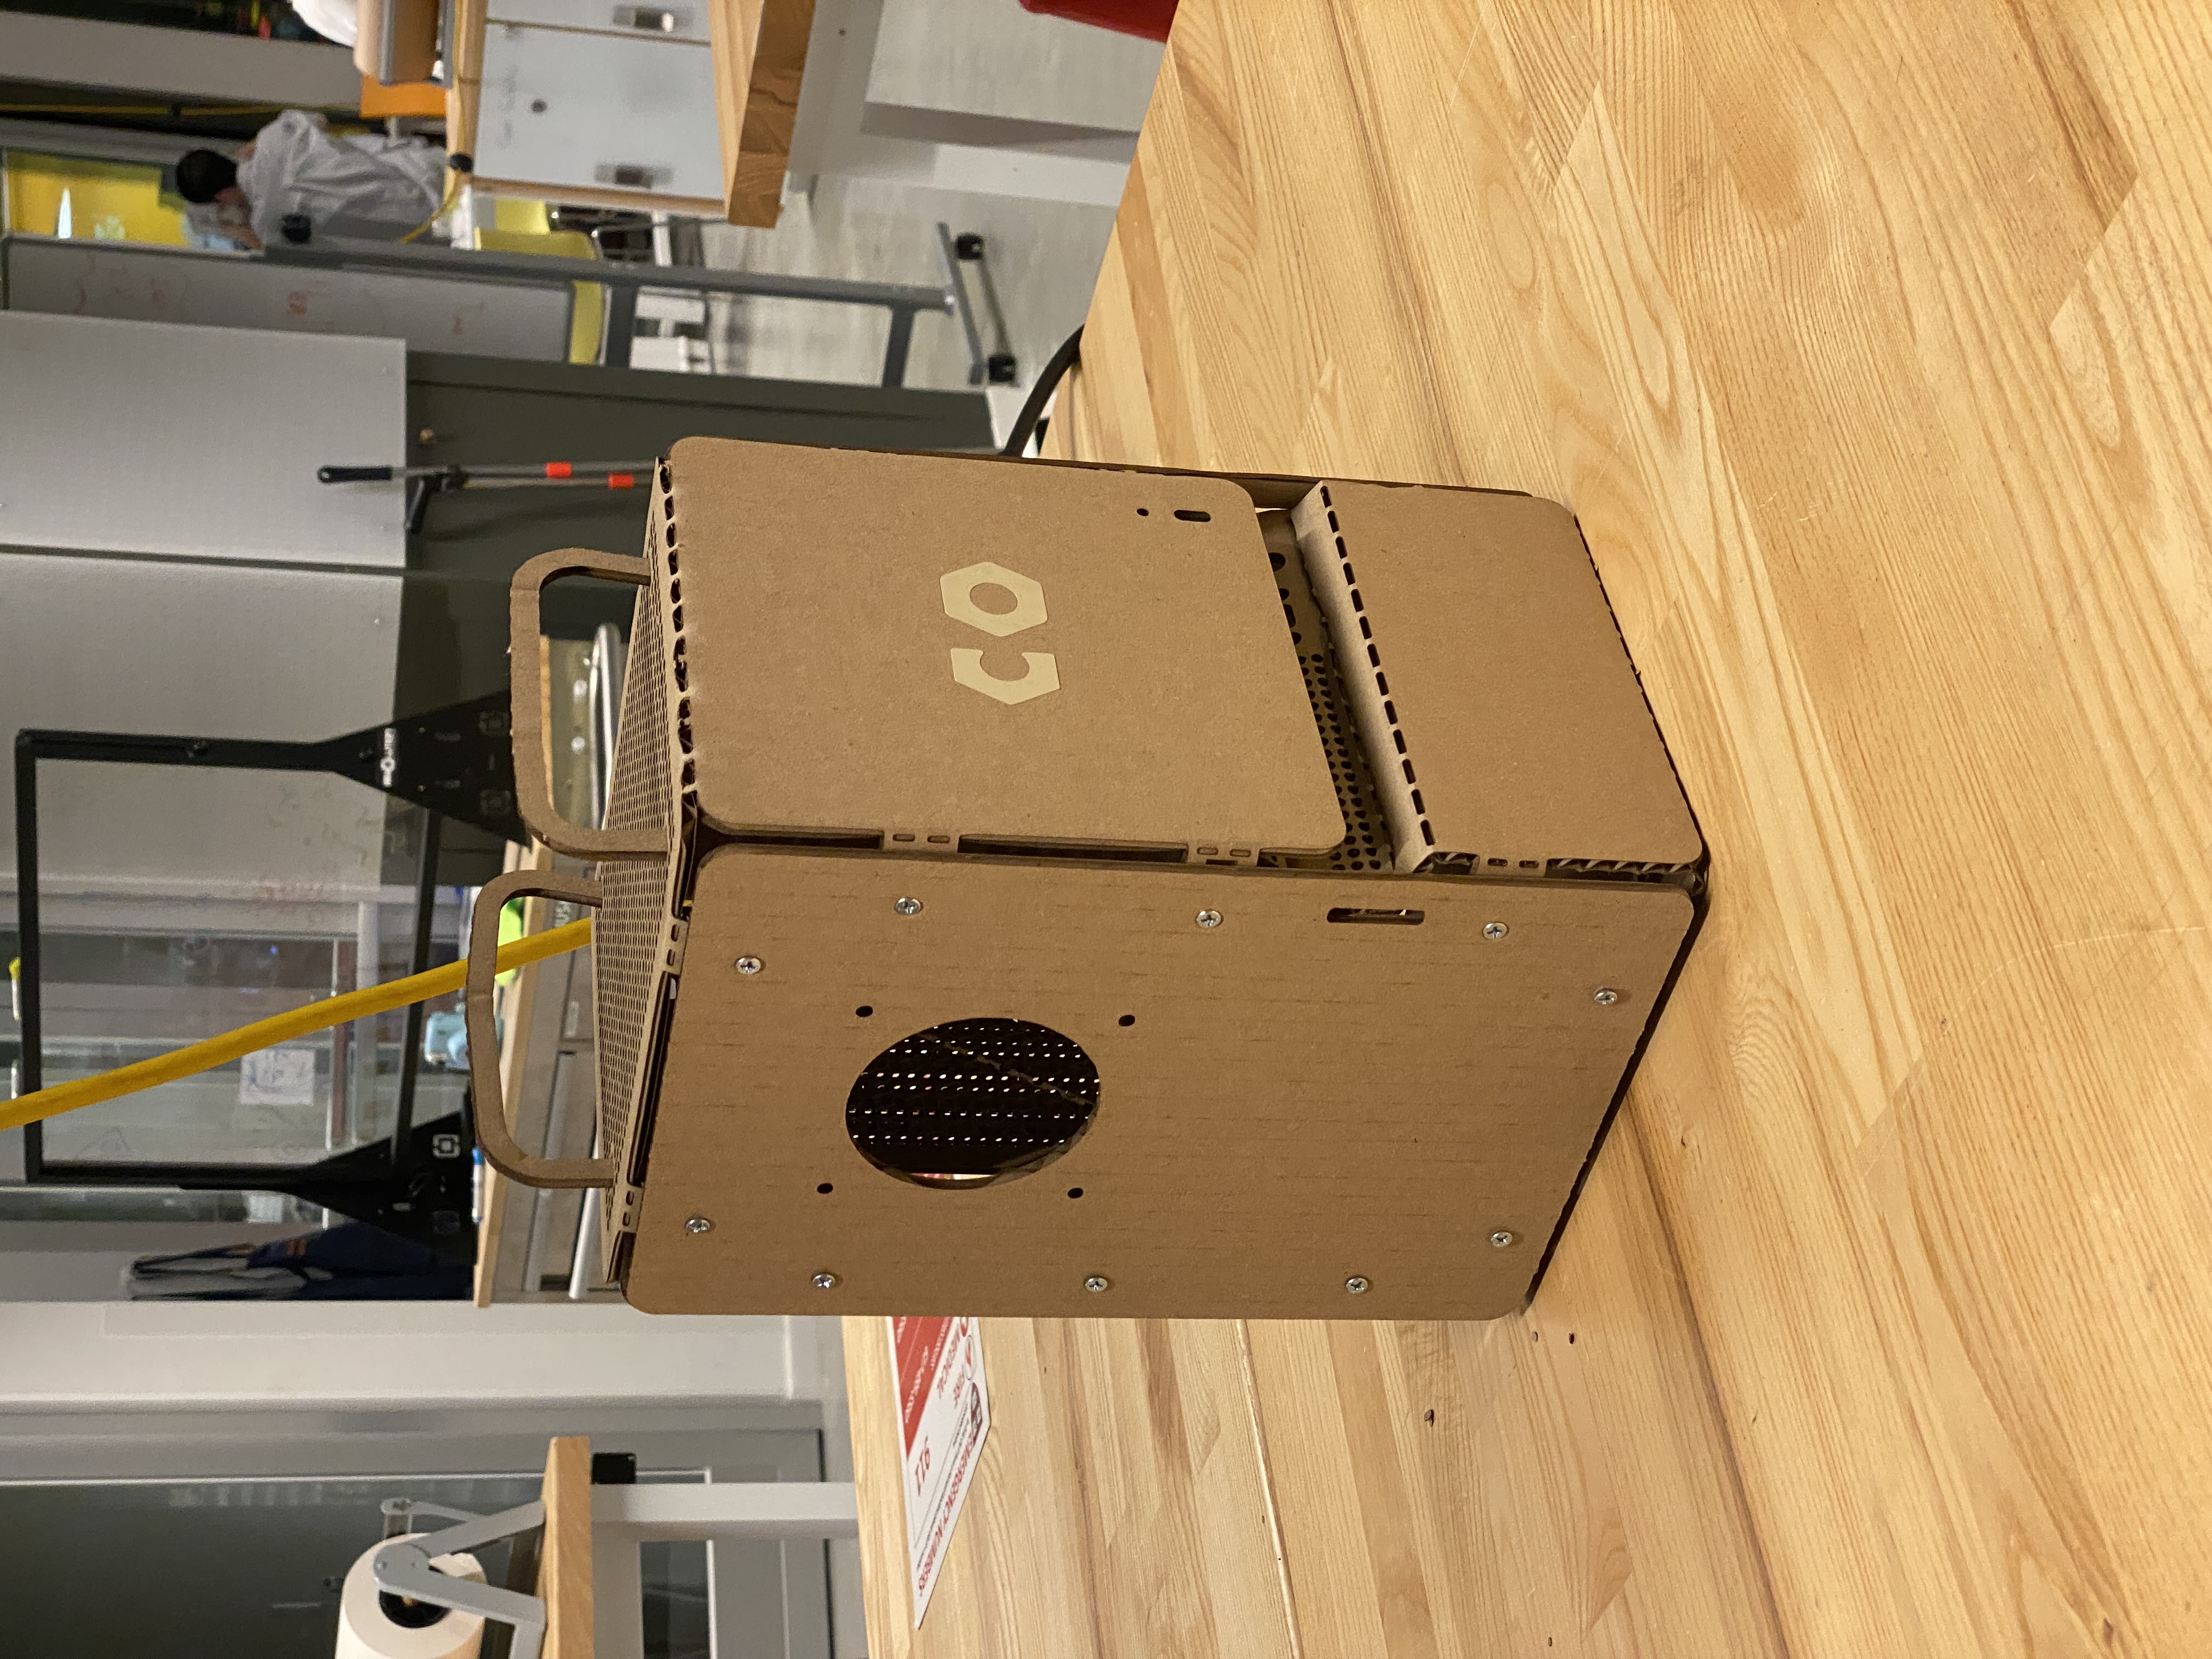
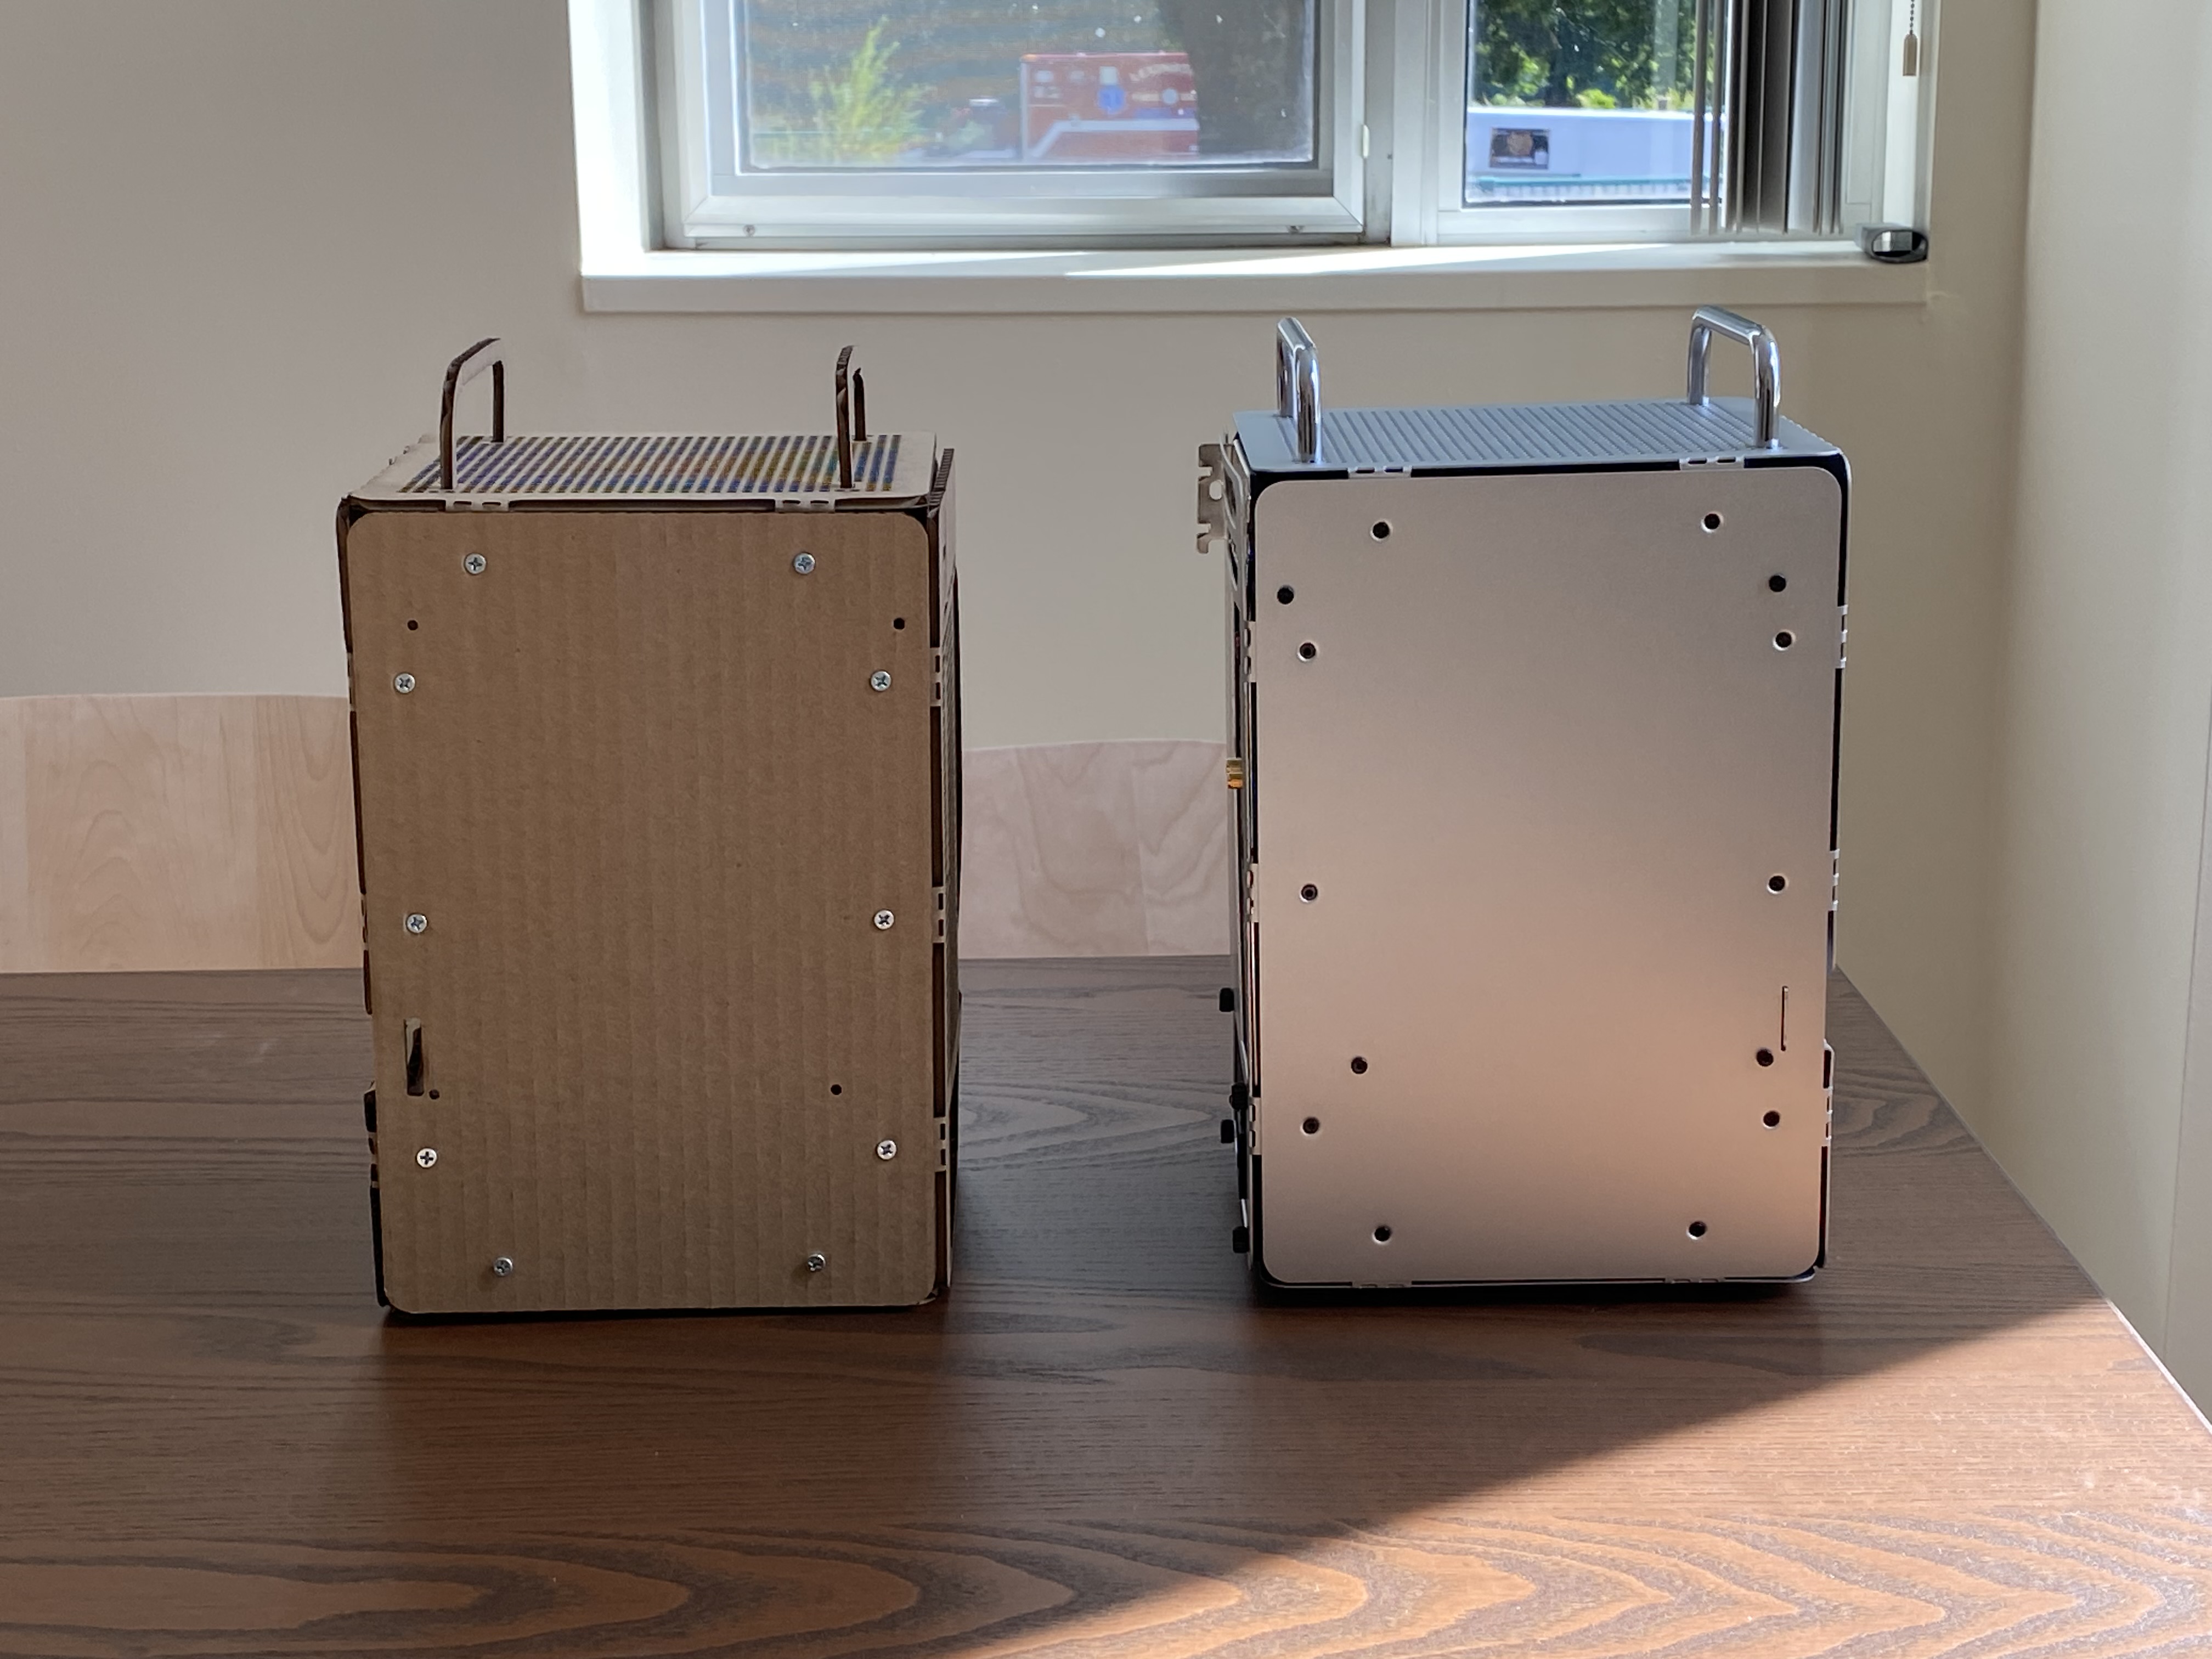
And then I thought it would be nice to put a sticker on the logo as the restered part was barely visible.
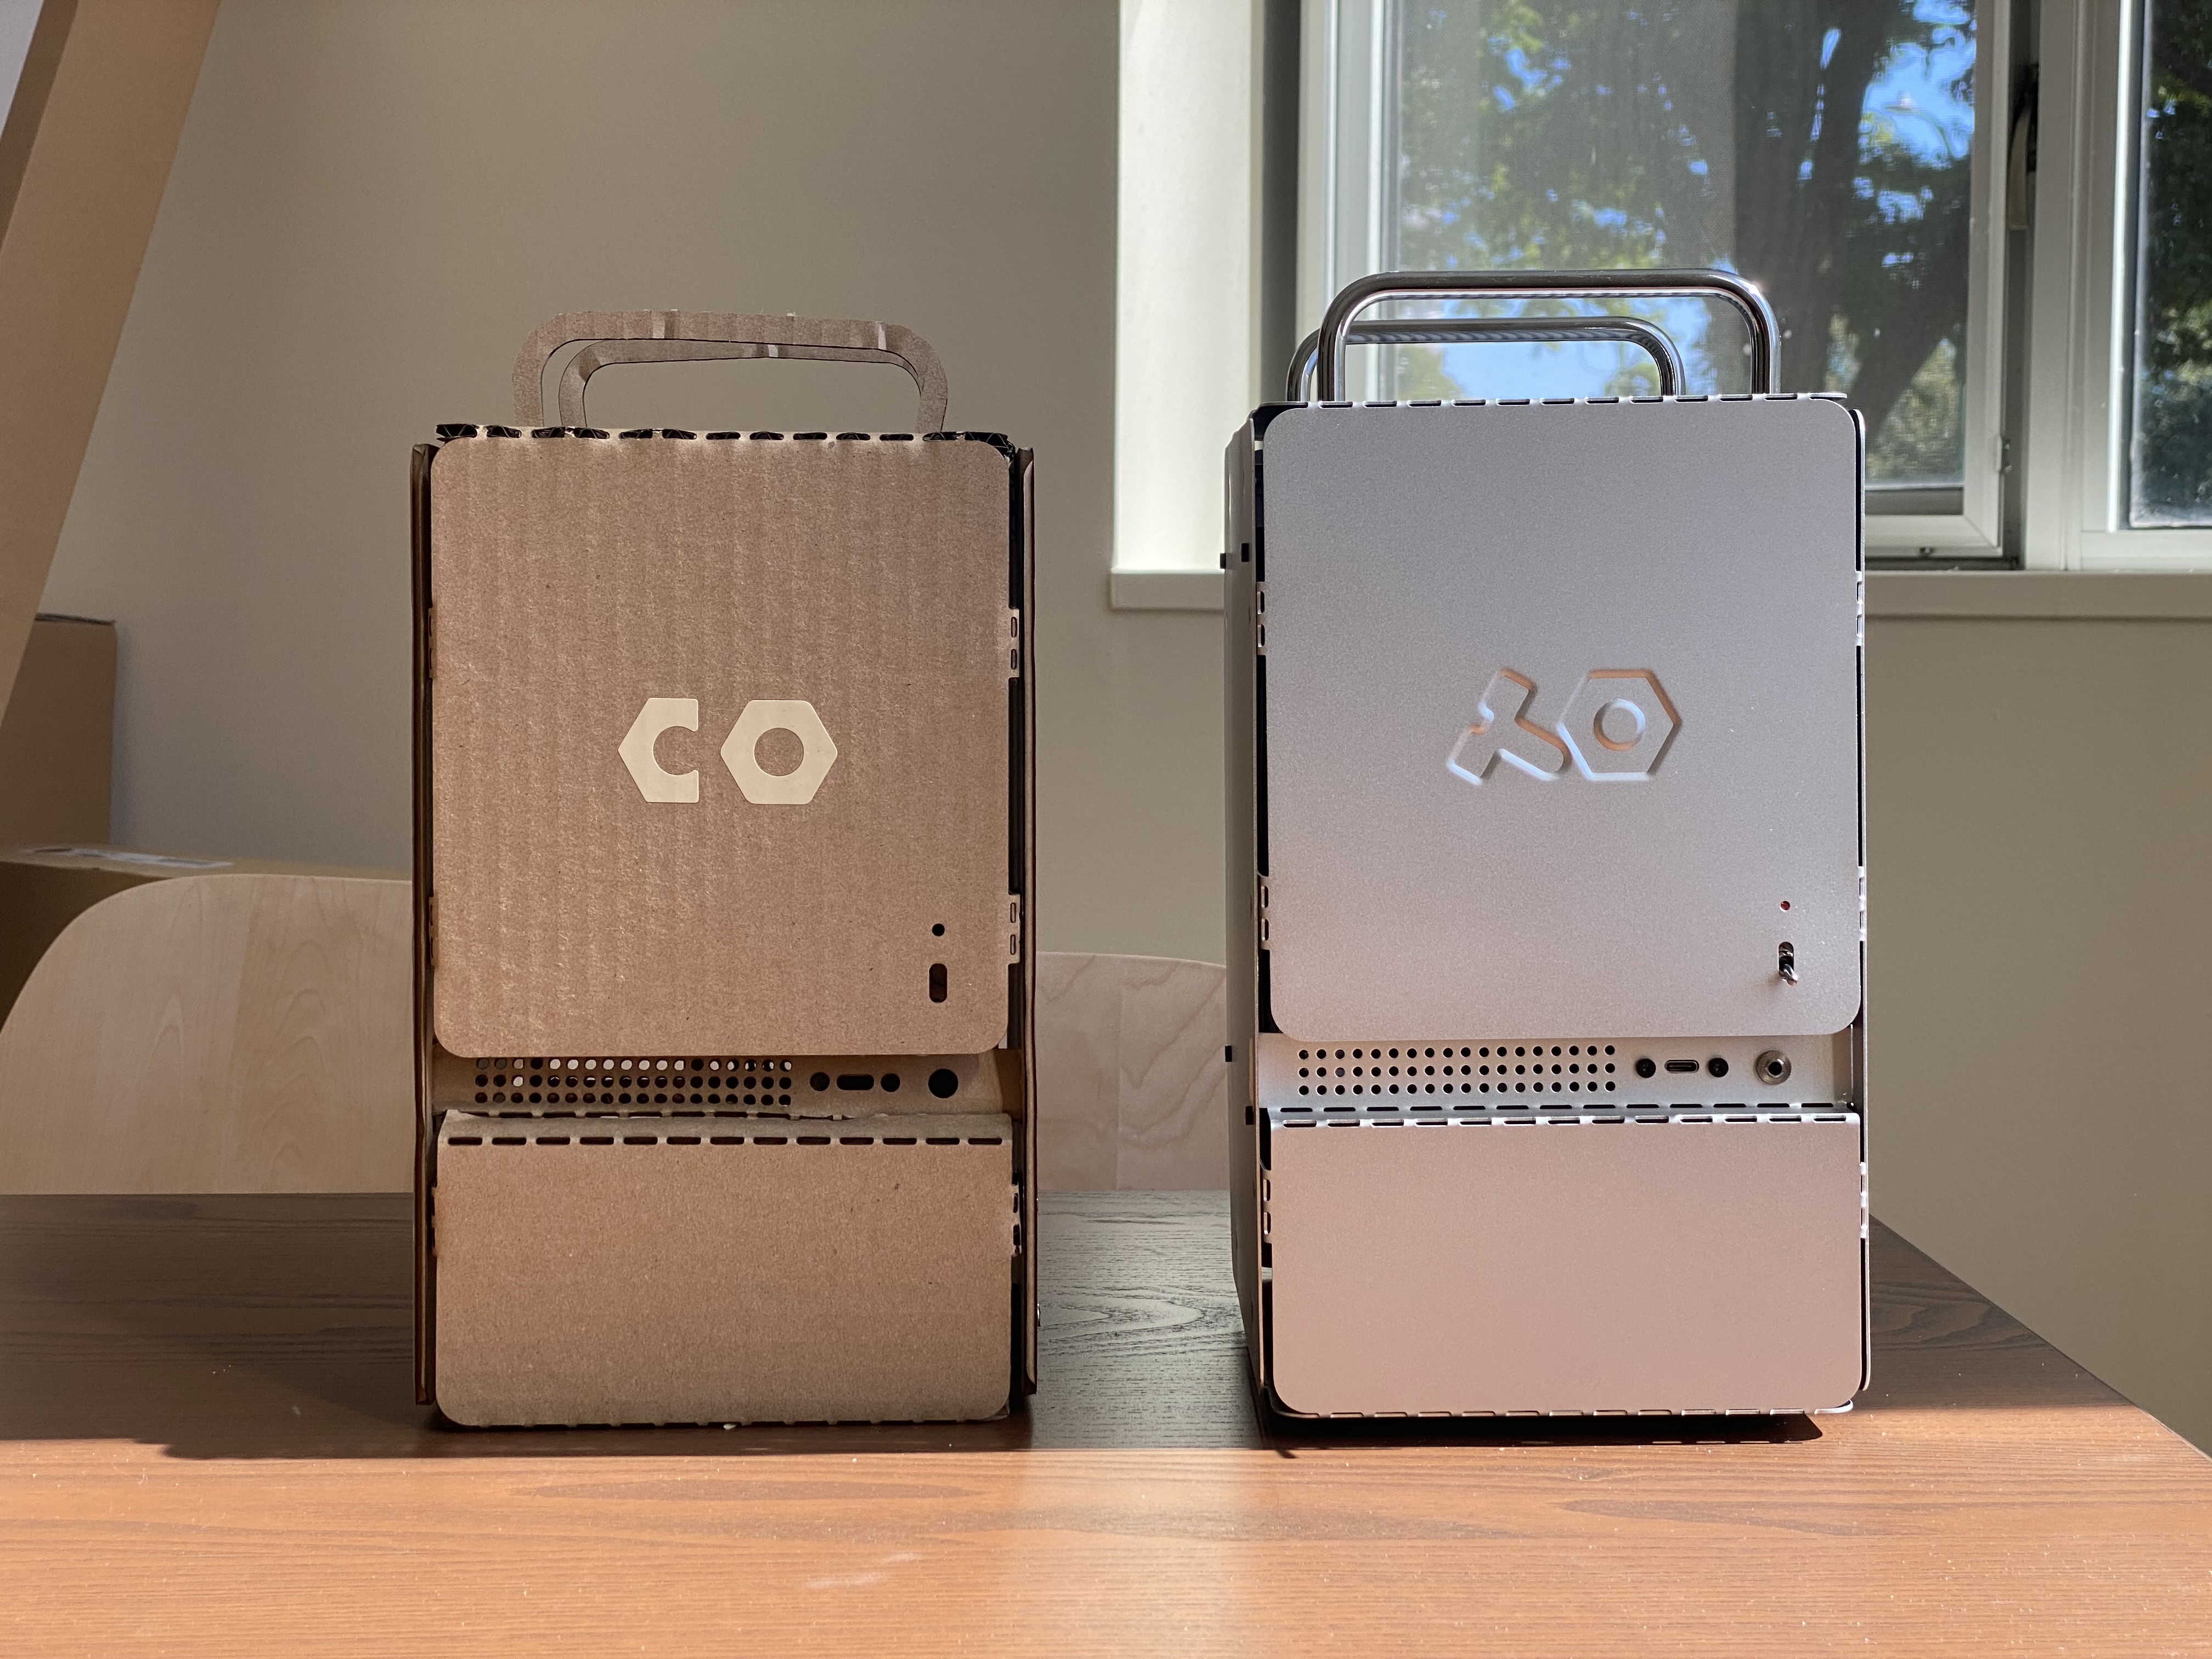
I changed the logo - from T+O(bolts and nuts representing ‘teenage engineering’ to C + O ( half nut and a nut) representing ‘cardboard engineering)
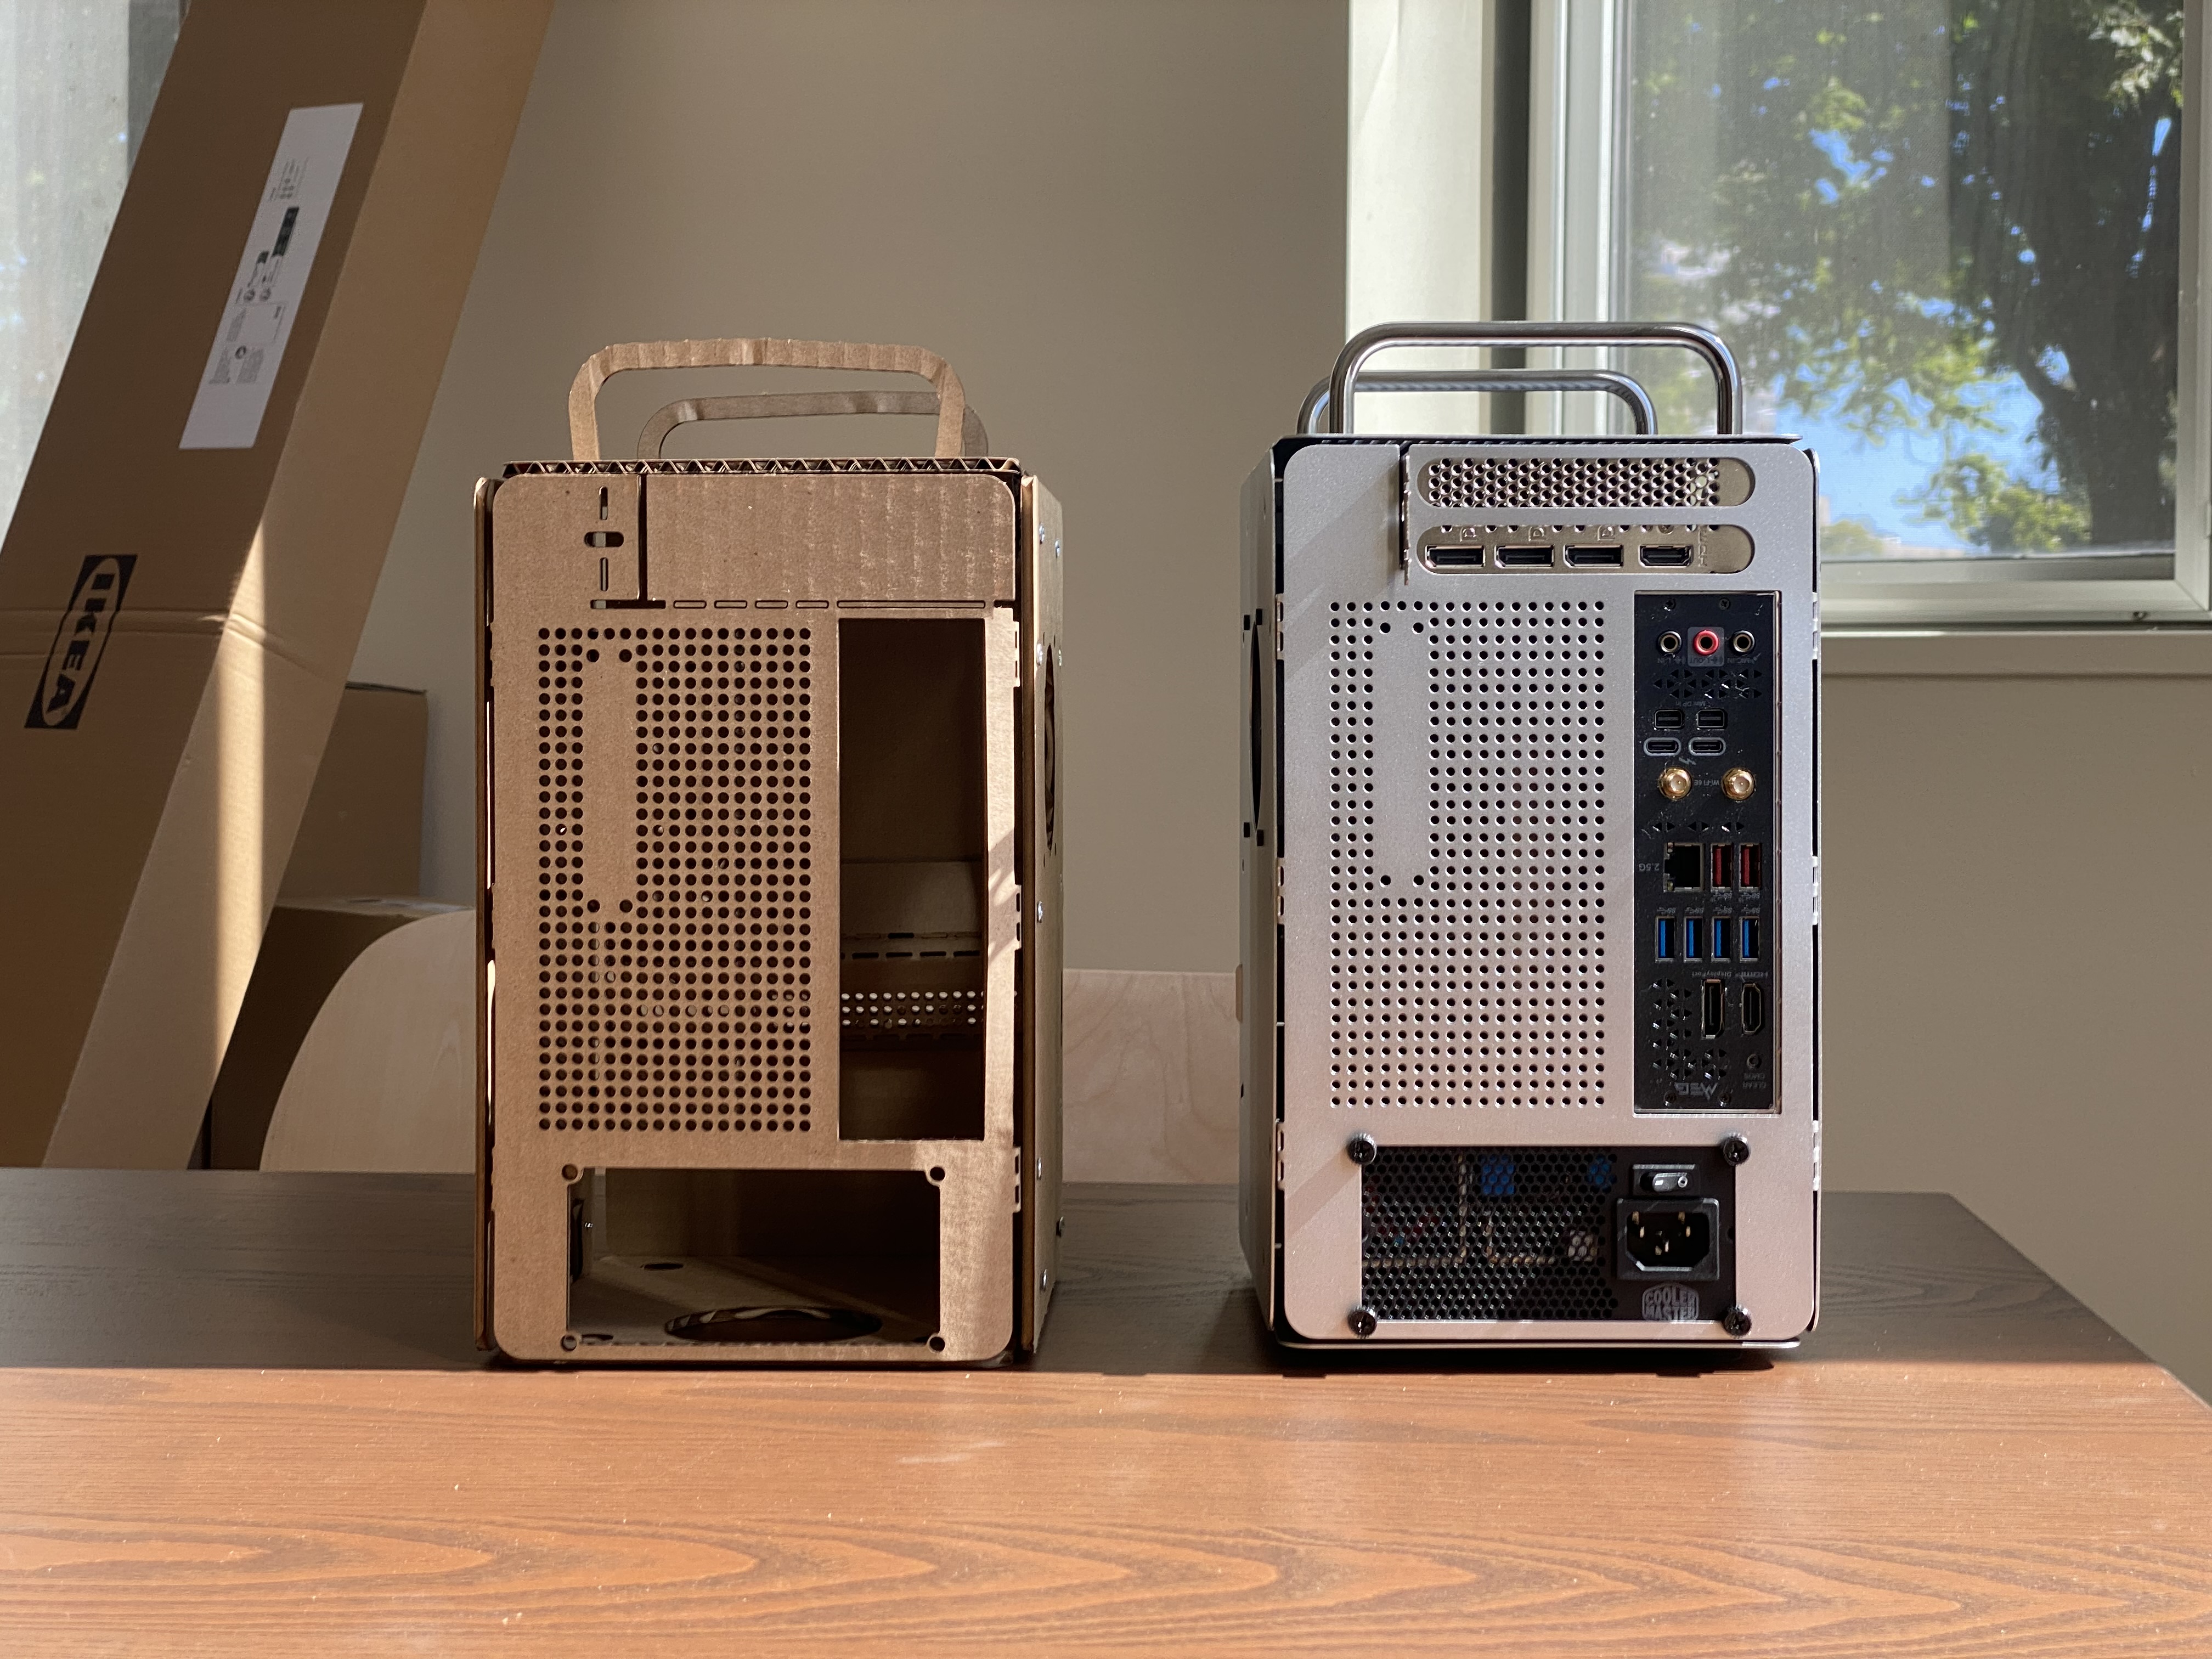
By the way, the size difference is because of the distance - the cardboard one is behind the aluminum one.
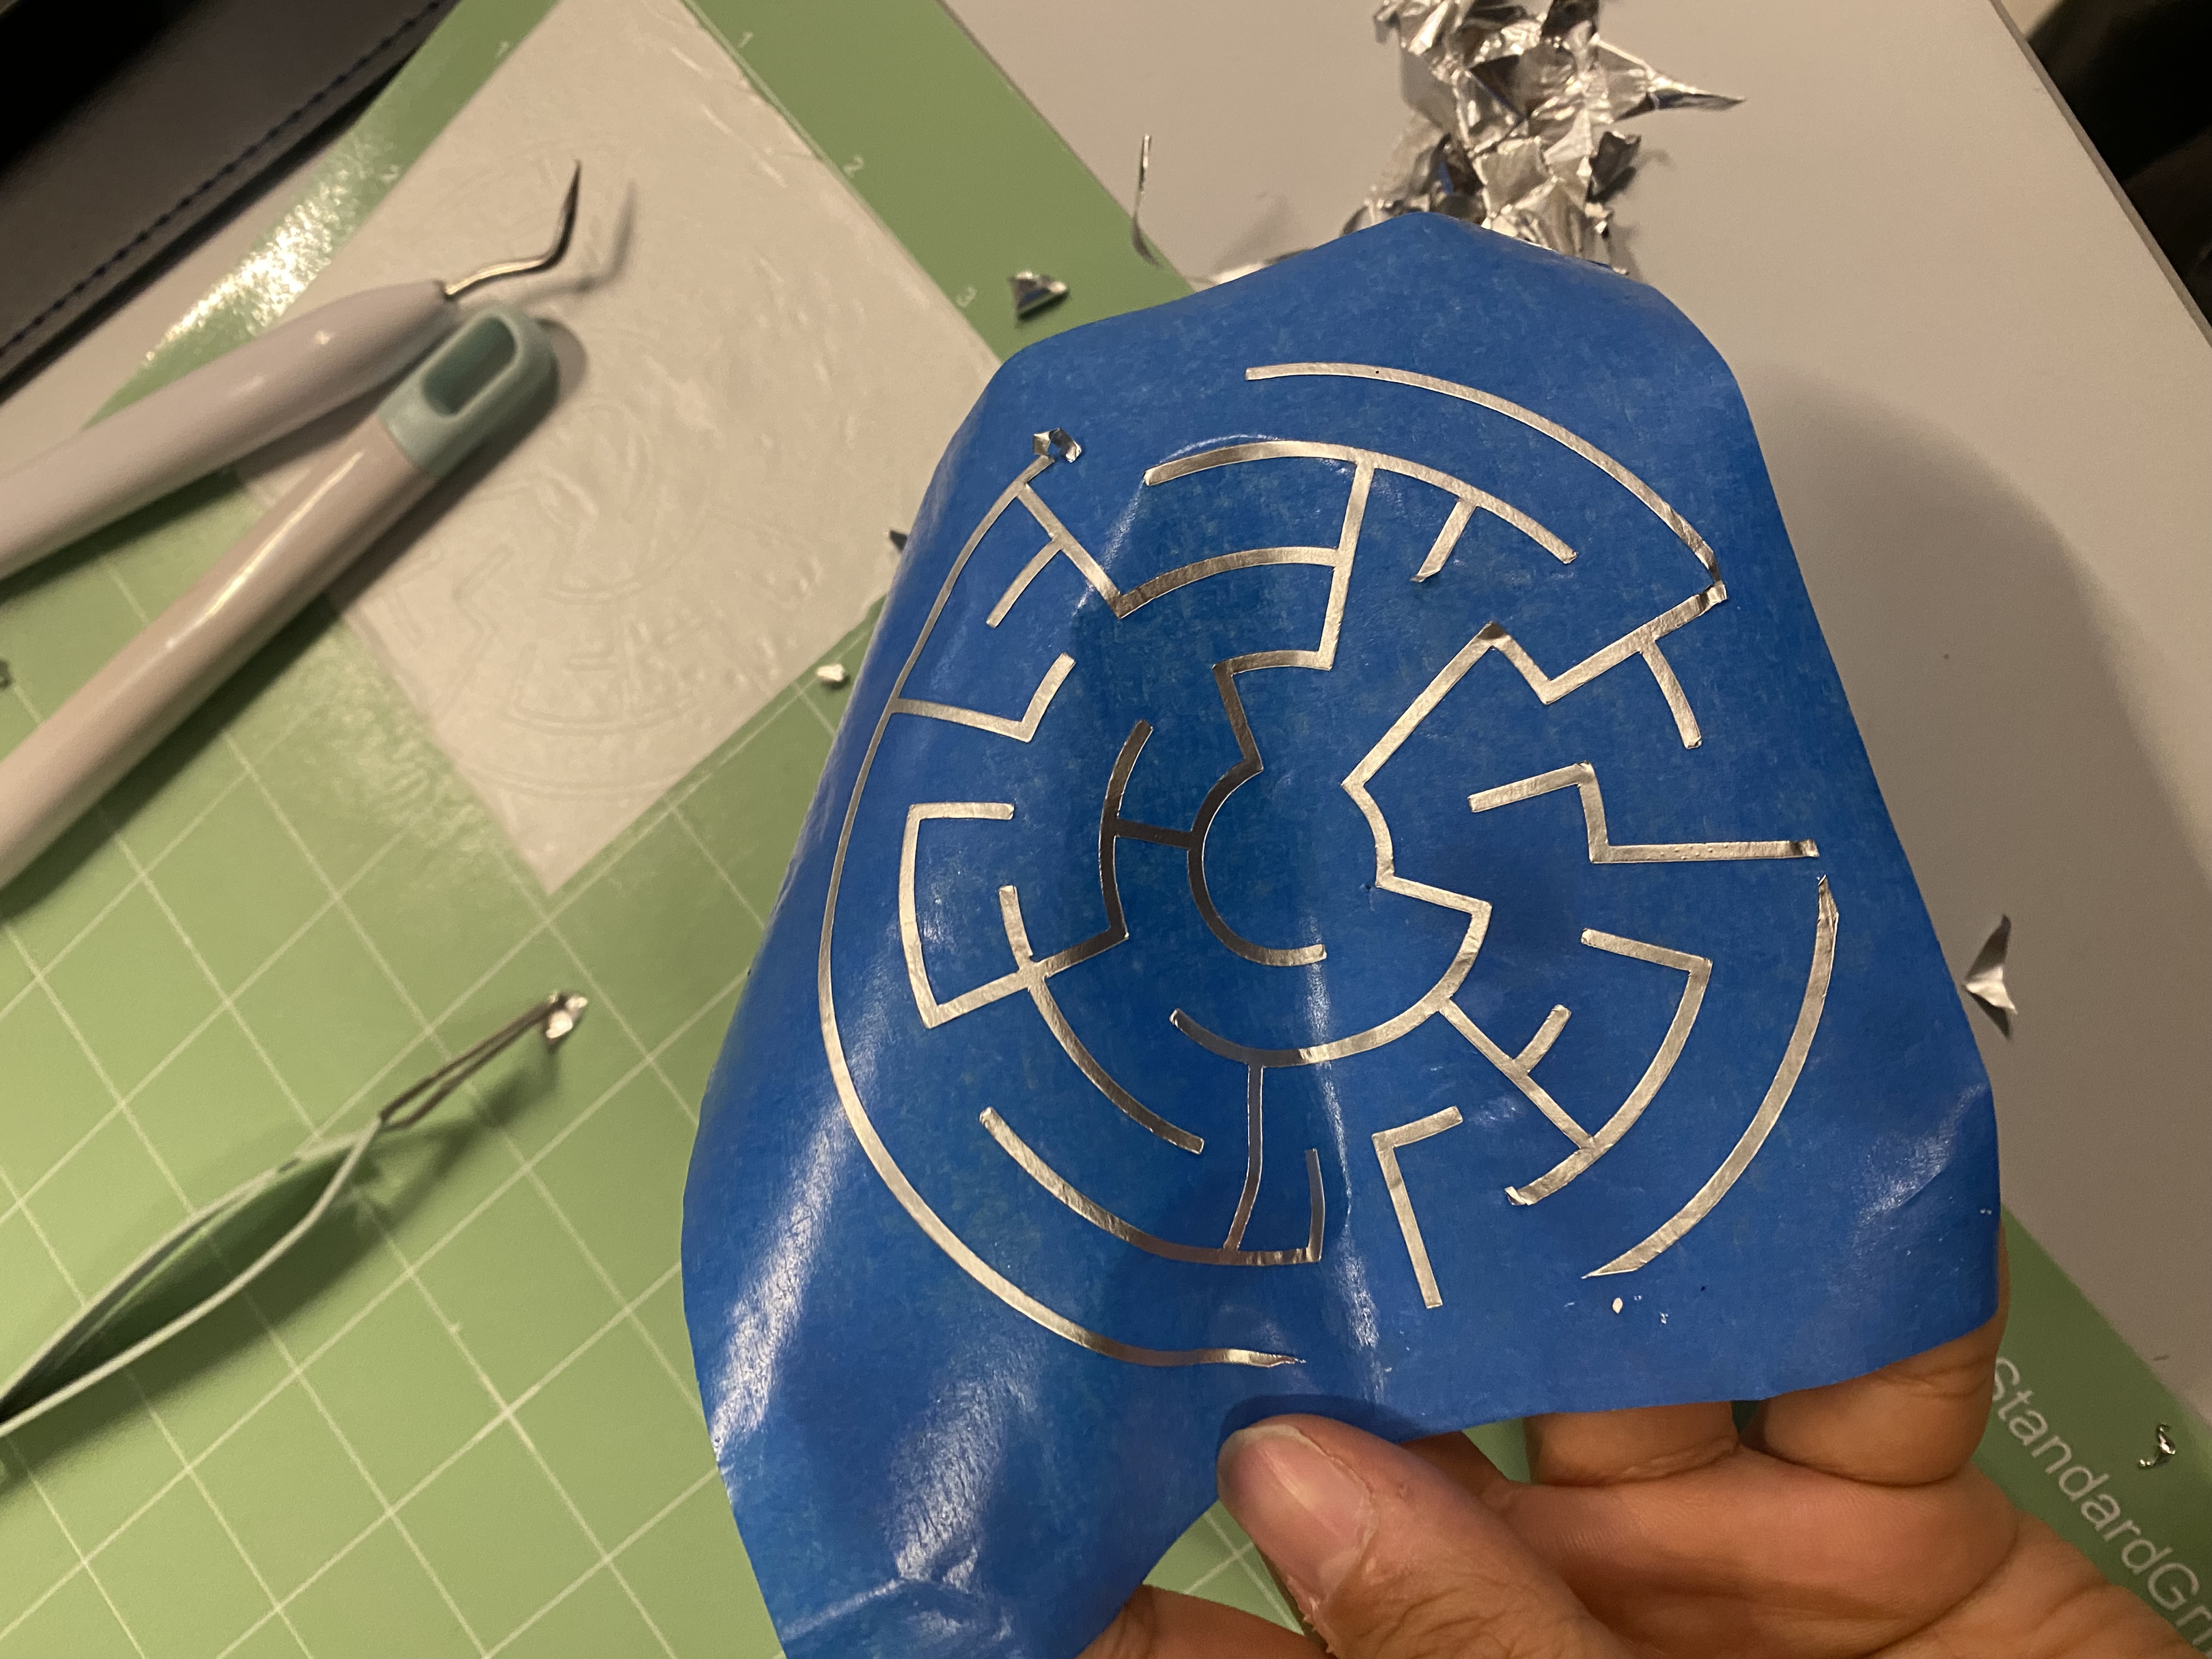
Output B: Testing conductive foil tape with Vynl cutter

For the final project, I wanted to test if I could cut conductive foil tape with Vynl Cutter.
So, the shape is intended to test the limits of the material.
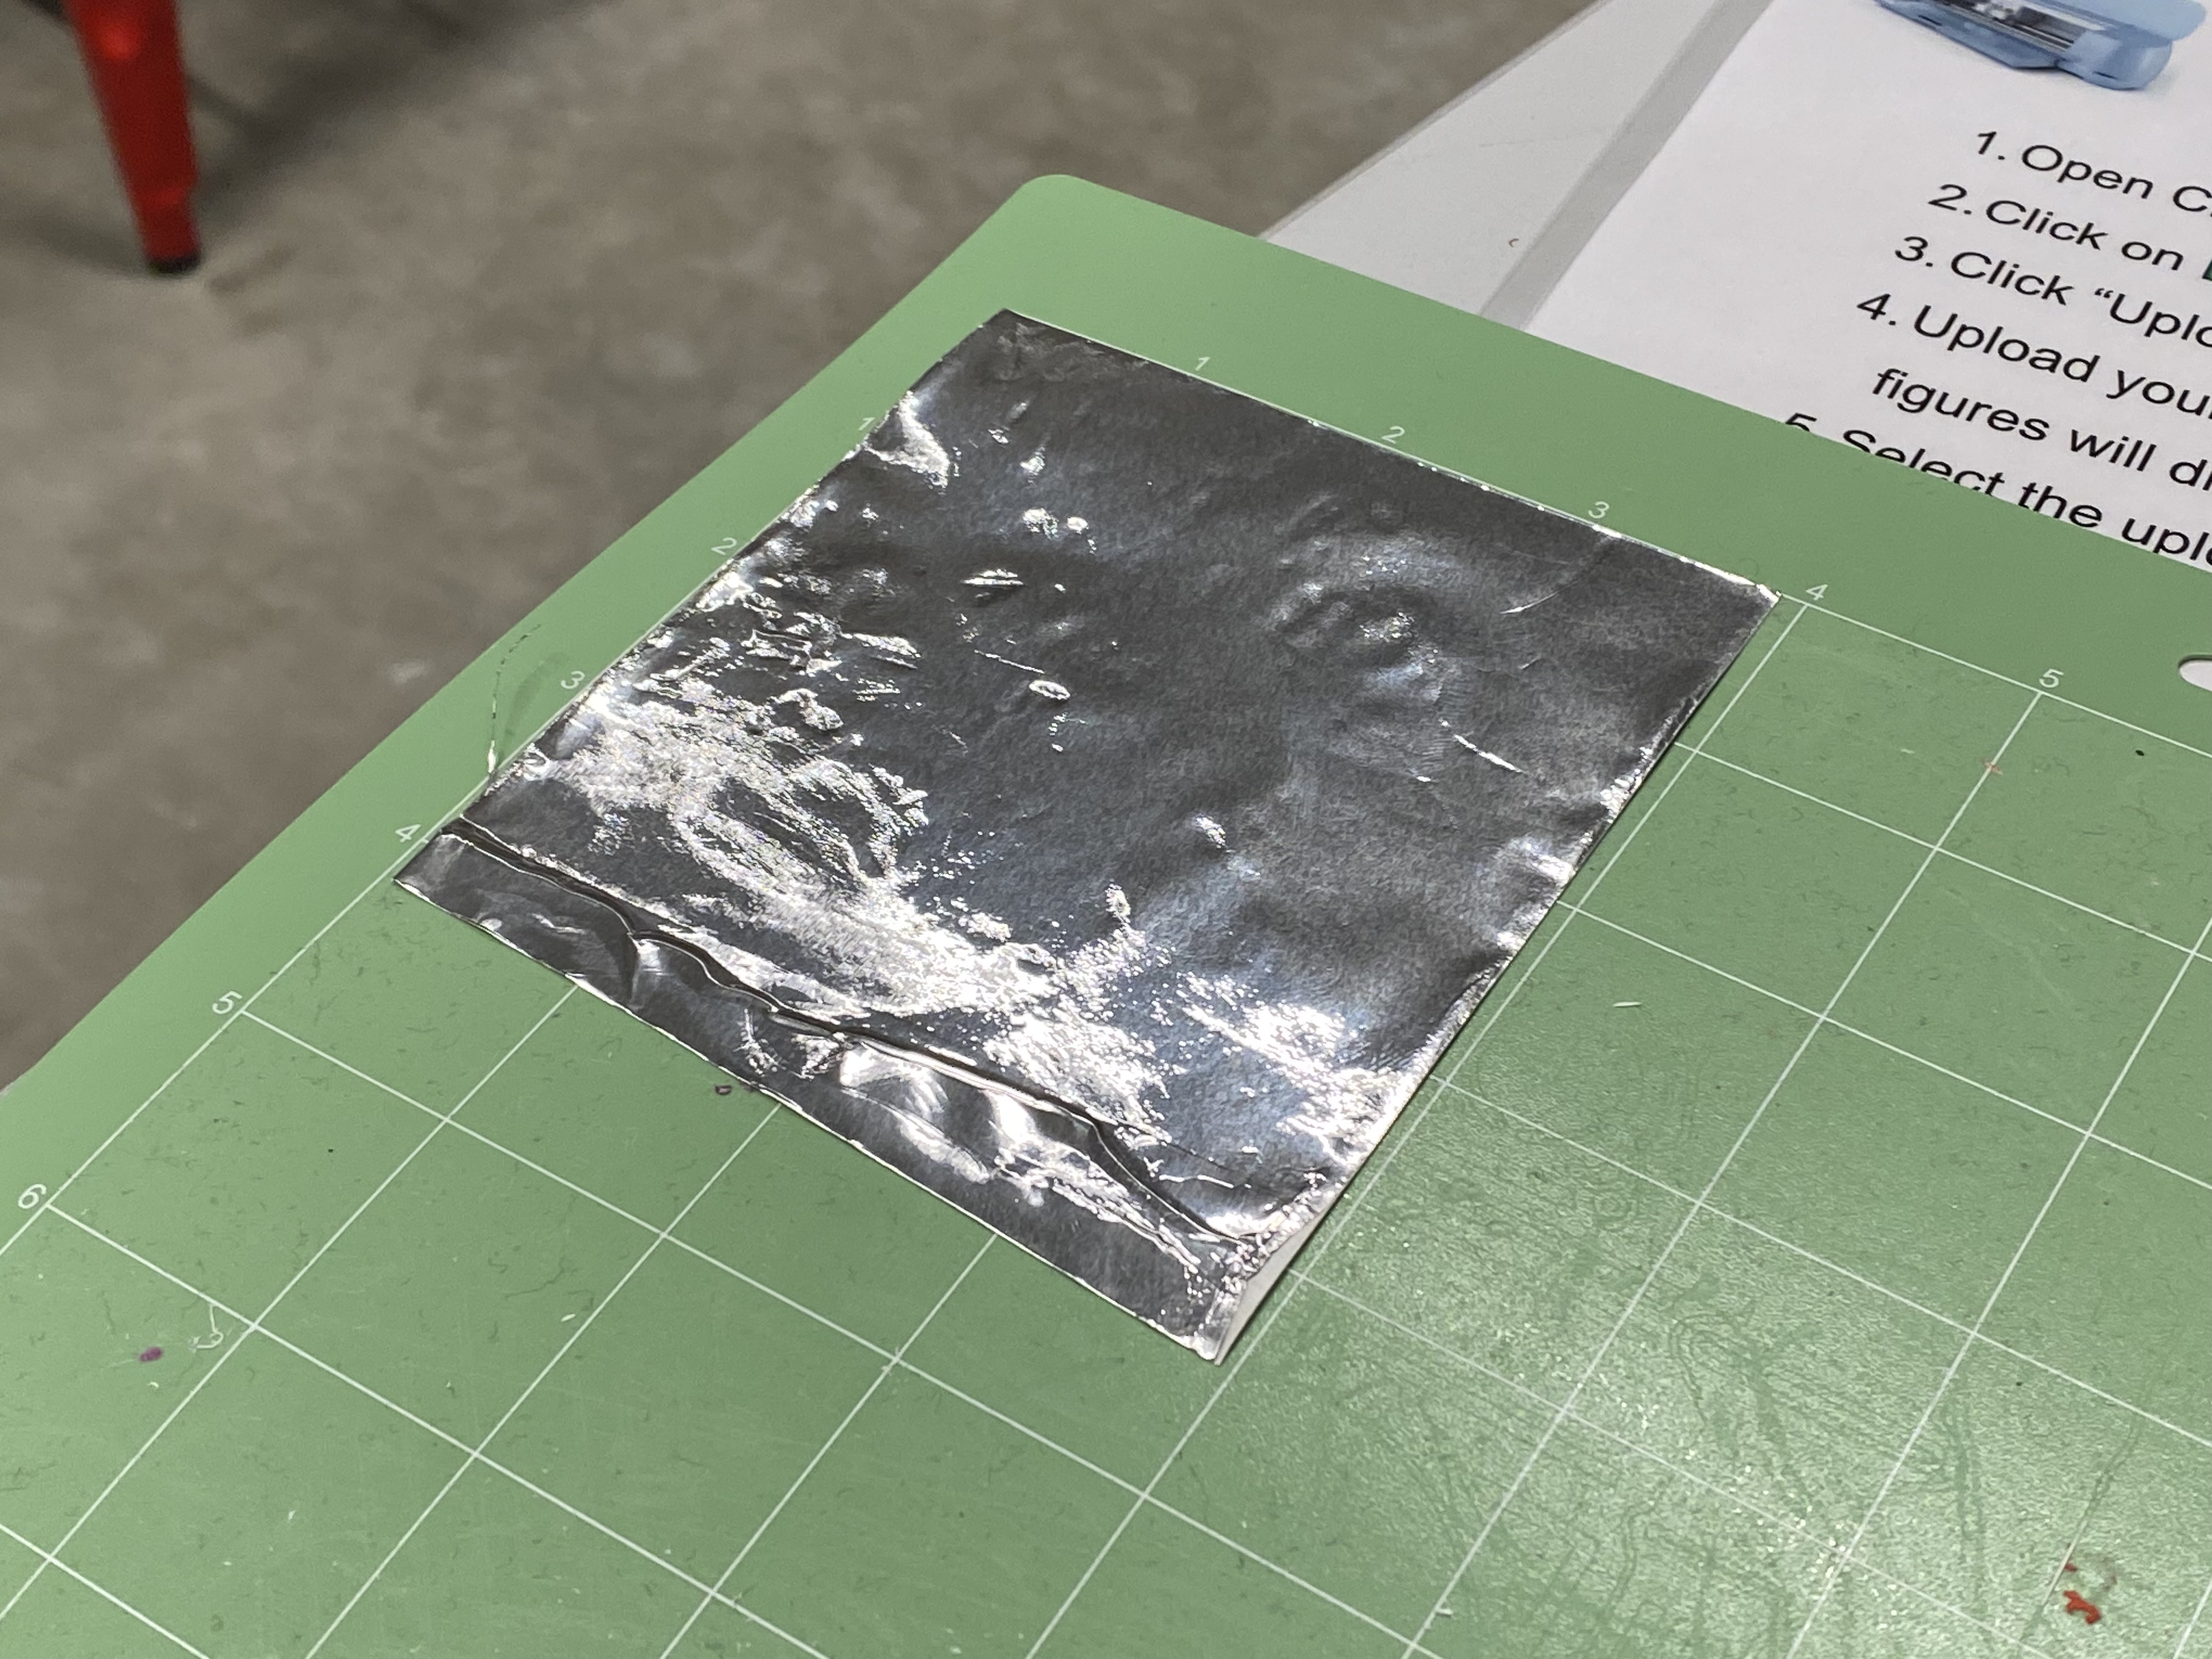
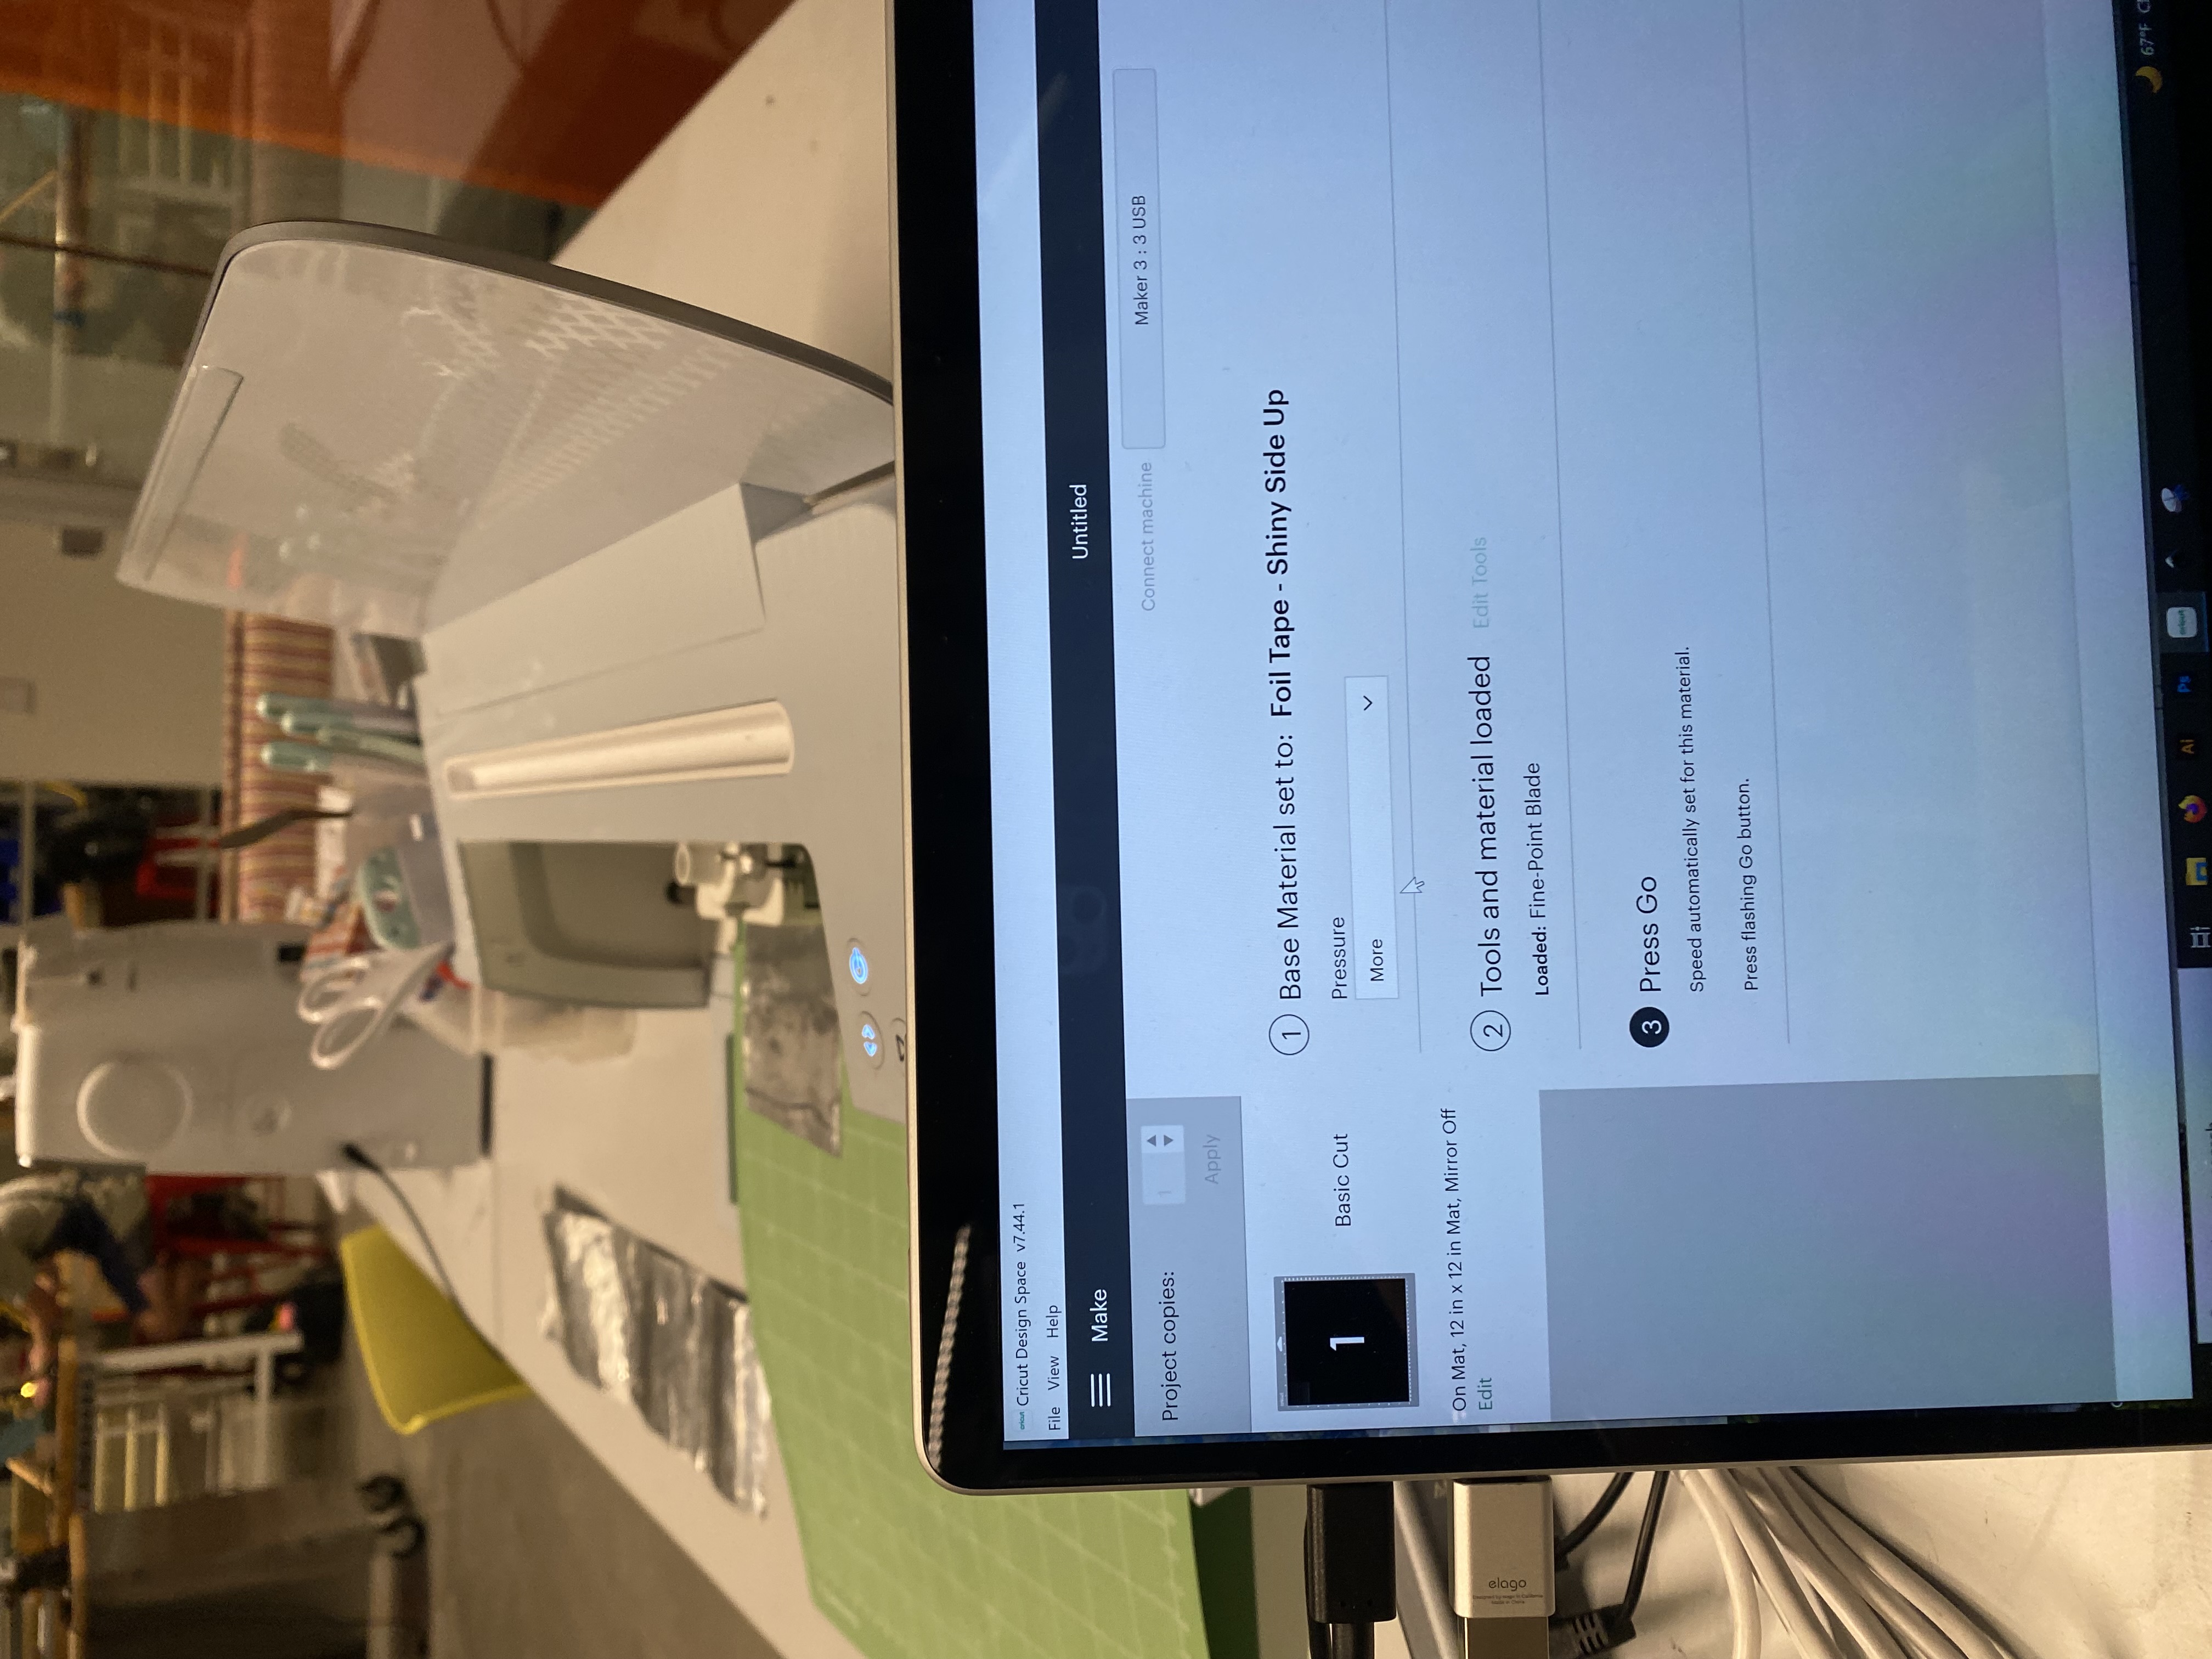
Prepare the foil and attach it to the pad.
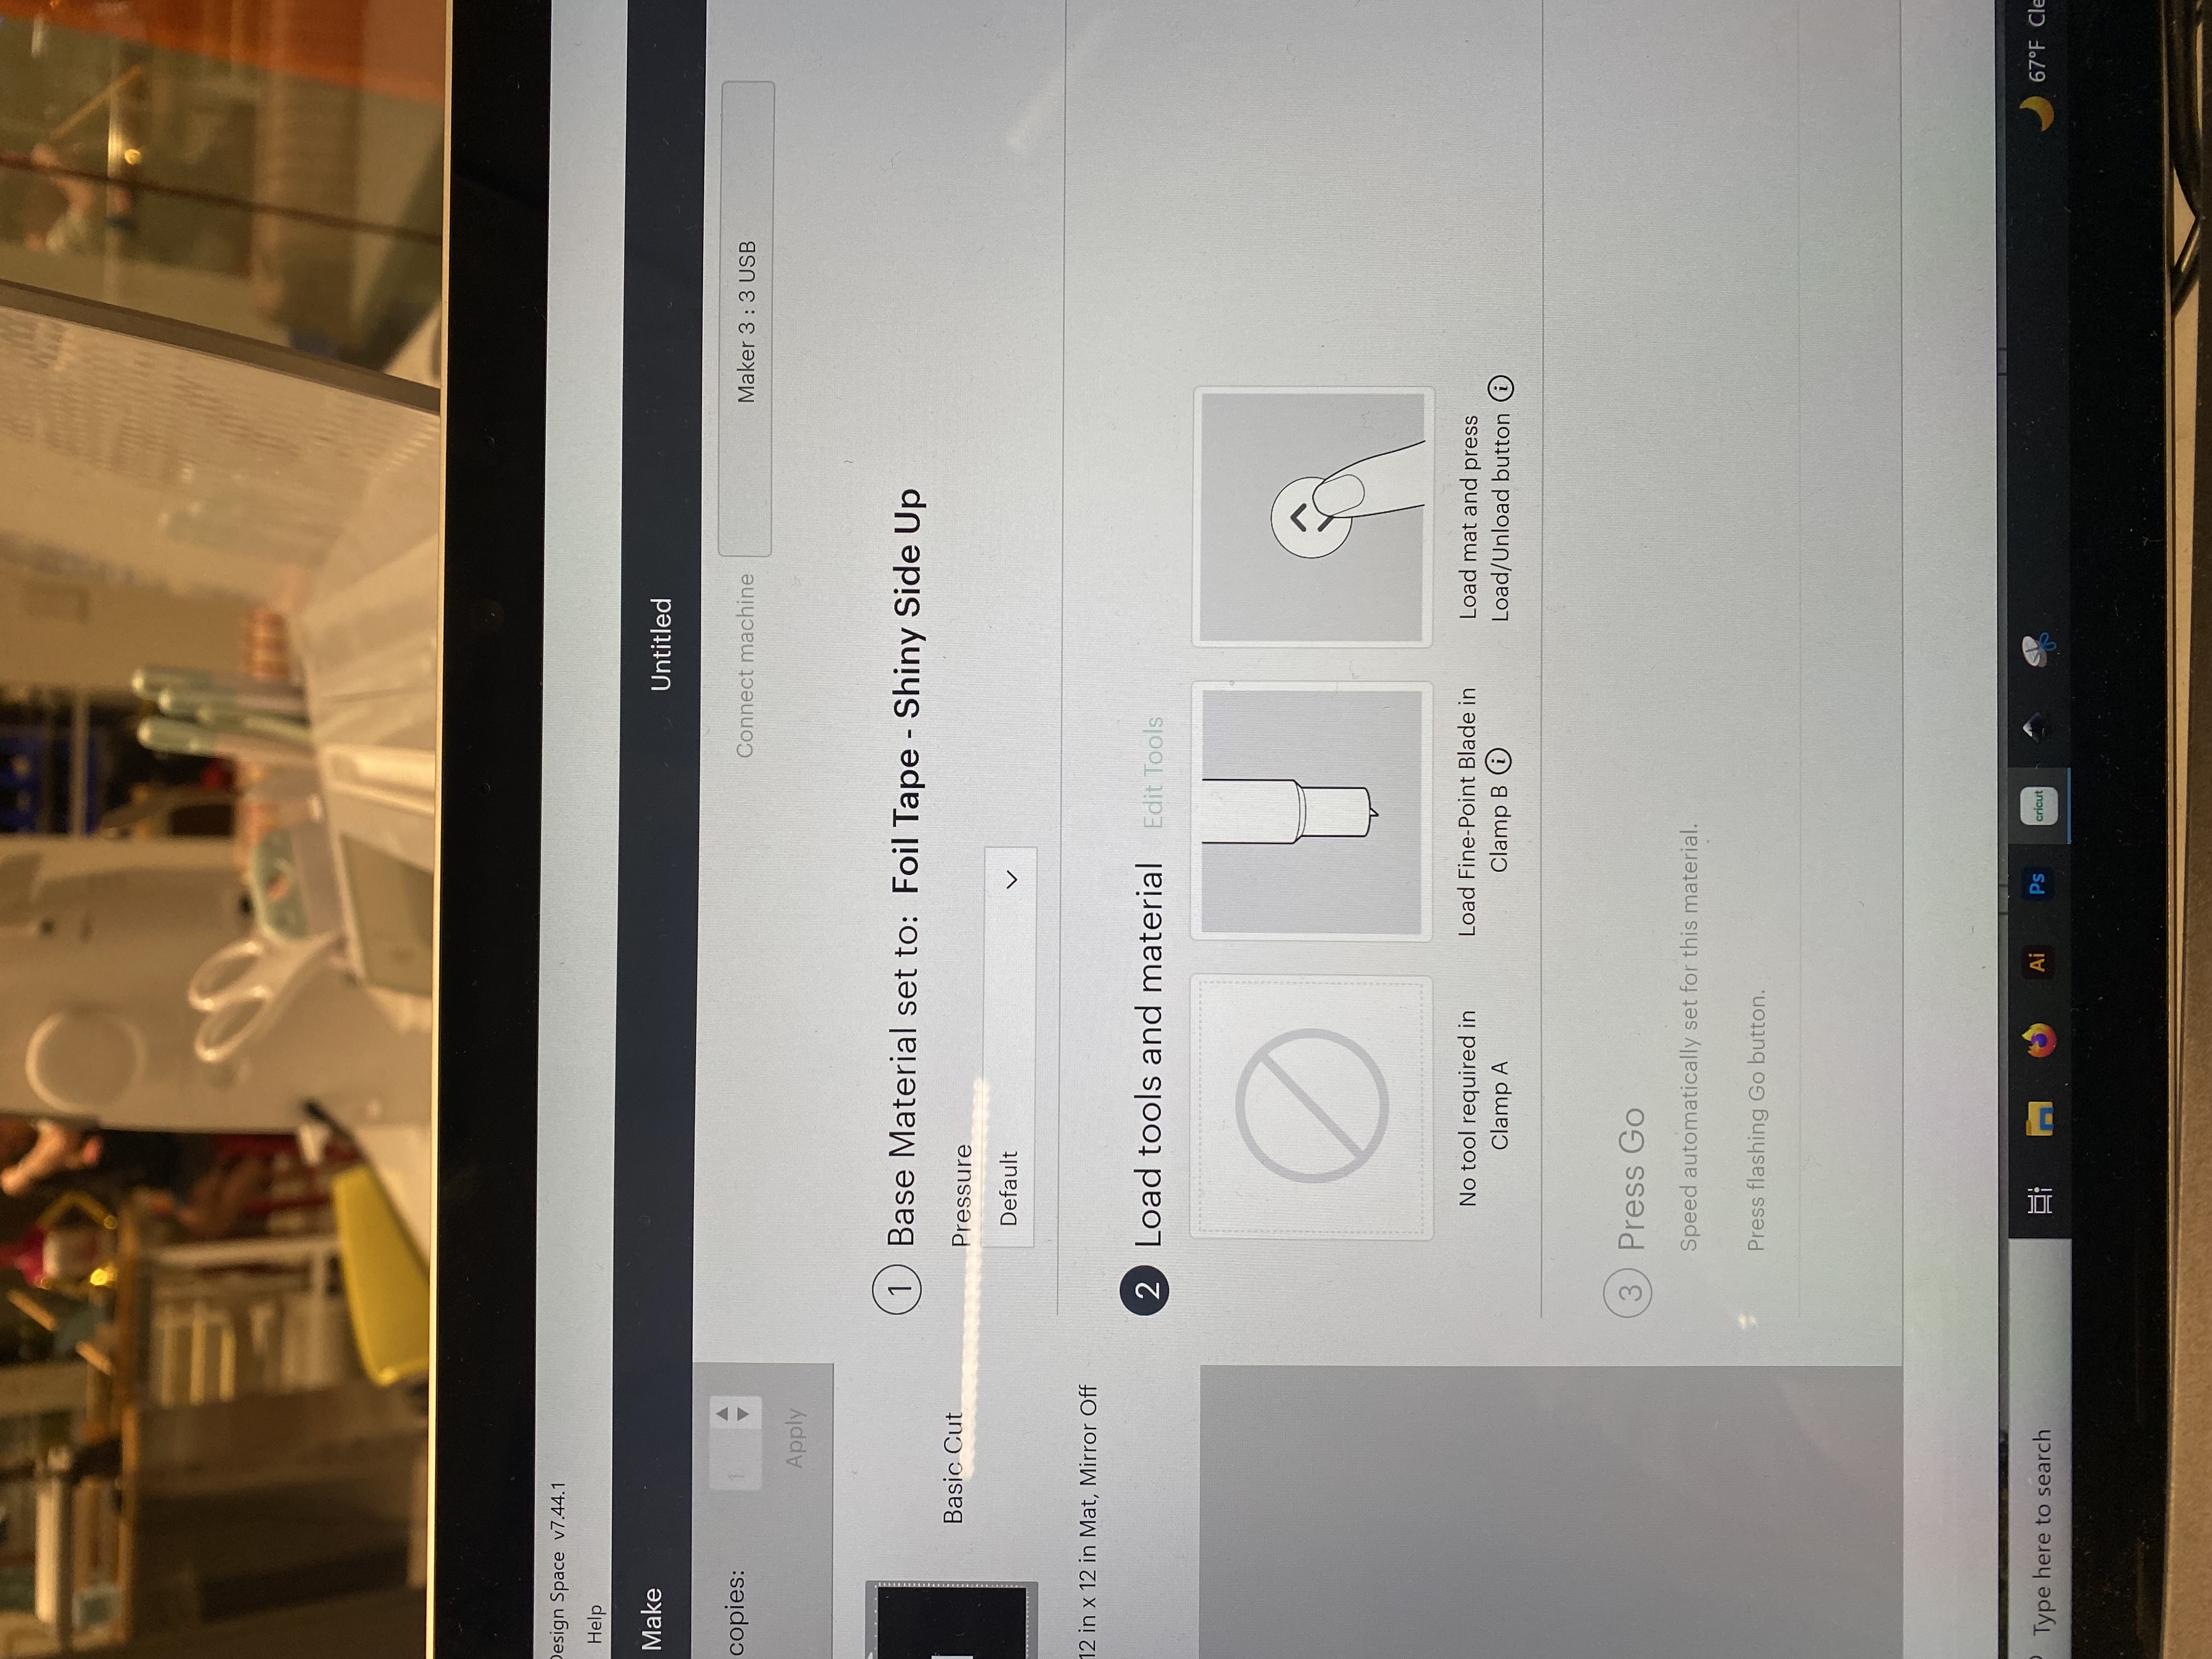
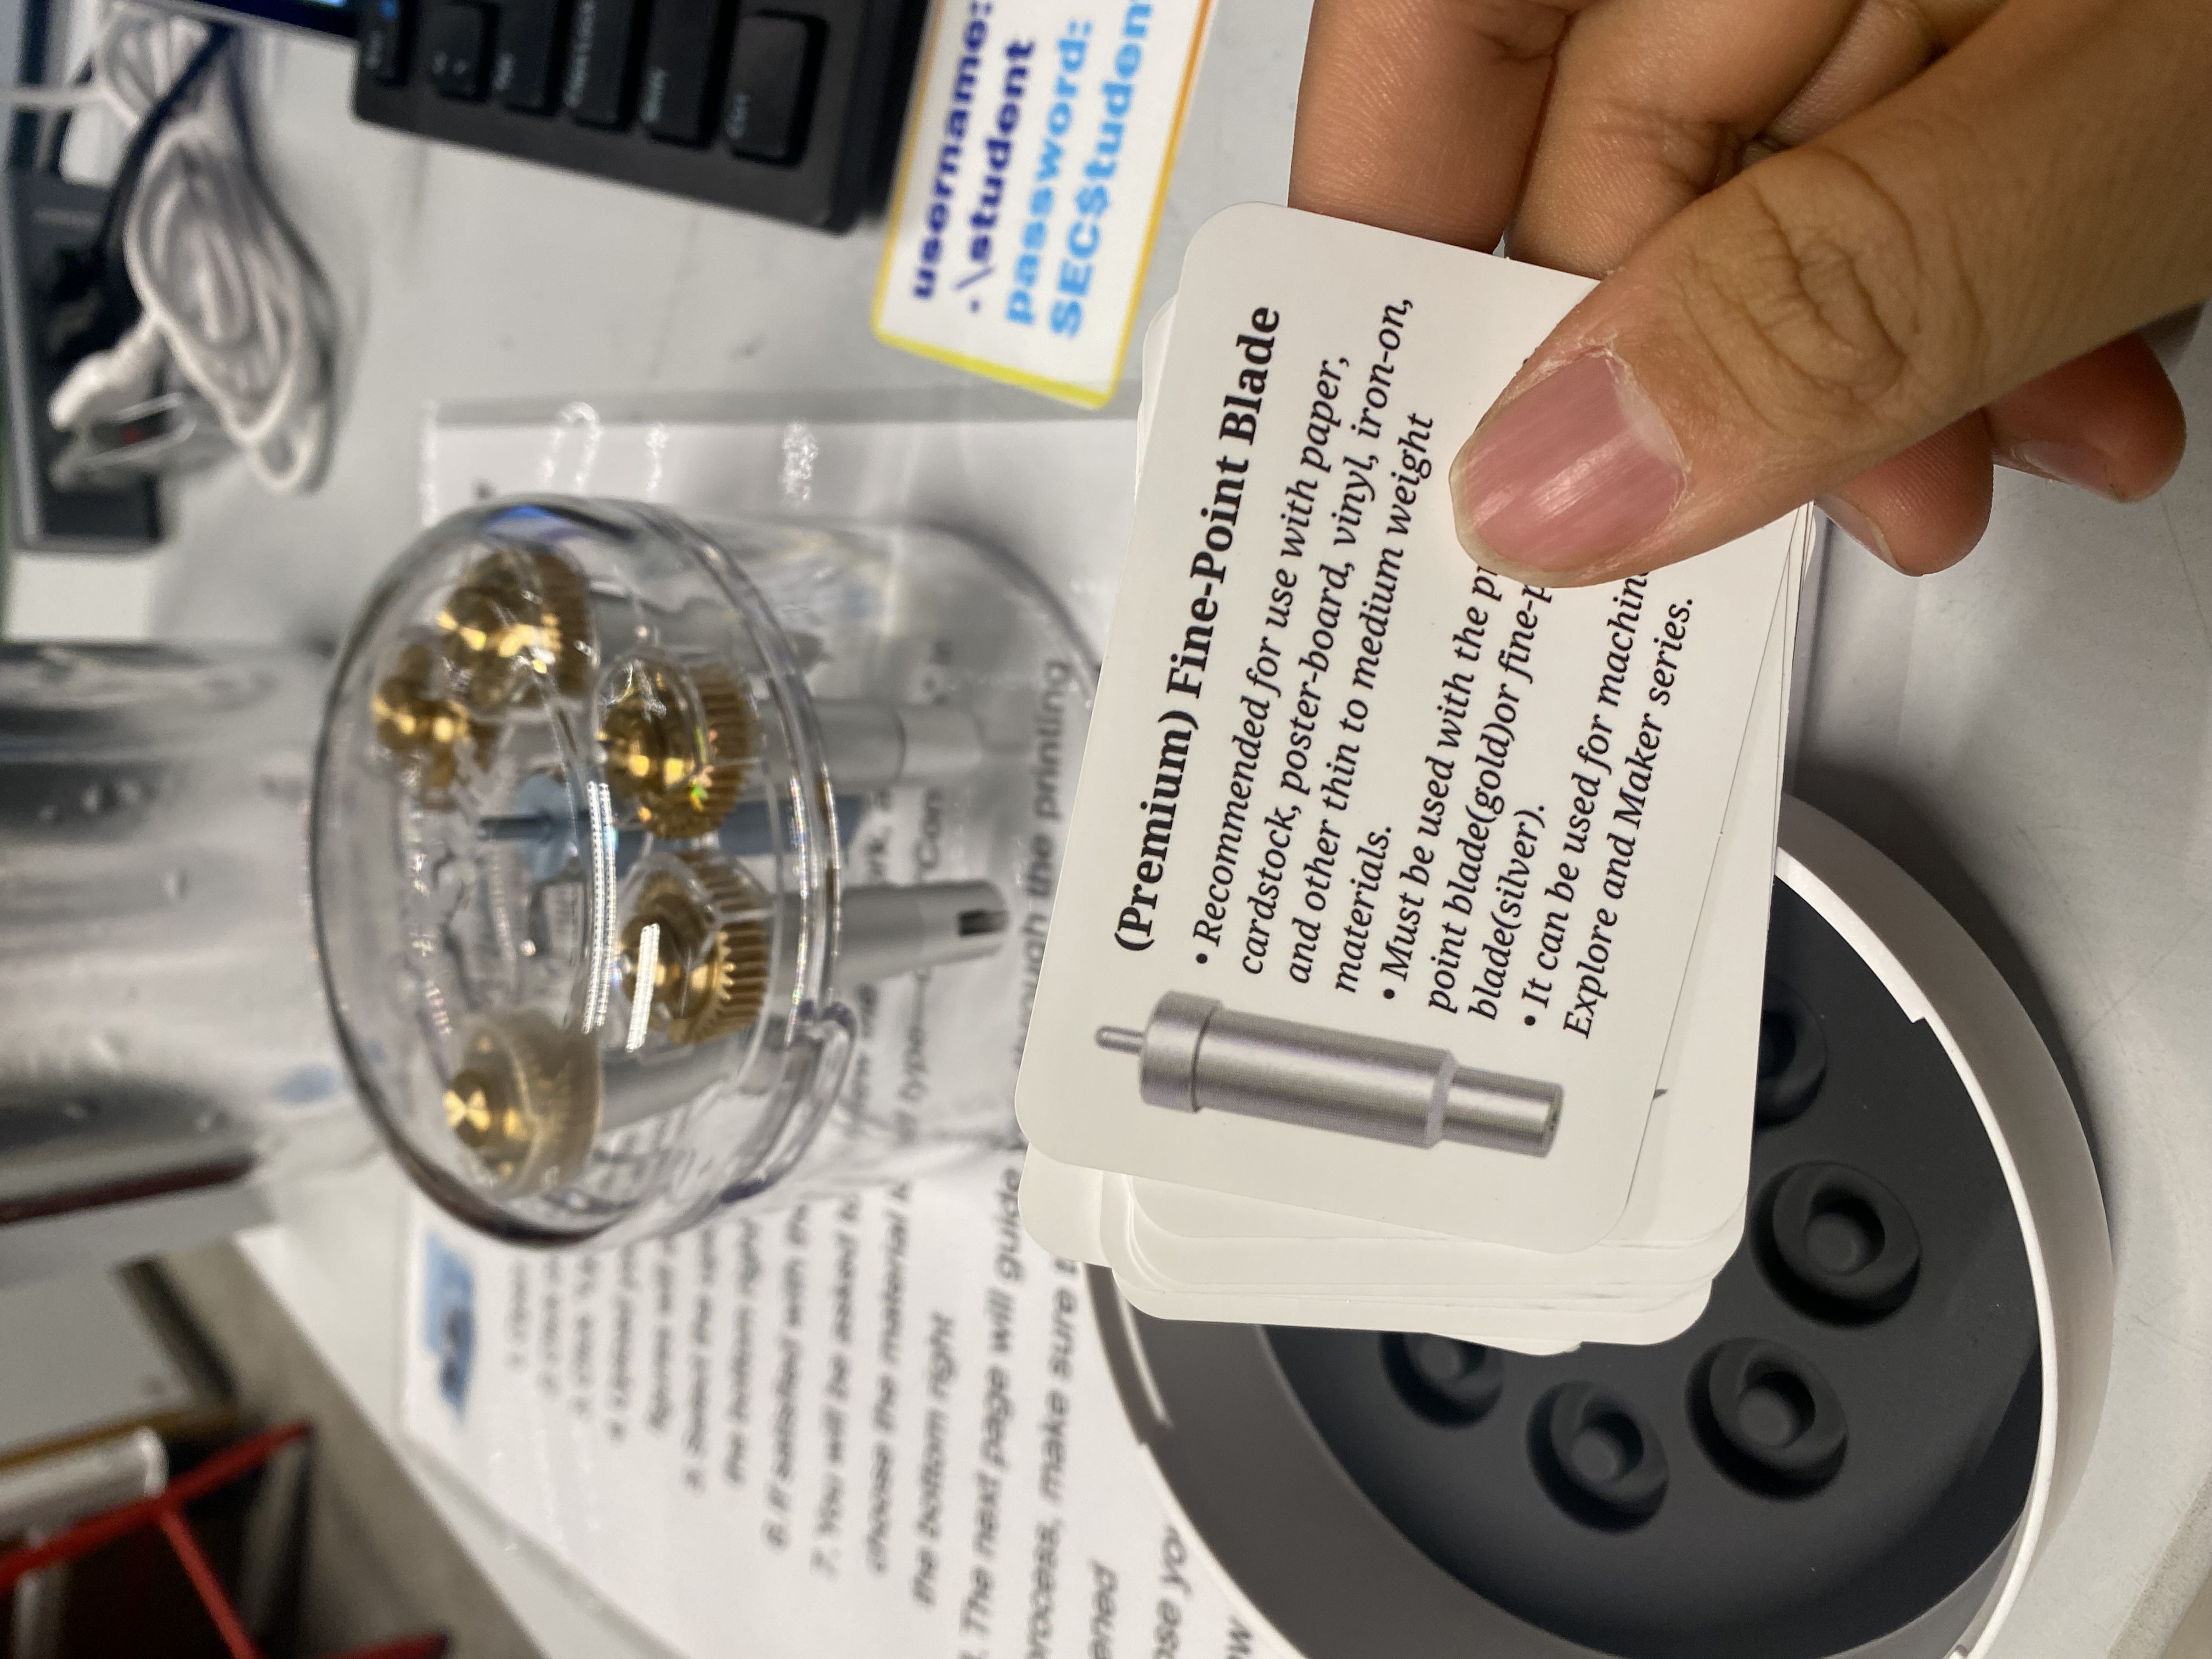
Select the right material setting and check the blade if needed.
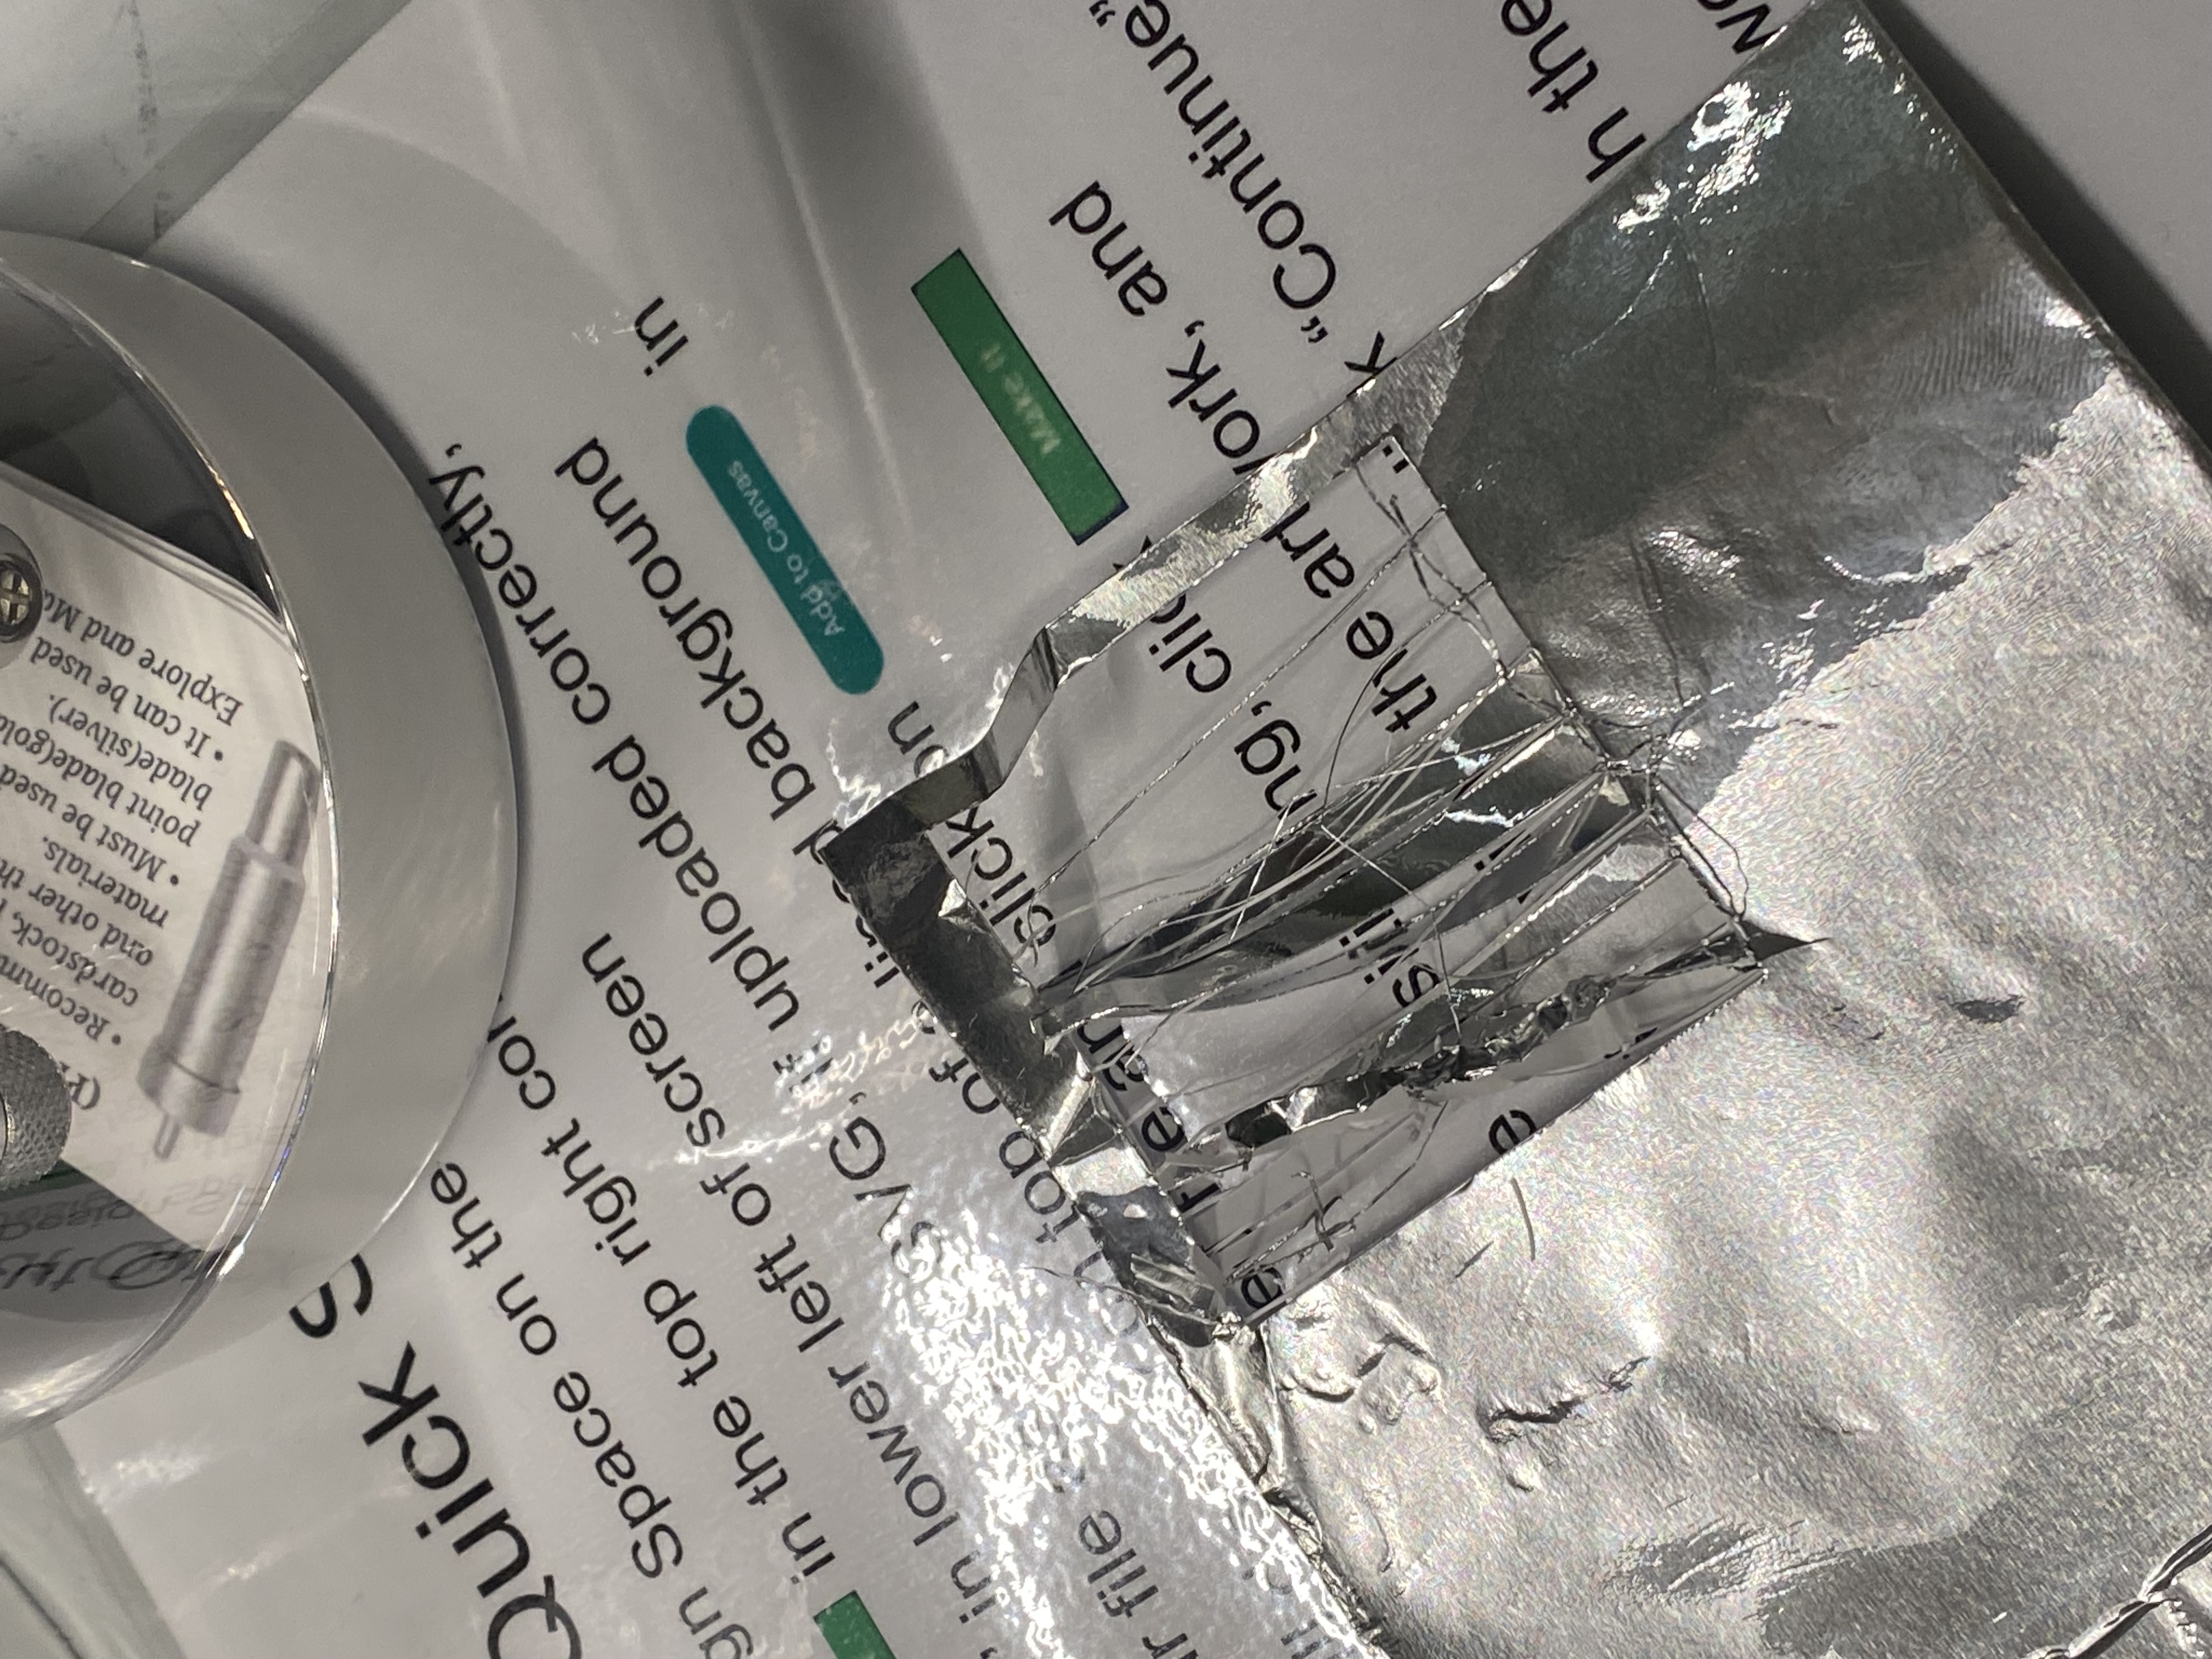
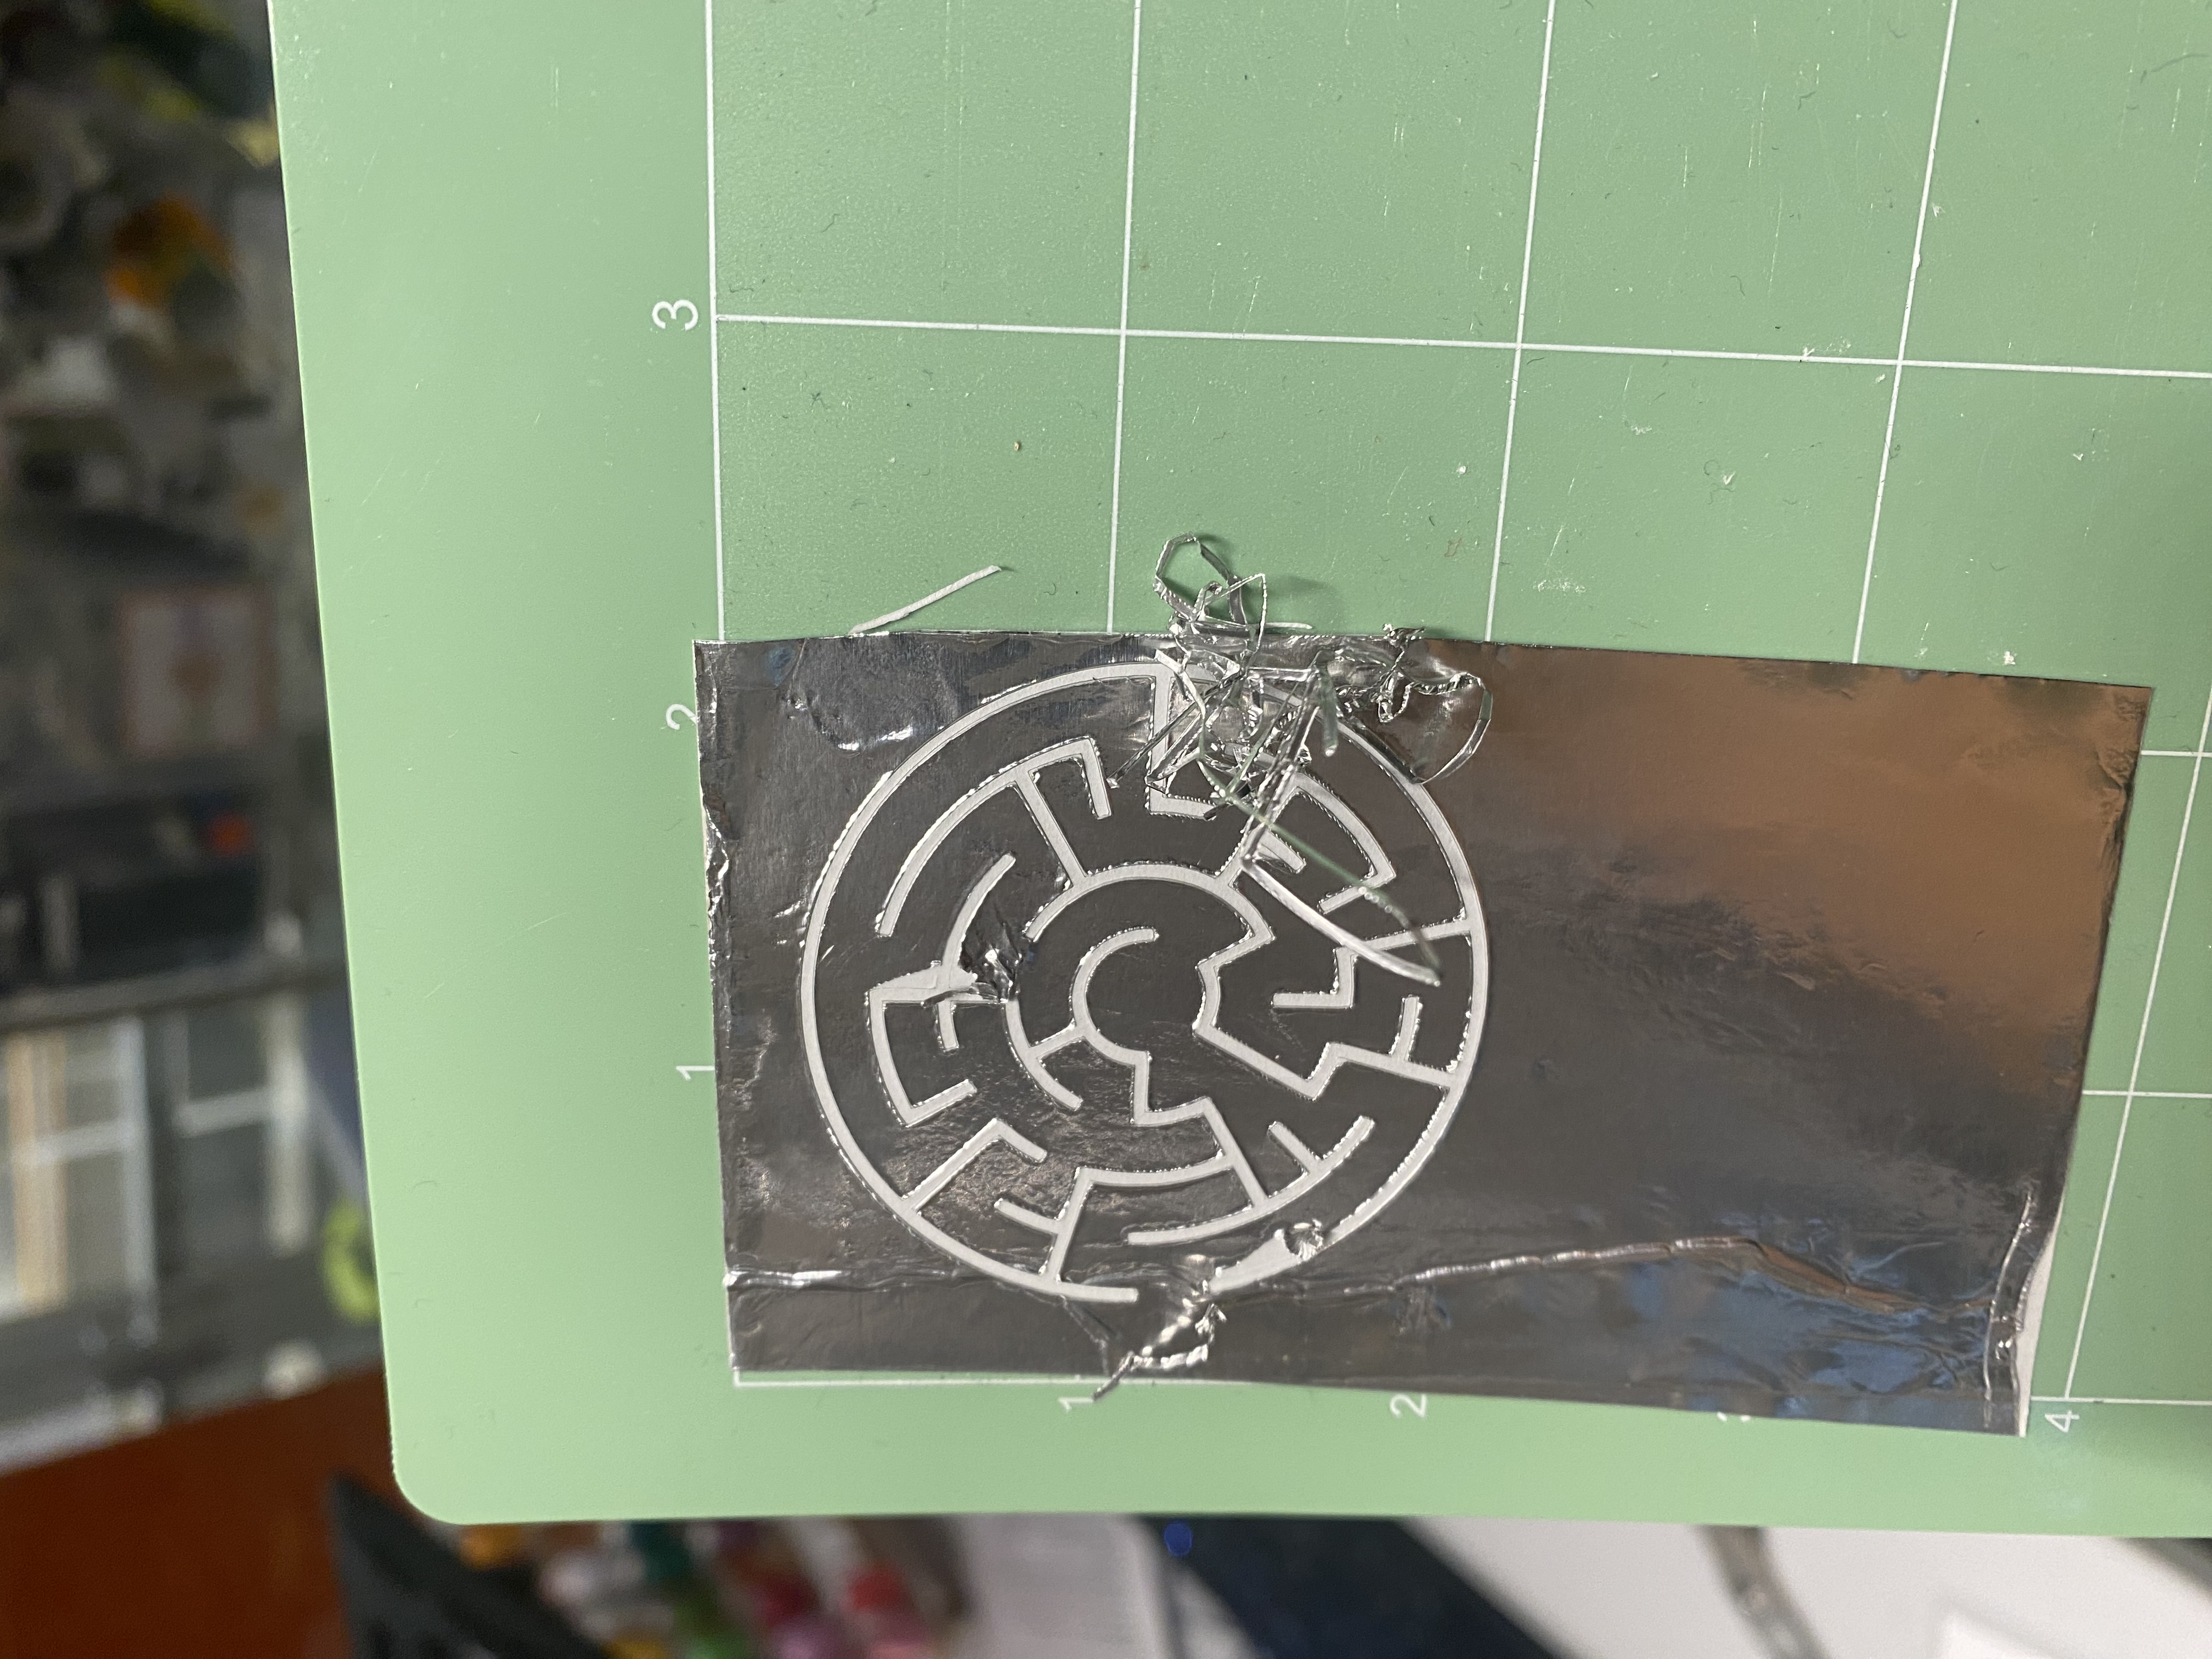
Failed - maybe the blade gone too deep?
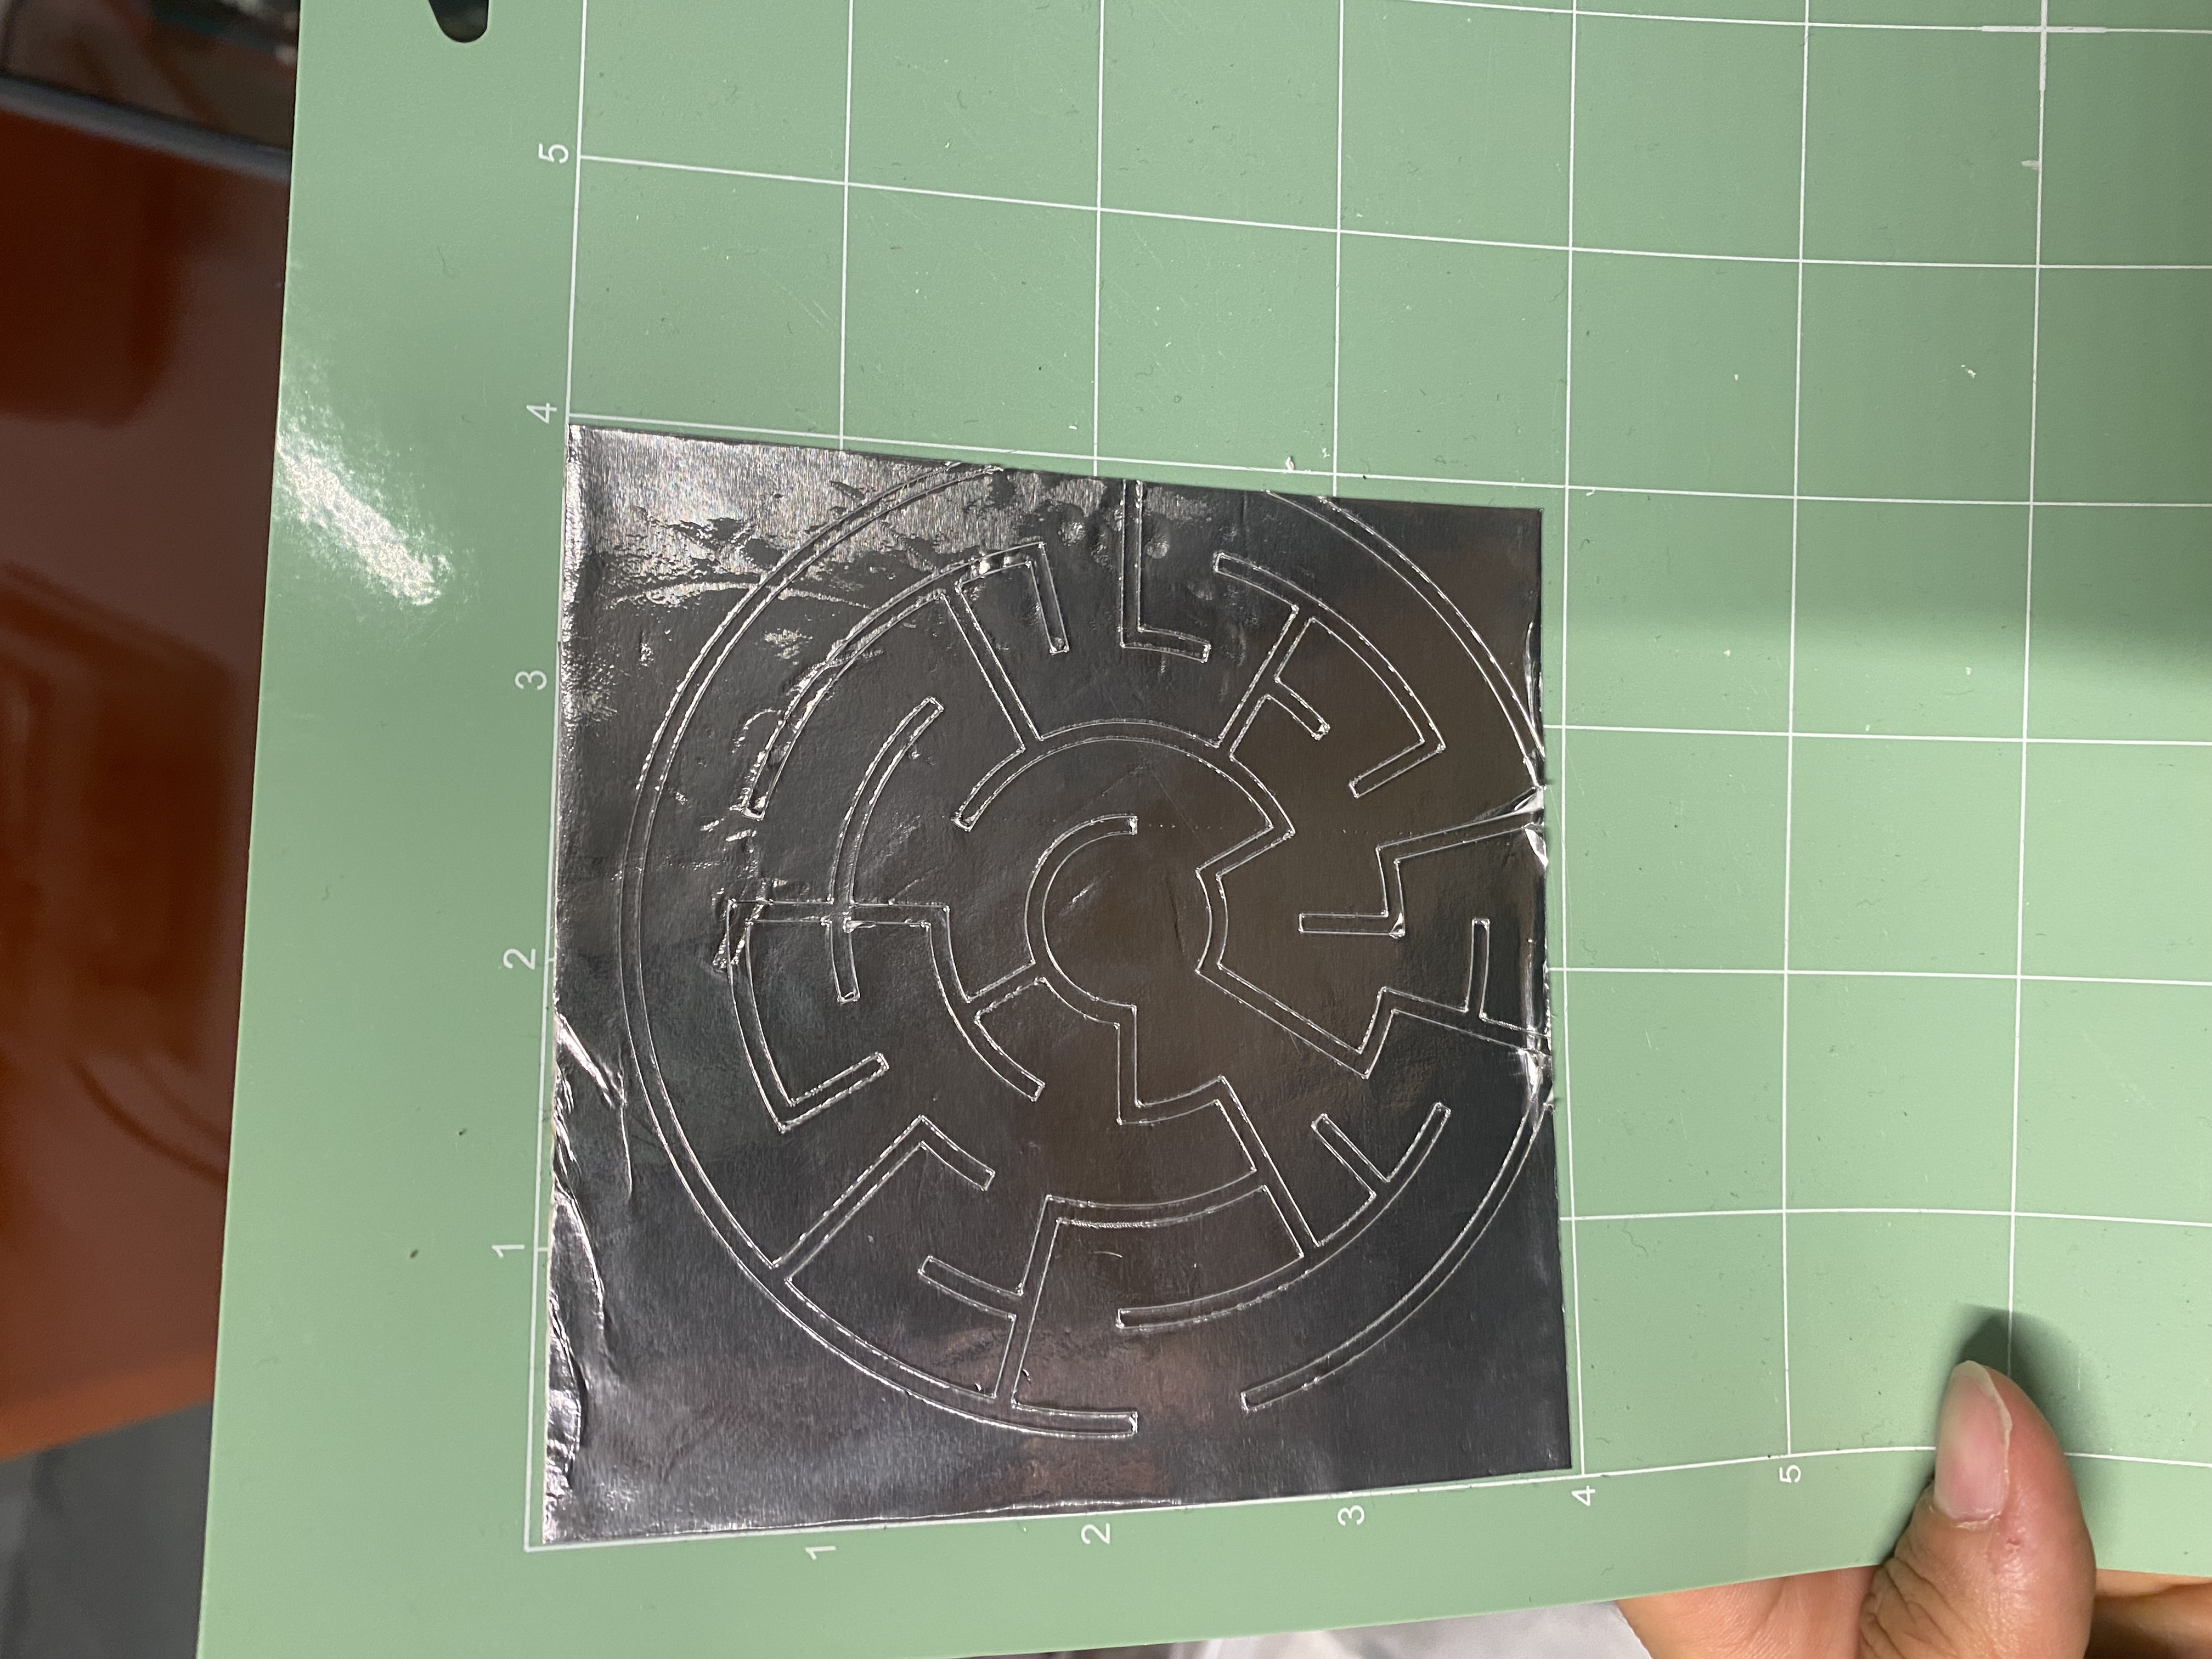
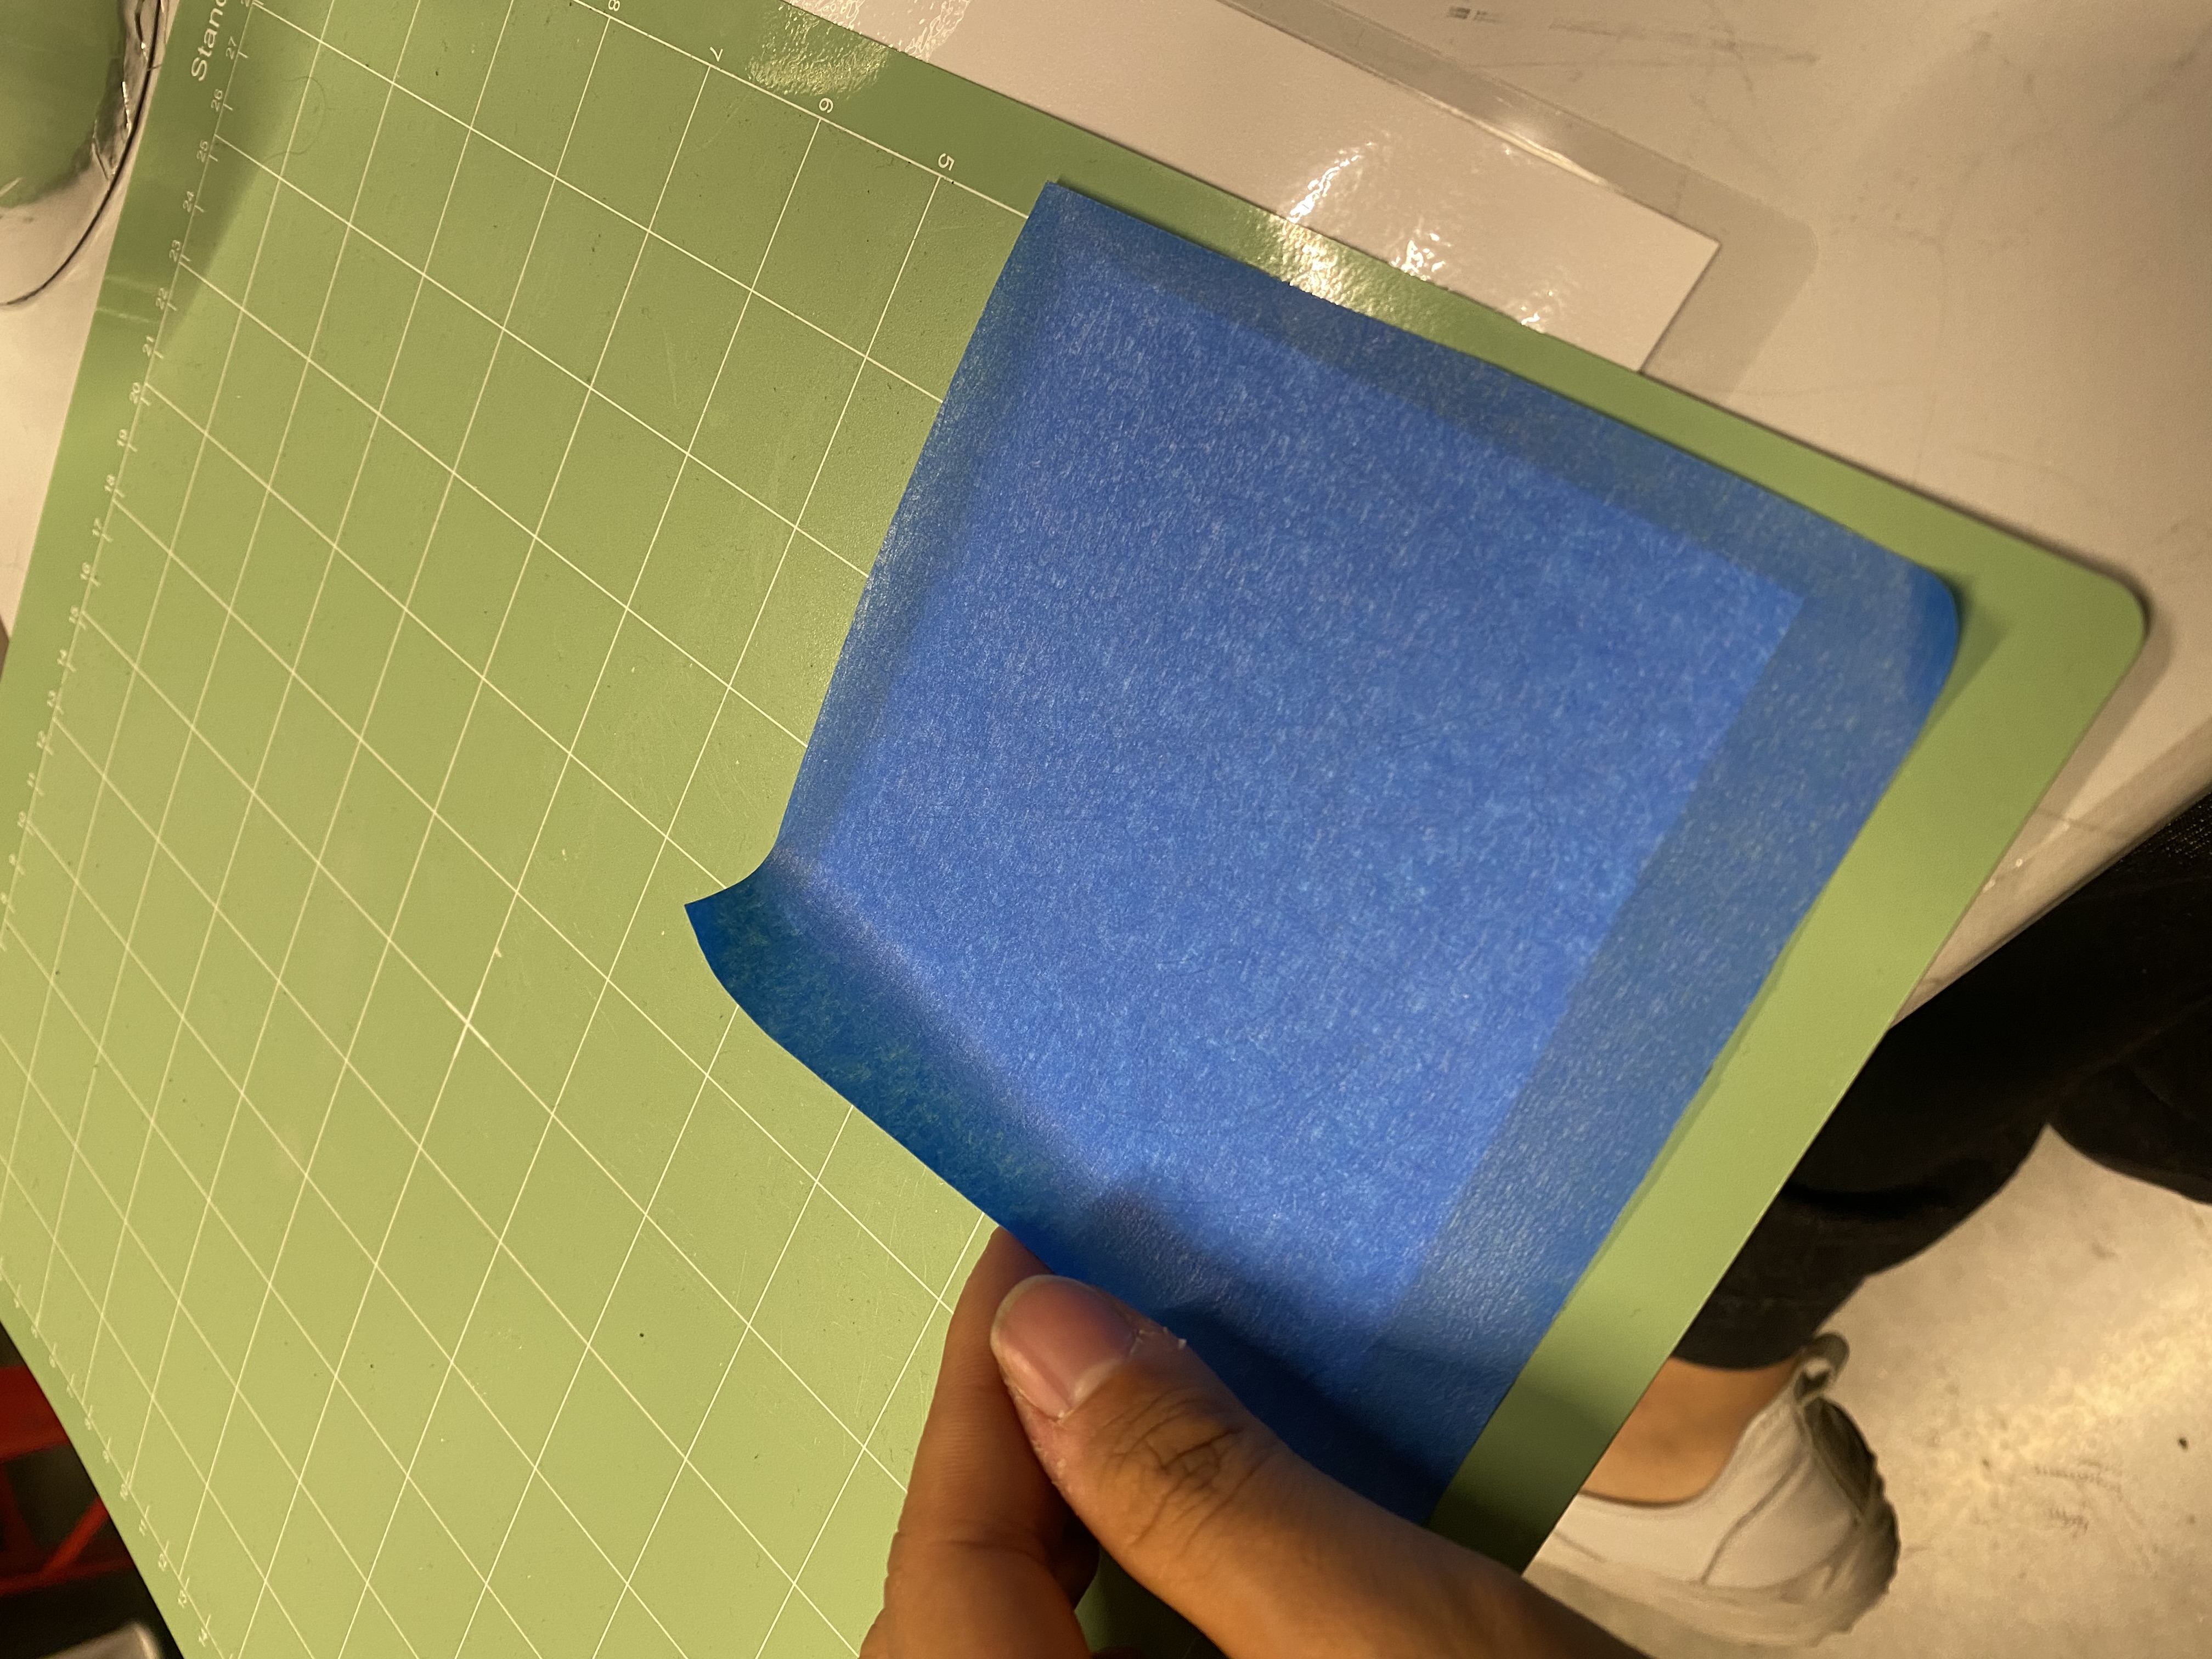
Nicly done! put the transfer tape on it
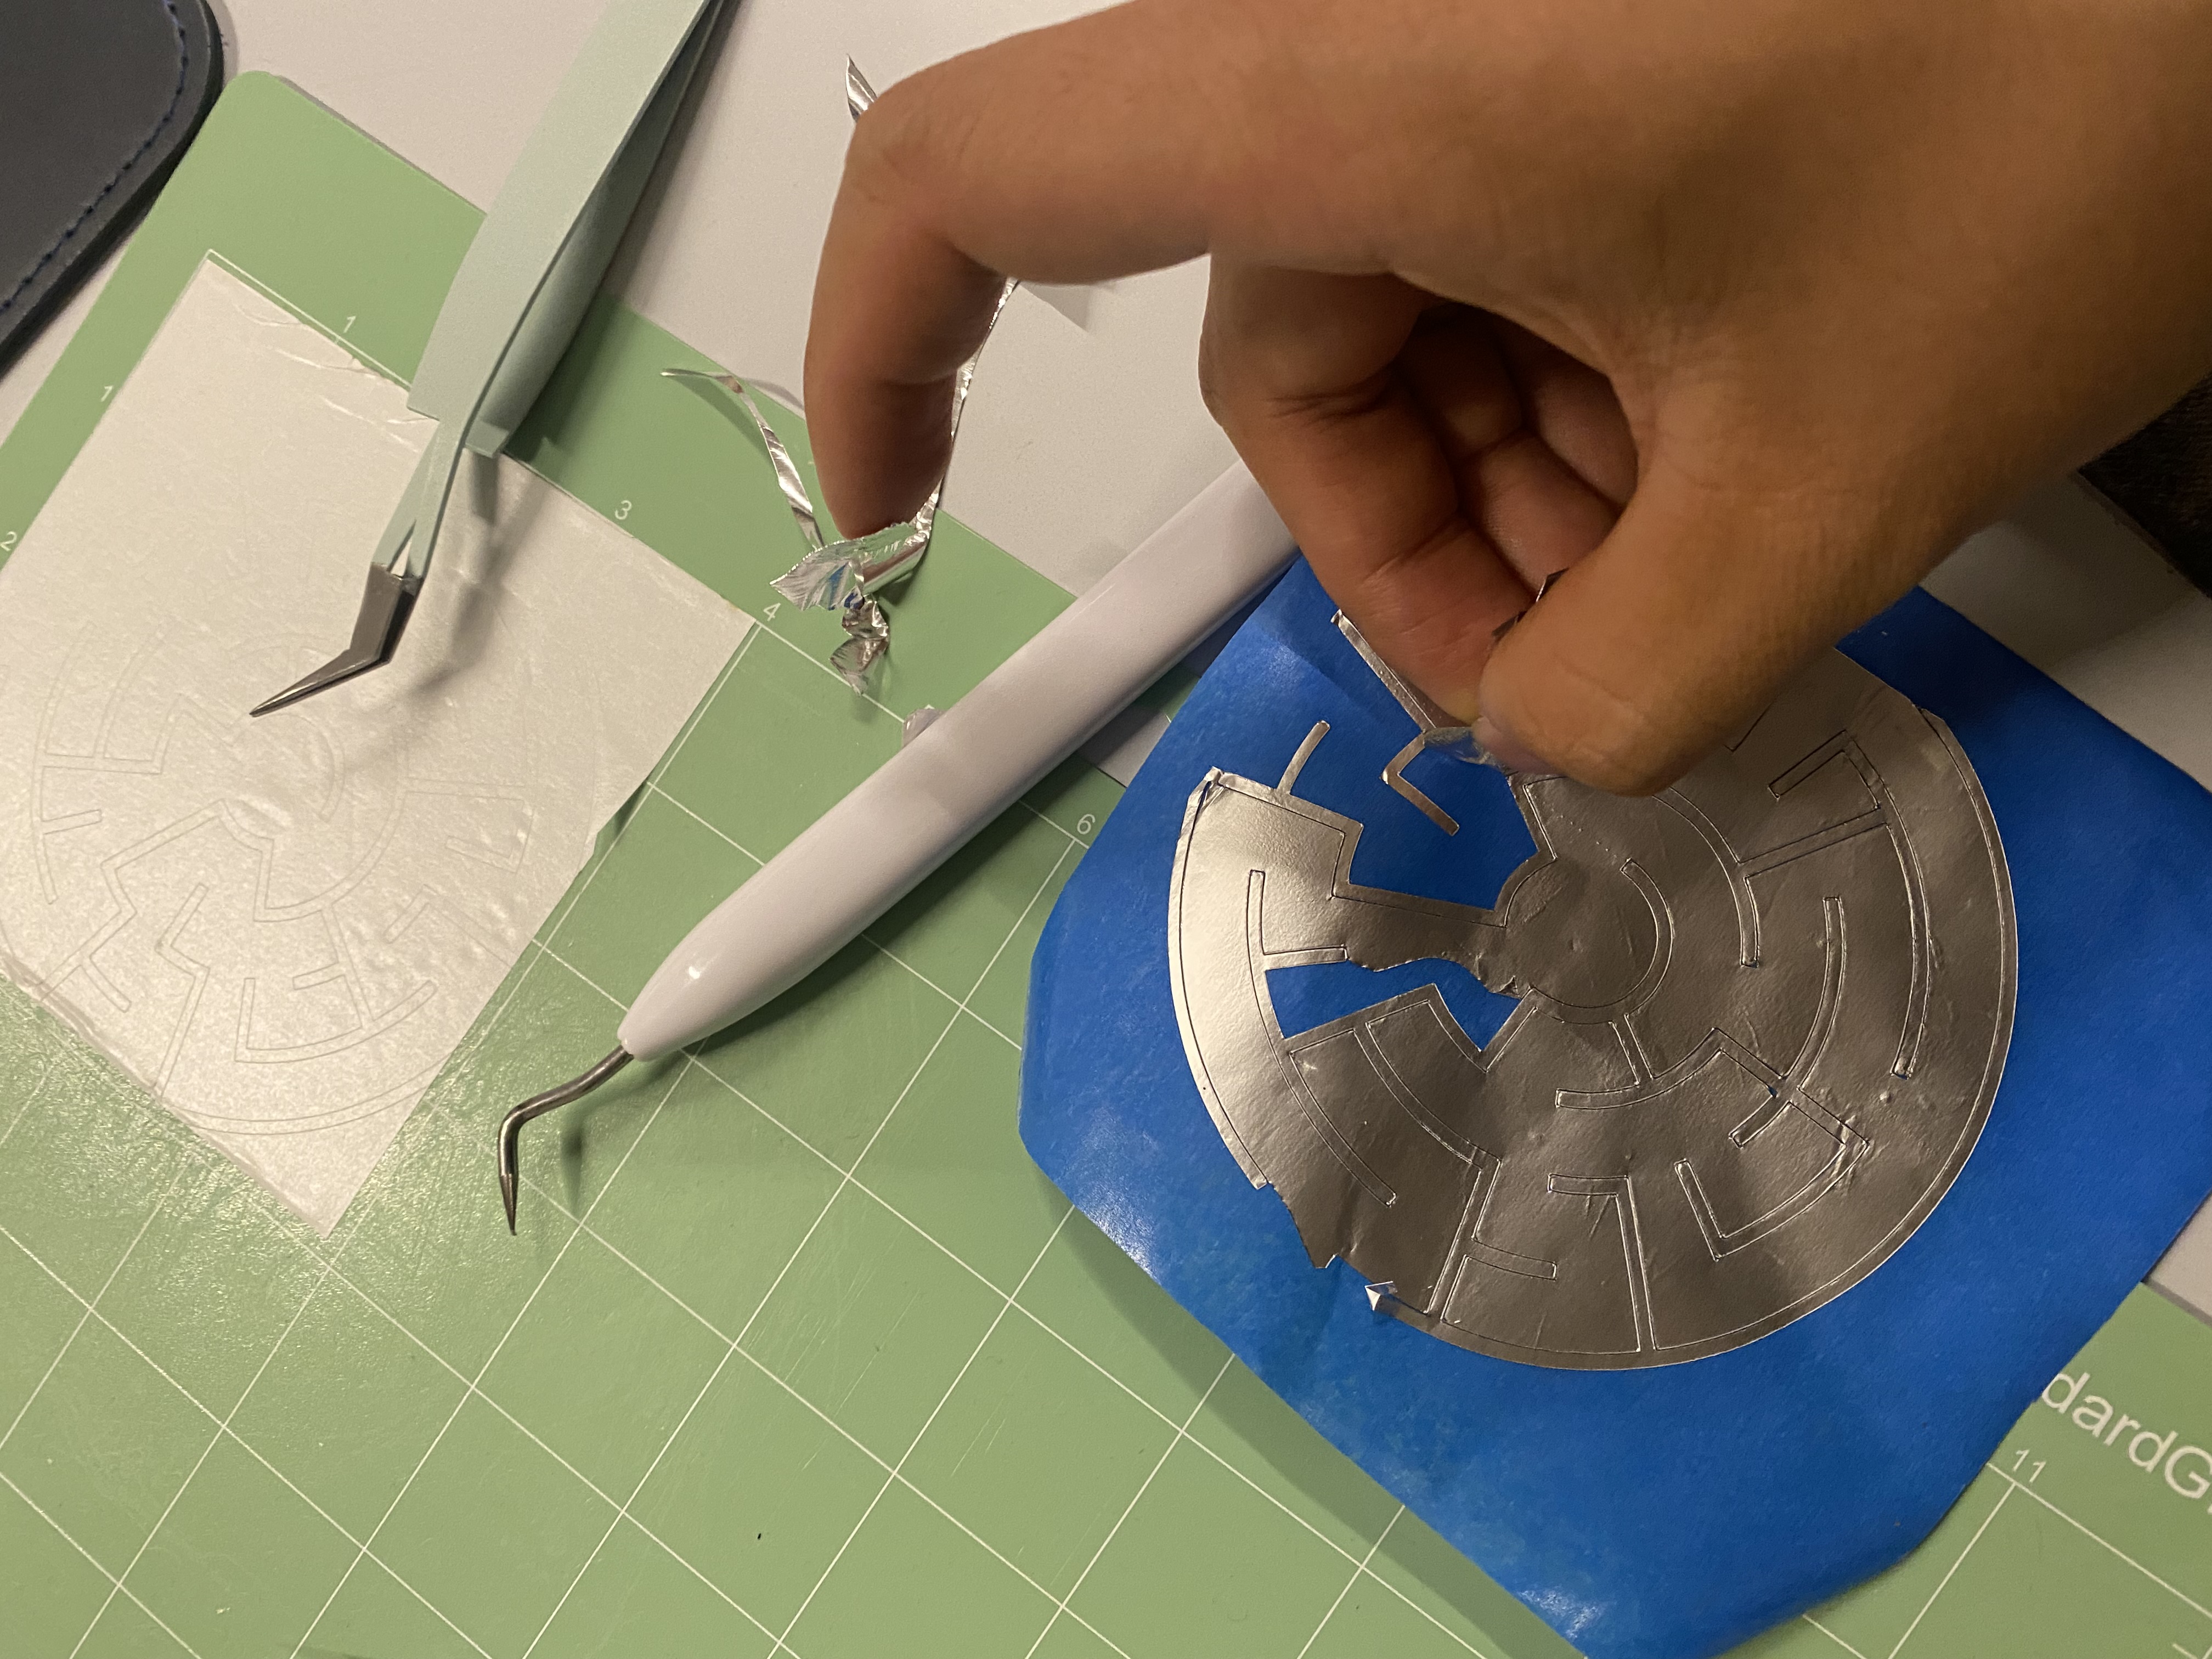
Who said this is meditative? ;-)

Also, Eventually, it failed because the foil was attached too tight to the transfer tape and did not come off to the acrylic plate.
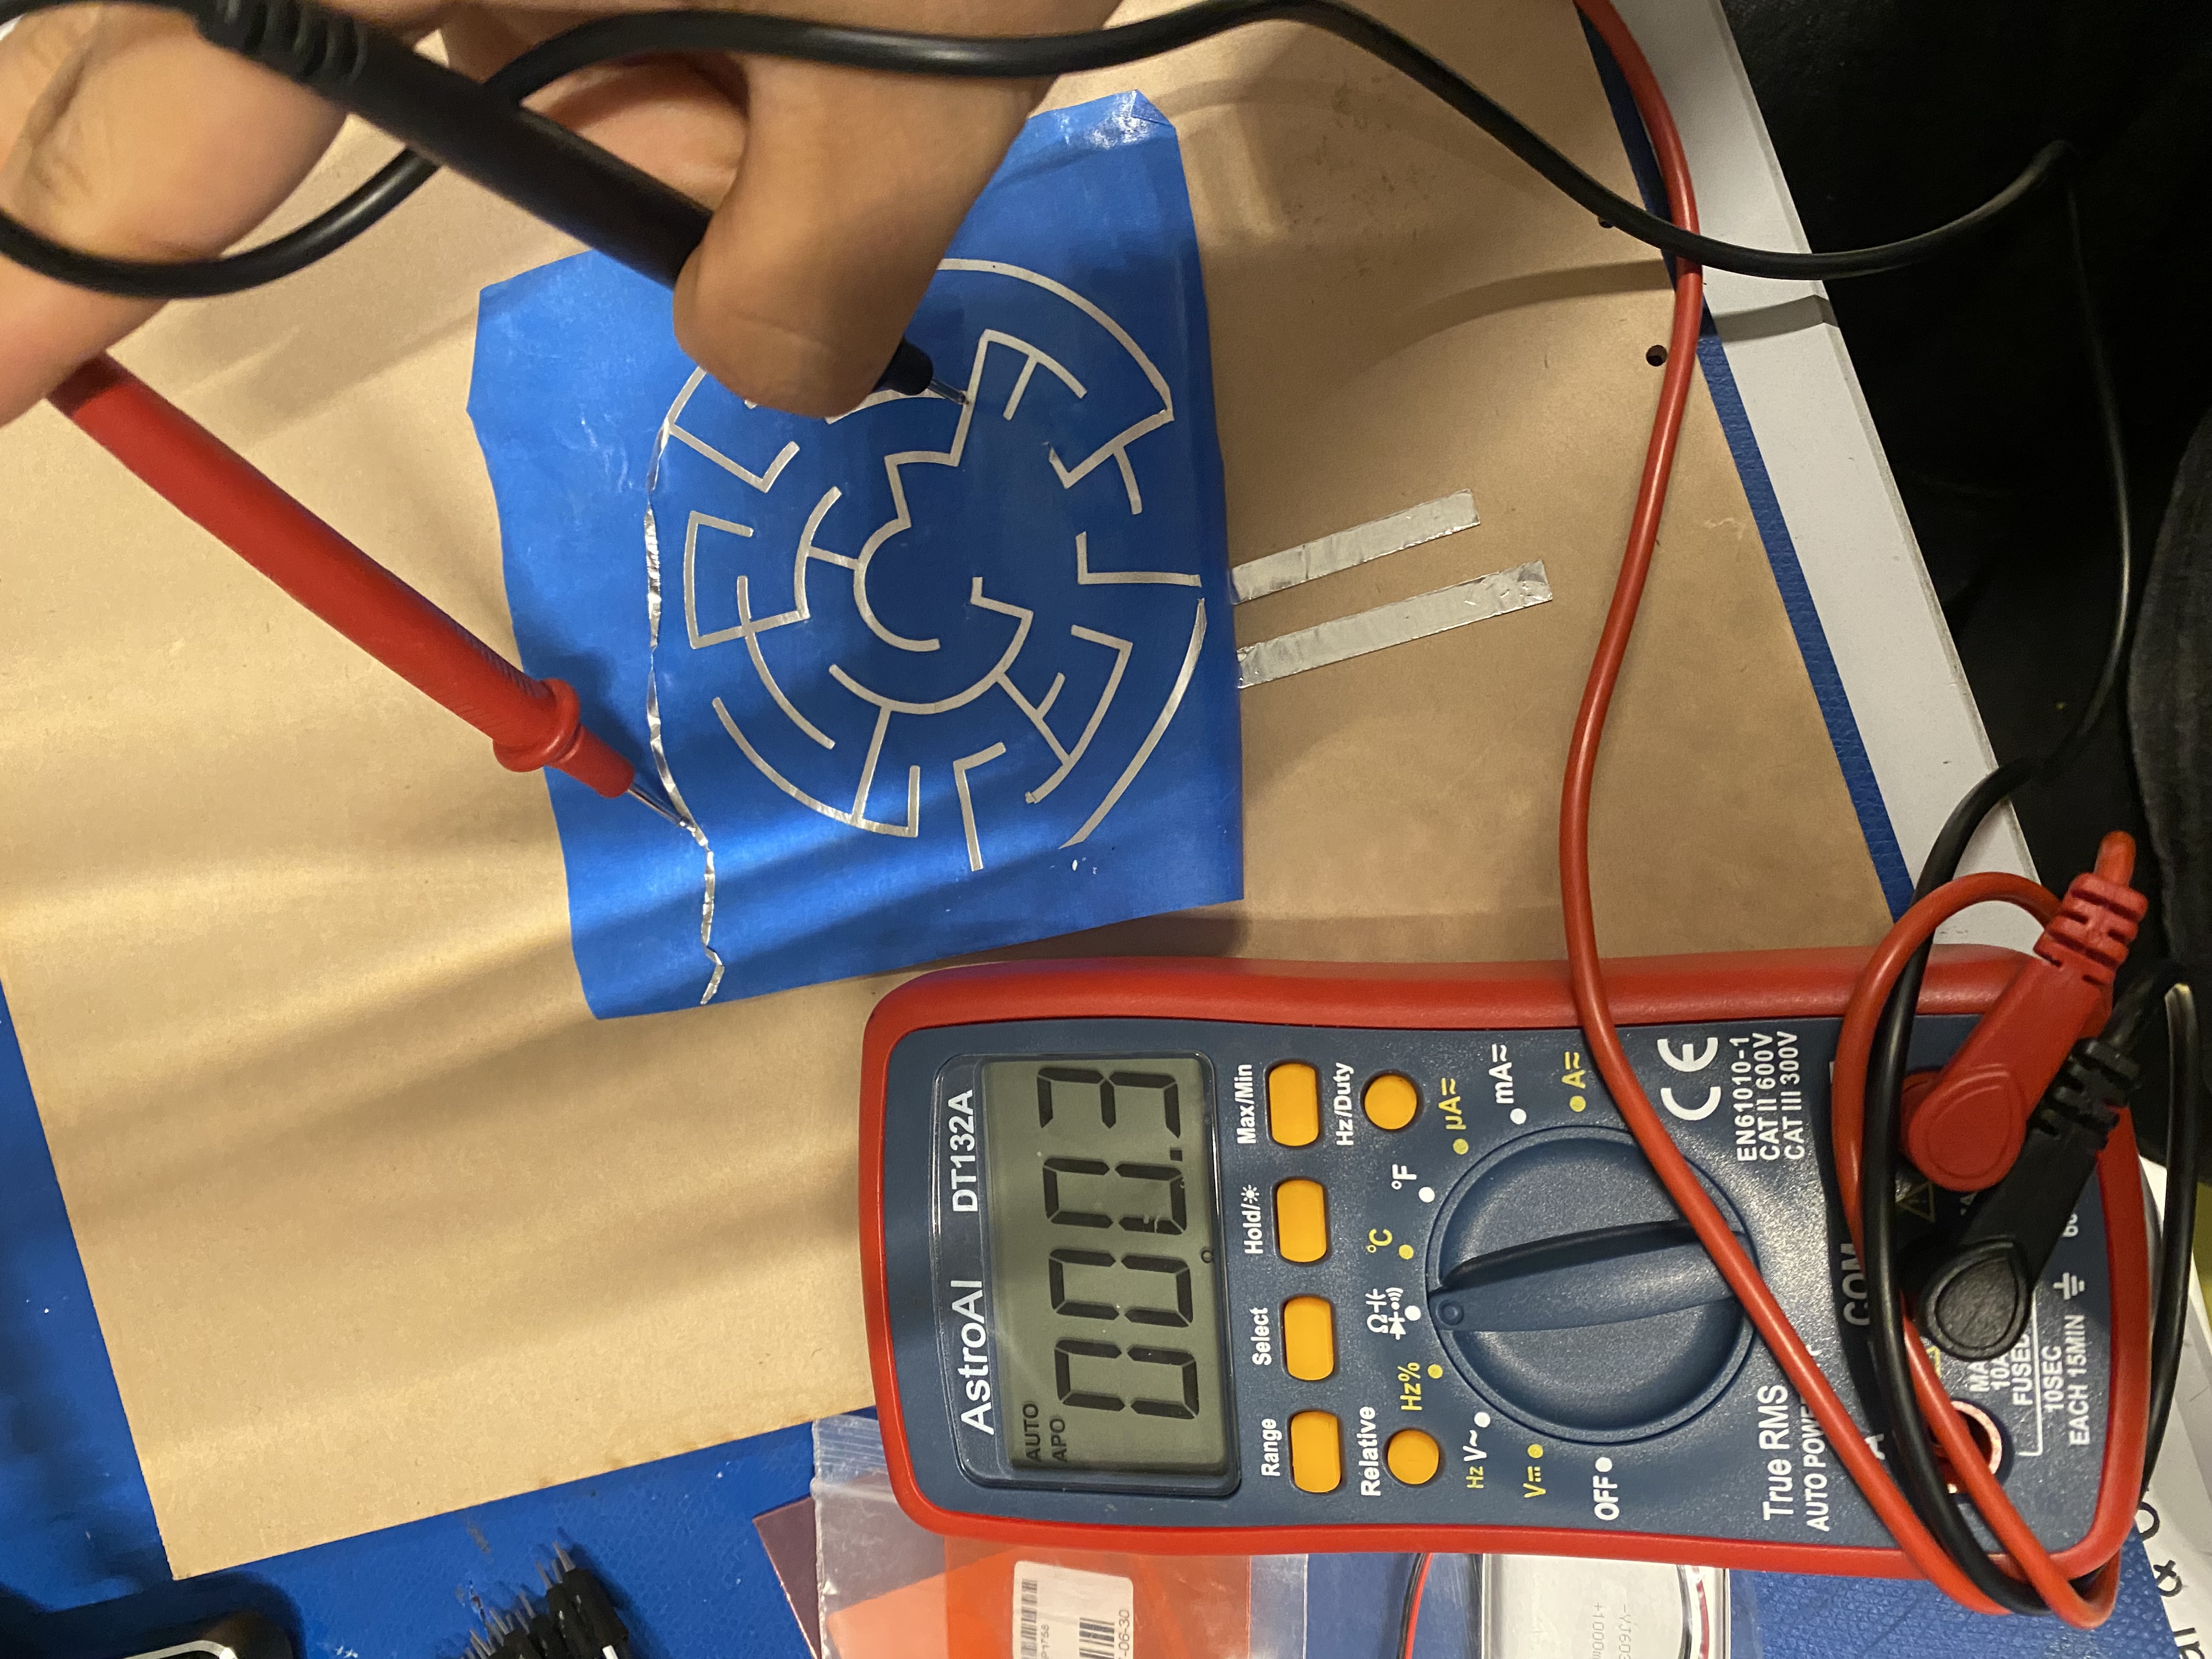
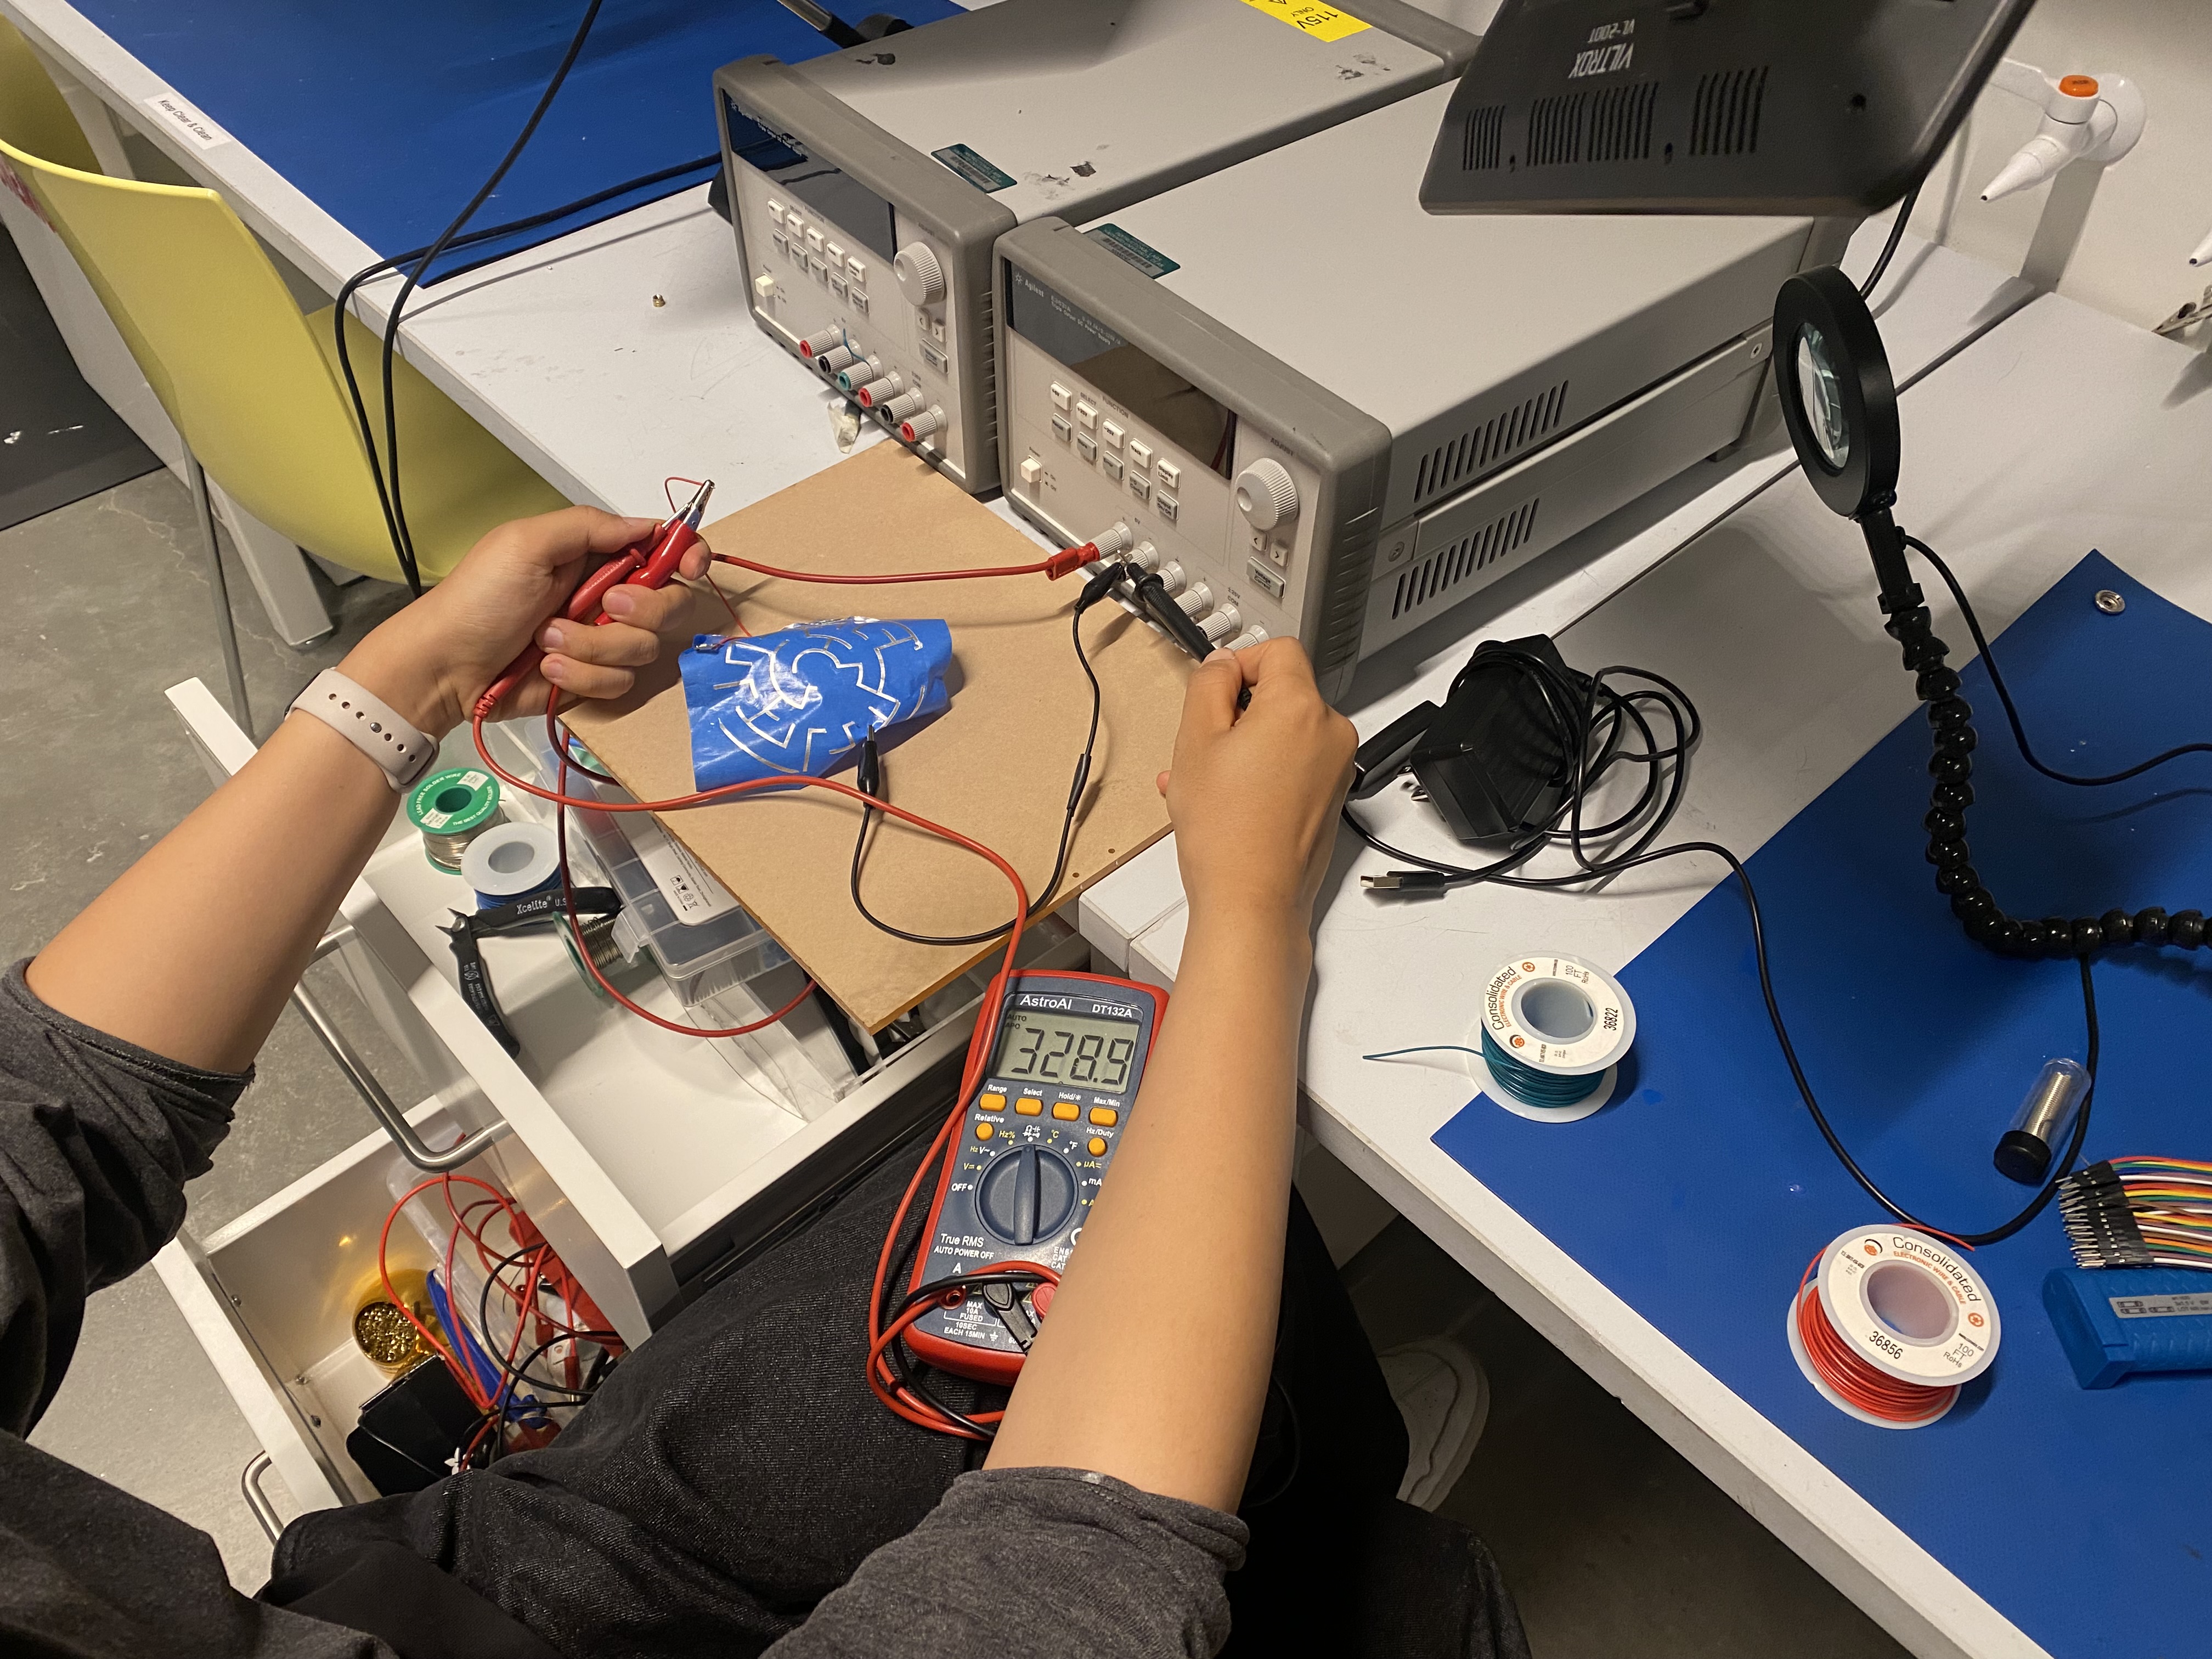
EE testing - connected a LED but didn’t work
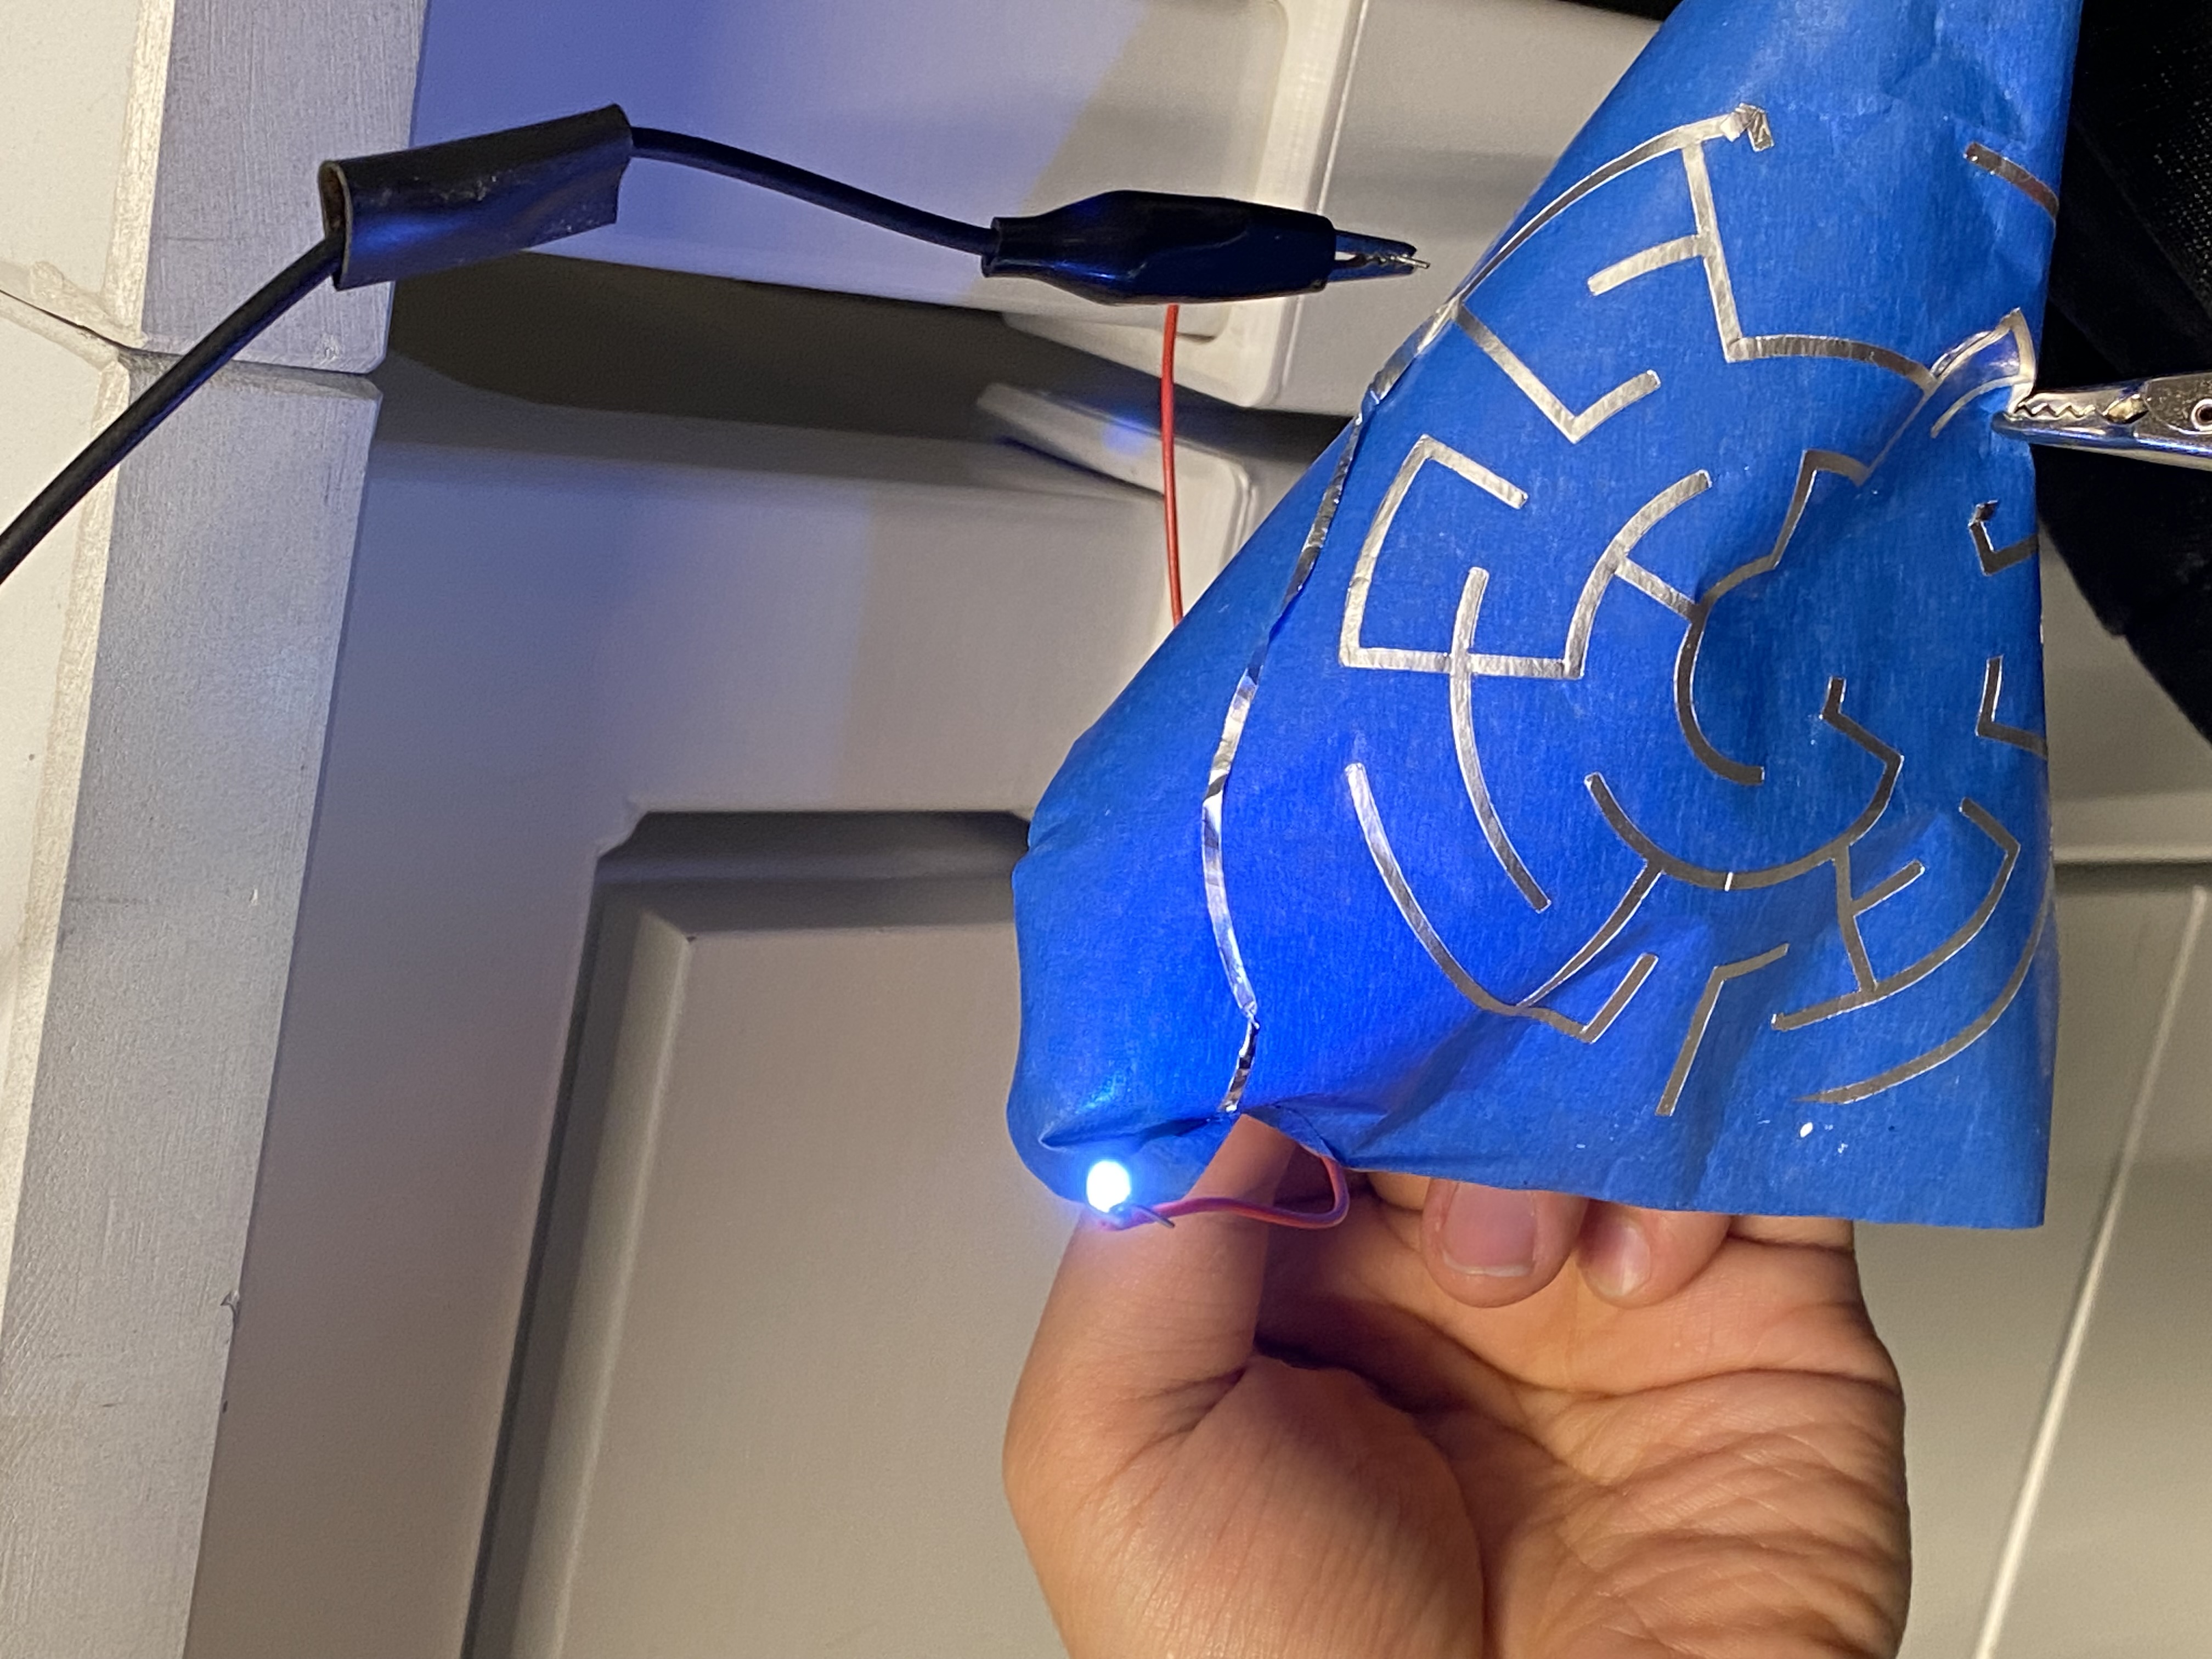
Turned out that I connected + to - . It works.